Showing posts with label fitting. Show all posts

Thursday, 27 February 2014

Sew Grateful Week: Sharing resources day

Ooops! I got the days and themes a bit confused, so this should have appeared yesterday. (At least it's still in the right week...)

So today is all about sharing sewing resources. I don't have a tutorial to offer, but I do want to share a few links to resources I've found really helpful in my sewing adventures. I'm super grateful for the online sewing community, both for the (passive and active) encouragement it gives me to keep sewing and stretch myself, but also for all the advice and tutorials out there. My friends aren't particularly into sewing, I live in a small town in a different country to my mum, and don't speak the language that well, so have a limited amount of "real-life" advisors I can turn to. So I turn to the huge wealth of knowledge that is the internet...

Fitting

Fitting is a bit of a bĂȘte noir for me (ooh, I do speak French!), but one of the main reasons I started sewing was to have clothes that fit my entirely non-standard body. It's all very much still a work in progress, but these are some of the techniques and advice that I have found helpful.

Full bust adjustment (FBA)

Sway back

  • I've started using a new method of adjusting for this, which preserves the CB fold if needed. There's a great explanation on Sherry's blog, plus another way of thinking about it here.

Forward shoulders and sleeves

  • Sleeve cap ease is bogus! And you will believe this too when you read Kathleen's explanation. I've found that sleeves to fit so much better when the ease is taken out - although the shoulder needs to be wide enough, and the armscye needs to be shaped well. There is some information about this here, here and here, and also in the comments of this post.
  • Linked to the fit of sleeves is adjusting for forward shoulder. This is effectively a more exaggerated version of Kathleen's reshaping of the sleeve head, plus adjustment of the shoulder line and neckline on the bodice. There's a nice explanation here, and I normally use Gigi's method for reshaping the sleeve head.

Books I've found useful

Sewing techniques

There's also a wealth of information of sewing techniques out on t'interweb. I'm always a bit wary of online "tutorials" as there are many terrible methods and finishes being sewn. I like to learn from those with experience, and that's one of the reasons I don't describe anything I do as a "tutorial", as I don't think I have the experience or skills to say "that's the way to do it". Anyway, these are a few things that I refer to frequently.

Zips

  • Inserting the zip is always something that can make or break the look of a garment. After reading Els's tutorial, I much prefer sewing invisible zips after the seam is sewn up (You can actually still use an invisible zipper foot here, you just have to do the diagonal backstitching by hand). She also gives a tutorial on a neat way to sew the a facing with an invisible zip, and Kathleen shows a similar method here and here.
  • For centred zips and lapped zips, I like to use Kathleen's methods. She gives good explanations to show the construction of both centred zips and lapped zips plus facings.
  • For a neat way to sew an exposed zip in a seam, I like to use Pattern Runway's method.

Buttonholes and loops

Linings

General

There's some good techniques, tutorials and tips gathered in the following places.

Many, many thanks to all those people who share their knowledge on the internet - there are SO MANY more links and books I find useful, but this post has got a little longer than intended! I always try to reference the techniques I've used when I write my blog posts, so you'll find more information there and I hope this little collection of links here proves useful to at least some of you.

Finally, a big thank you to all those who've entered my giveaway so far - I'm so pleased that I've managed to put together something that people like! A reminder that the giveaway closes at the end of Sunday 2 March, so add your comment if you would like to enter.

Wednesday, 2 May 2012

Drafting a basic knit bodice block

Making myself a knit/stretch bodice "block" has been on my to-do list for a long time, as I wear knit tops and dresses much more than wovens, and therefore would be much more likely to wear more of the things I make if more were knit.

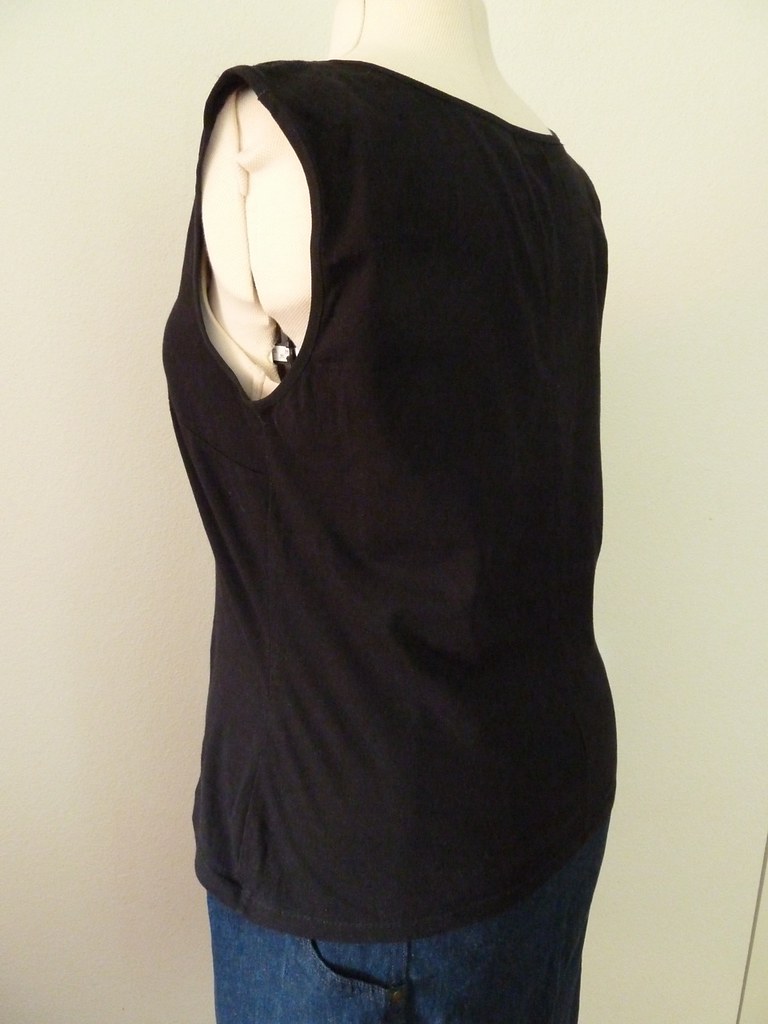
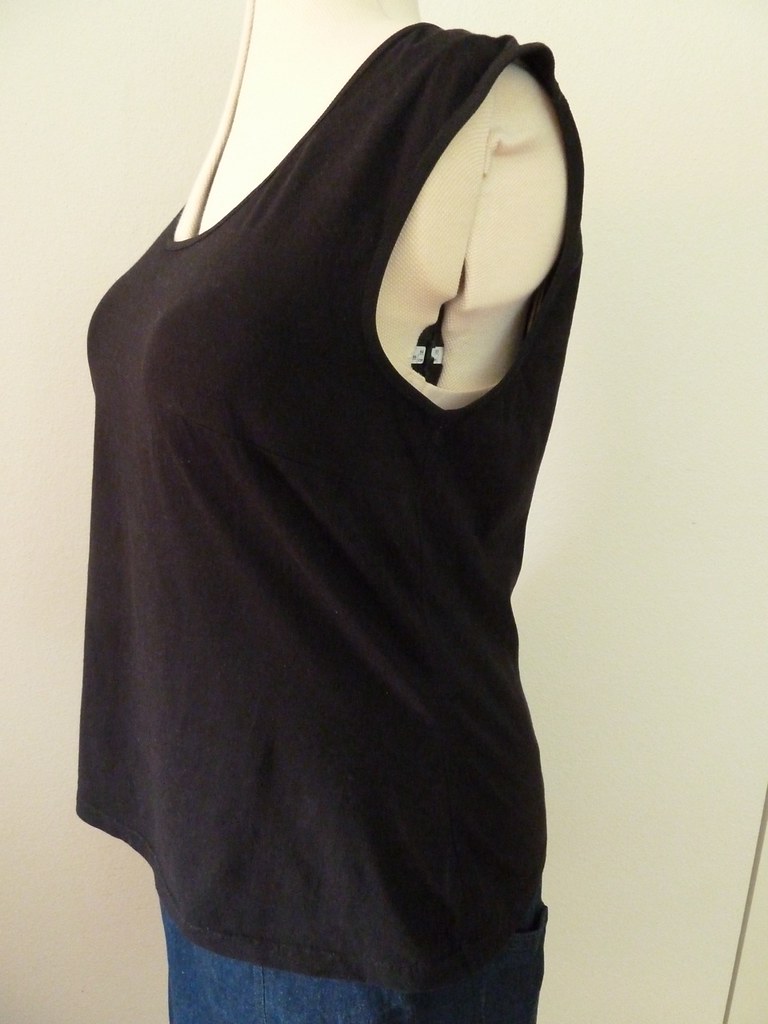
I'd previous attempted using KwikSew 3497 as a starting point to making a fitted top to use as a block, but I eventually gave up in frustration as it was just getting worse with each iteration. I think one problem was that the drafting wasn't quite right (is it just me or do KwikSew stretch garments have huge amounts of ease?), and an even bigger problem was that I didn't know enough at that point about pattern manipulation for stretch garments or about my particular fitting alterations. I thought I'd done a blog post on this top, but I can't find it, so you can see the results from my first try below.

As you can see, I did an FBA but used a dart (always odd in knits), didn't add enough length at the front (and because of the FBA the bottom wasn't straight across grain, so it would look odd in anything with horizontal stripes), the fabric hangs out too much under the bust, and the fit at the back is decided dodgy, despite a shaped CB back seam. You can also see what I mean about the generous ease in the pattern (I cut the size recommended using my high bust measurement as the bust measurement!). I actually quite like tops that aren't skin tight, but this was just silly.

So, a year or so passes, and after getting more used to sewing with knits (with garments drafted from woven blocks), I thought I would have a go drafting a proper knit block to my own measurements and using that as a starting point. I used the method given in my Aldrich book (I have the 4th edition), as I've used this before, including in the custom pattern cutting course that I did a few years' back at LCF, drafting the close fitting body block with the ease for the "less flexible jersey" as I didn't want it super tight.

(Unfortunately I didn't take any pictures of my muslining adventures, so I've made some diagrams - note that these are not to scale, and adjustments are slightly exaggerated. I really must remember to take more pictures whilst working)

I drafted the block using a "standard" bust measurement (close to my high bust measurement) rather than my actual bust measurement, and did the FBA as below to add the extra to the front pattern piece. This was the method I learnt in the pattern cutting class and means that a large relative bust measurement doesn't distort the shape of the block. The main difference in my drafting was to use my actual hip measurement rather than squaring down from the underarm point, as I knew otherwise the garment would get caught up in that area. I also made a small square shoulder adjustment by raising the shoulder point. I then did the following steps (for ease of explanation, I've included the adjustments I made after making a first muslin):

1. Traced off front and back to a separate pattern, adding balance points/notches at waist and on the side seam between waist and underarm, below the level of the bust point (you'll see why I needed this a bit later).

2. Adjusted the back by transferring half the waist shaping to the centre back seam. I didn't initially do a sway back adjustment, as I've recently realised much of my problems fitting at the back result from an incorrectly fitting front, coupled with a large back high hip and large bottom (hey hey!), and I wanted to correct for these bigger (ha) problems first.

3. After the first fitting, I still needed adjustments to the back, so did a combination of more shaping at the CB waist and neckline, and a small "quick" swayback adjustment (using inspiration from this excellent analysis) by pivoting the back neck down, using the shoulder point as the pivot (remembering to re-square the CB neckline to the CB seam). I also un-scooped out the back armscye so that it fit more to my liking.

4. Adjusted the front with a dartless FBA. Now, I spent hours and hours trawling my books and the internet to find how to do this, with not really much luck in finding actual details. So for the benefit of others, this is how I ended up doing it - it worked pretty well for me. I think it's some sort of bastardisation of a "pivot-and-slide" method, although I couldn't find a good description of the whole process of using this for an FBA.

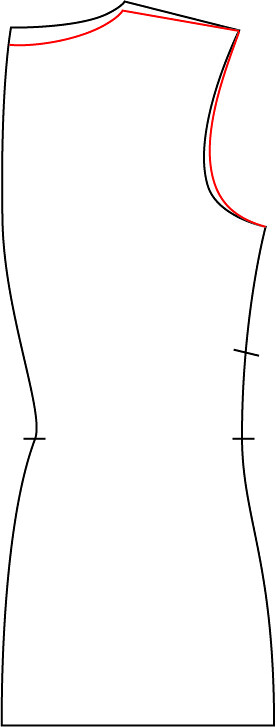
First of all I traced around most of the pattern - the shoulder, neckline, CF, hem and side seam up to the waistline. I then pivoted the side seam at the armscye out to add width, pivoting around the shoulder point (red), then pivoted around the new underarm point to bring the waist back into the original measurements (blue). Note here that you need to do a significantly smaller width adjustment in a knit! I forgot to take into account the stretch of the knit and ended up taking it in by about half the measurement I added.

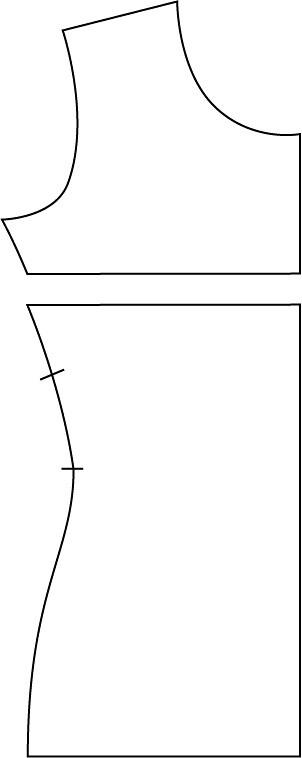
To add the length needed to fit the top over my bust I slashed and spread across (roughly...) the bust point. I found that the length I needed to add was fairly equivalent to that needed for a woven.

These adjustments meant that the distance underarm-waist was now much longer on the front - the excess here would under normal circumstances be taken out with a dart, but I didn't want to have a dart on my tops. So, I shaped the side seam where the dart would normally be, and simply stretched the back piece to match between the underarm and the first notch (I guess this would work to some extent in a non-stretch fabric by easing the front rather than stretching the back). After a little refinement of the shaping in the front side seam this worked nicely to give the space needed in the front - I would imagine though that if you were making a very large FBA (or using a non-stretch fabric) you might need a combination of this method with a small dart.

I drafted the sleeve block at the same time as the original bodice block, but haven't yet made up and fitted the sleeves - this is the next stage that I'll move onto shortly.

I'll show you the first thing that I made from this block in the next post...

Sunday, 1 May 2011

Musings on fitting

Does anyone else loathe fitting? Nothing else in sewing (or any other craft really) frustrates me as much as trying to work out how to adjust something to make it fit me correctly. Give me a BWOF pattern sheet to trace, or a vast playmat to quilt, or sharp cornered seams to match - just anything other than having to fit something on myself!

In conjunction with trying to work out the actual adjustments needed to translate from a "standard" shape to my very unstandard shape, I've been trying to work out what it is that frustrates me so much about it, in order to see if I can make it a little less painful (as there's really no point sewing clothes for myself if they don't fit well). Not to mention that I find myself putting off sewing as I'm dreading the fitting stage.

So I think my conclusions are:

  1. It's really hard to pin out alterations on yourself.
  2. It can be super frustrating trying to work out the correct alteration to fix problems, and having to keep taking garments on and off.
  3. A fair amount of frustration with fitting stems from dislike of my body.

So, what to do about these? I guess the first one is just something I have to live with (at least until my husband develops a hitherto hidden talent for basic sewing skills), and I'll just have to make better use of photos, and get used to taking things on and off much more to adjust them properly. I actually had a bit of a revelation about this recently, when it was pointed out that if I'm muslining, I can put the opening wherever is easiest for me to pin together - i.e. put it at the front rather than the back!

The second I guess will get better with experience, so for now I just have to suck it up and get on with it. To be honest, it's already better than it was when I started sewing as I have more understanding of how to "read" the toile to work out the fitting problems, and more of a library of alterations in my head in order to fix them. The books I currently use most to help with fitting are Fast Fit: Easy Pattern Alterations for Every Figure by Sandra Betzina, and The Collins Complete Book Of Needlecraft (OOP - I inherited this from my mum) - and also good old Google! There's such a wealth of information out there on the interwebs.

The third is a little more tricky, and is going to need rather more work. I've been making a few changes to my diet and activity levels, so even if I don't change size or shape much, I'll at least be reasonably healthy and know that my body reflects how I should be, rather than be simply a product of something I have done to myself with crap food and a sedentary lifestyle. Oh, and I'm starting to invest in good undies. I've also been looking more closely at other bloggers' pictures (haha how to make everyone self-conscious :) and realised that many of them aren't so different from me - I've realised that two bloggers in particular I especially admire are almost the same size as me (although slightly different shapes), and they both look completely fabulous! Therefore I obviously do too...!

What are everyone else's tips on fitting? What's your bugbear when sewing?