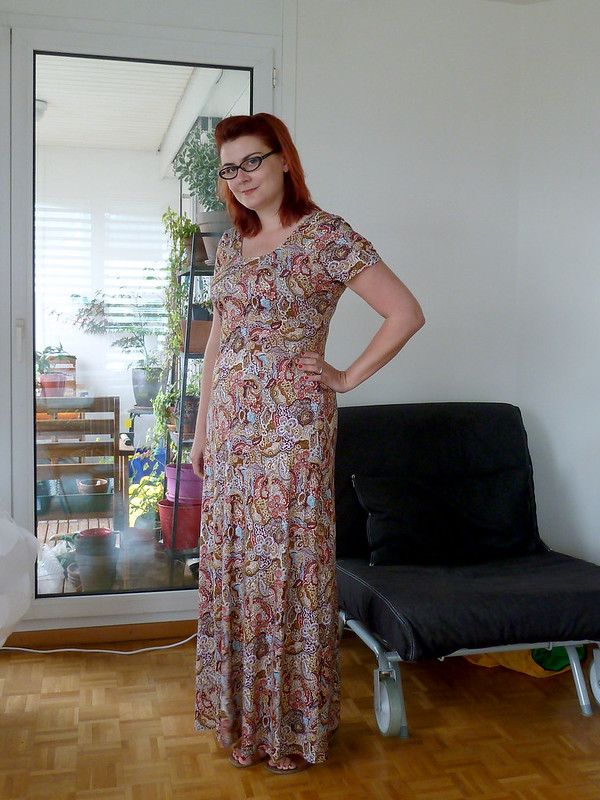
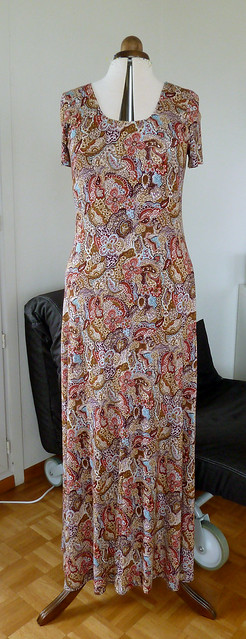
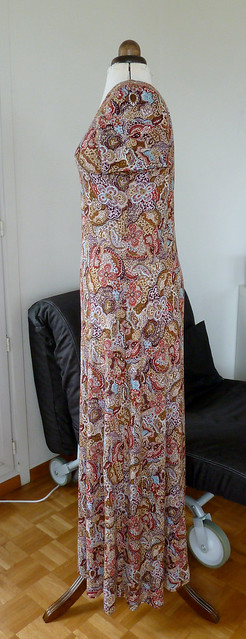
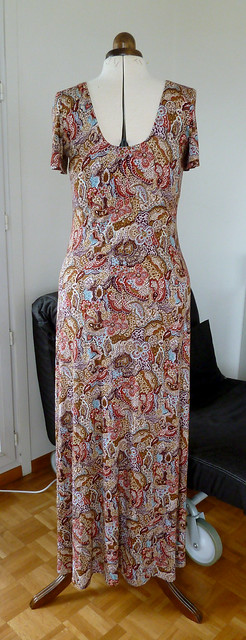
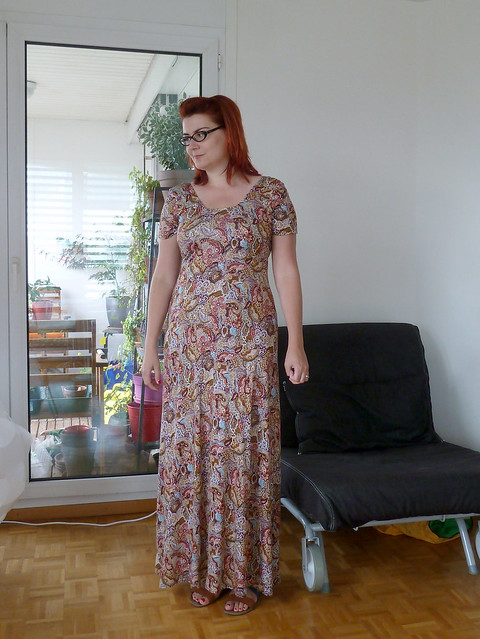
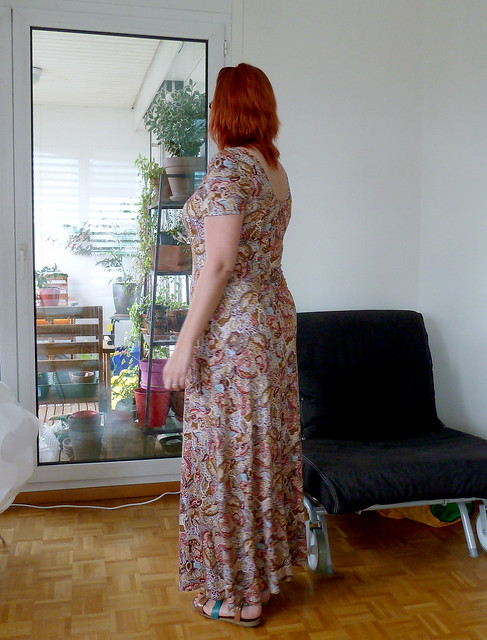
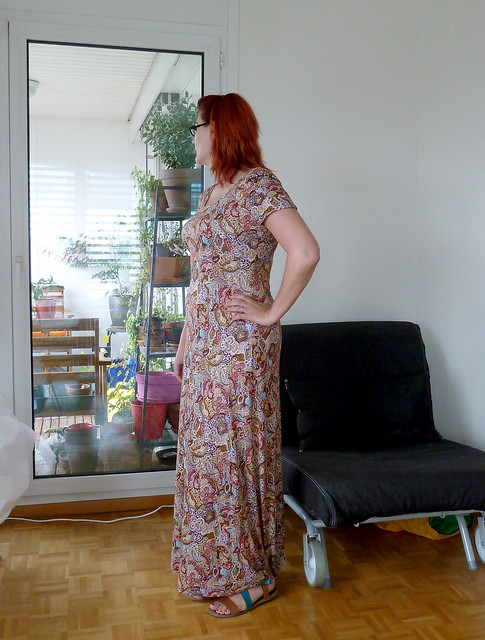
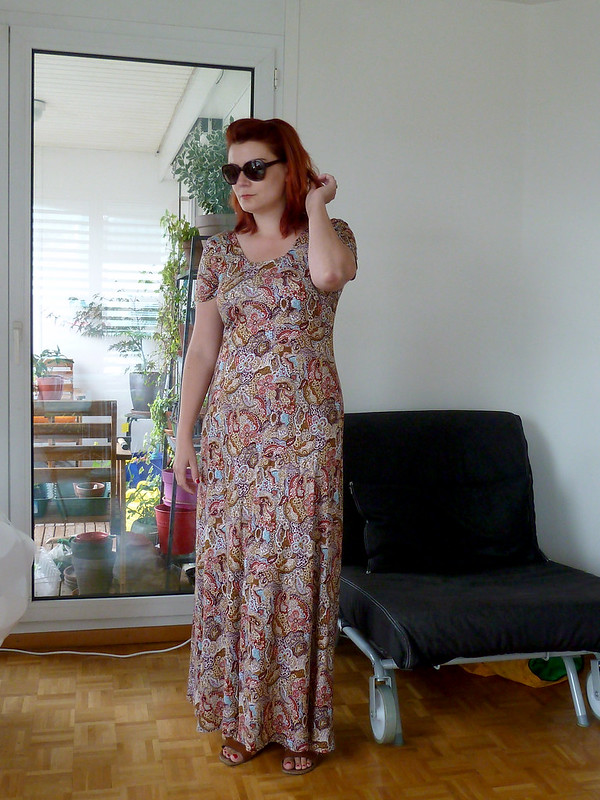
I love wearing maxi-dresses in the summer, so easy to wear and also so comfortable. Despite this, I only have a couple that I regularly wear, and have put off making them for ages because I find cutting out large pattern pieces kind of annoying. However, with 30˚C predicted by this weekend I need a few more warm weather clothes that I fit into. I'd also seen a lot of Nettie variations floating around the sewing blogosphere recently. These two ideas percolated for a while, and I realised that I could use Nettie as a basis for a maxi-dress. Excellent!
Pattern description
Close-fitting dress or bodysuit, with choice of necklines and sleeve lengths.Pattern sizing
2-18 (32-44" bust). I cut the 18. Note that I bought the pattern before Heather made the changes in sizing, so this is now the equivalent of the 16.Fabric used
Rayon-spandex knit. It was a bit flimsy and see-through by itself, so used bamboo rayon jersey to line it.Did it look like the photo/drawing on the pattern envelope when you were done?
Yes to the top part, but obviously no to the big ol' maxi-skirt stuck on the bottom.Were the instructions easy to follow?
I just did a cursory glance through as I make a lot of knit stuff, so I can't really comment on them.What did you particularly like or dislike about the pattern?
Love: the neckline! Also the fit is nice, snug without being too tight. A couple of minor niggles as detailed below, but don't really dislike anything.Pattern alterations or any design changes you made
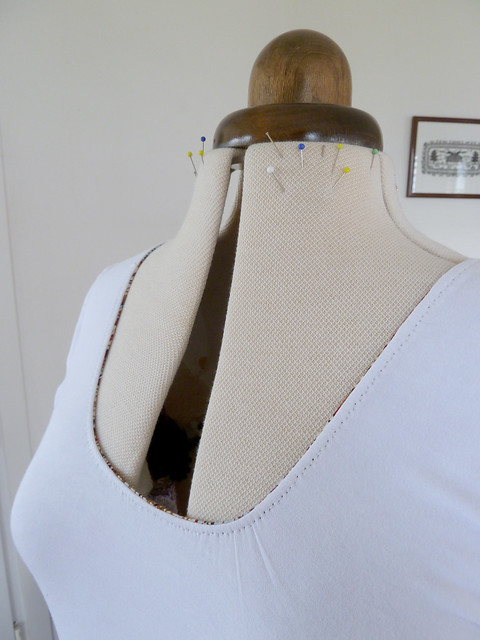
I quite like bodysuits (hello, nineties me), but I know I'm unlikely to wear one for the time being. However, the neckline is gorgeous, and the fit seemed pretty much what I was looking for. For the bodice of the main dress, I went with the scoop front and mid back neckline, and short sleeves.Comparing the pattern to my custom block, it looked pretty good. I added 1.5cm length on the front, plus about 1cm width to allow for an FBA, adding notches to keep things aligned (rather than making a dart, I eased in the extra length). I raised the hip curve on both front and back - to me it seems very low as drafted. I took in the waist and added to the hip about 1cm each on the back piece only.
I made a forward shoulder adjustment by moving the shoulder seam forward 1cm. I also flattened the back armscye and scooped the front by a few mm.
A note on the following: Heather's got back to me on my feedback and assures me the sleeve is correct, just mirrored from doing the layout. I'll leave what I originally wrote here though as it worked for me, just ignore it for yourself!
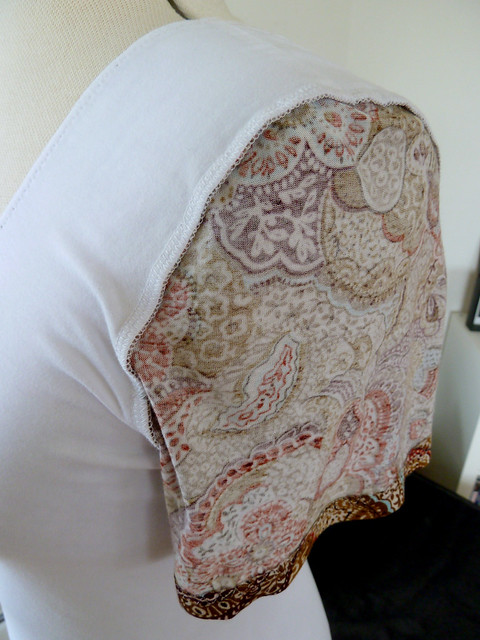
To me, the sleeve head was a little odd. According to the notches, the pattern piece is a left sleeve, rather than a right sleeve (as is usual for pattern drafts, and as per the rest of the pattern), which whilst unusual, isn't a problem as you just mirror it. However, the shoulder point notch wasn't centred, it was towards what was marked as the back of the sleeve, and as drafted there was around 1cm extra ease in the back sleeve head only - normally this would be the other way around. I figured the notches were probably marked in reverse so followed them that way instead... Having moved the shoulder seam forward, this transferred the extra ease to the front of the sleeve head, which was better for me anyway (although for any future makes, I will probably lower the sleeve head slightly and remove the ease from the front portion).
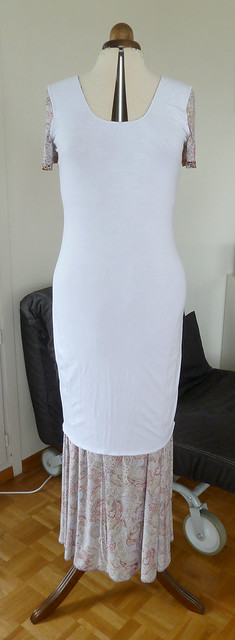
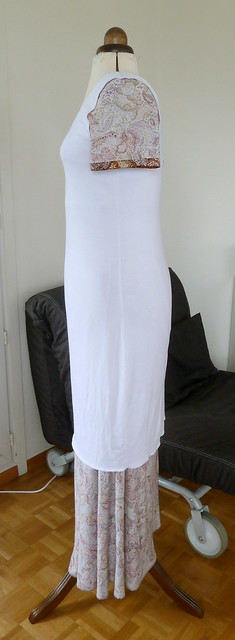
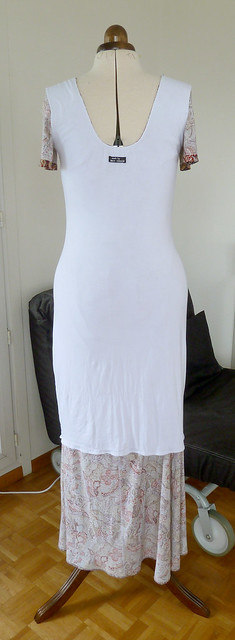
I decided to make the lining as the Nettie dress as given (i.e. with a short straight skirt) to help keep everything in place as well as adding opacity, and then added a simple long skirt portion for the fashion fabric flaring from just below the waist.
I added seam allowances at the neckline to sew the shell and lining together, but didn't actually need to - I misunderstood the neckline finishing in the original. Totally my fault for skipping reading this part, nothing to do with the instructions! I will remove this extra seam allowance for any future versions to open up the neckline a little.
Construction details
In order to save fabric, the front and back pieces were cut in different directions - this is a directional print, but it's very busy and not immediately obvious that they're different, and this way saved about 1.5m... In order to do this, I also needed to add a CB seam, but again this isn't immediately obvious (and I even managed to entirely accidentally do almost perfect pattern matching down this seam).I thought I was going mad because I couldn't find any instructions about seam allowance. I eventually went with 1cm after consulting the sew-along, but (after making it) discovered this is given in the instruction booklet, but the yellow typeface didn't show up when I printed it out! It's given as 1/4" or 0.6cm, so mine is technically a little smaller than it should be, but it hasn't made a huge amount of difference.
The construction was pretty straight forward, apart from the neckline. The shoulder seams are stabilised with clear elastic on the shell fabric only. (Reminder to myself so I don't need to always do a test: sew this seam with the elastic on the bottom so it catches the feed dogs, and the back piece uppermost so that the elastic doesn't need to be folded if the seam is pressed towards the back as normal. This means that the shoulders are sewn in different directions, but it doesn't seem to make much difference on this sort of stretchy jersey garment if you're careful. Cutting the elastic longer than the seam at each end is also very helpful to keep the application neat, although it adds a little bulk in the neckline and shoulder seams at each end.)
The shell and lining are joined at the neckline as a "shell" and "lining" to give a clean finish, but treated as one layer to join the sleeves for simplicity.
I had originally intended to sandwich a contrast binding between the layers to both stabilise add interest to the neckline. However, I decided against it as I thought it might look a bit odd just having the contrast there (although after having made it, I think it would have actually looked better with the contrast binding, and also been a lot simpler to make...) This left the problem of how to stabilise the neckline - given the weight of fabric in a maxi-dress, I wanted to add something stronger and more stable than just stitching, and stretchier than bias tape. Elastic was the obvious choice.
I used 5mm wide regular elastic (I really don't like clear elastic on pretty much anything except shoulder seams). I cut a loop 10% shorter than the neckline, plus an overlap that was sewn together flat on top of each other, taking care not to twist the elastic. This was zigzagged it to the wrong side of the lining piece just inside the seam line, matching it at quarter points as you would do a regular binding. I actually had to do a lot of pinning to make sure it was even as the bamboo rayon jersey is slippery and the curves in the neckline are quite tight.
The lining and shell necklines were then carefully sewn together on my serger, right sides together and lining with elastic uppermost. I ran the knife down the edge of the elastic (being careful not to nick it), which meant that the left hand needle landed just inside the elastic, fully enclosing it, and making it invisible from the right side (the serger makes a 6mm wide seam). This was then turned right side out, pressed, and topstitched with a narrow zig-zag to stop it rolling. (I really should have taken pictures of all this, but didn't think about it until too late, hopefully the description is relatively clear...!)
I'd already sewn the side seams of the lining (to test the fit before cutting the fashion fabric) before installing the sleeves, so I sewed up the side seams of the shell as well, basted the two layers together at the armscye, and then set in the sleeves rather than sewing them in flat.
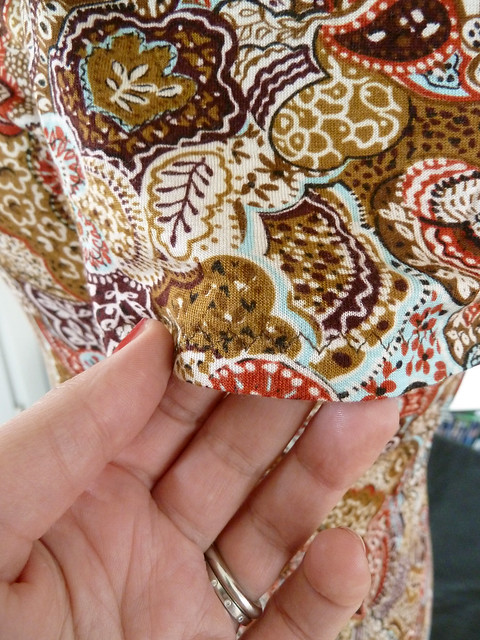
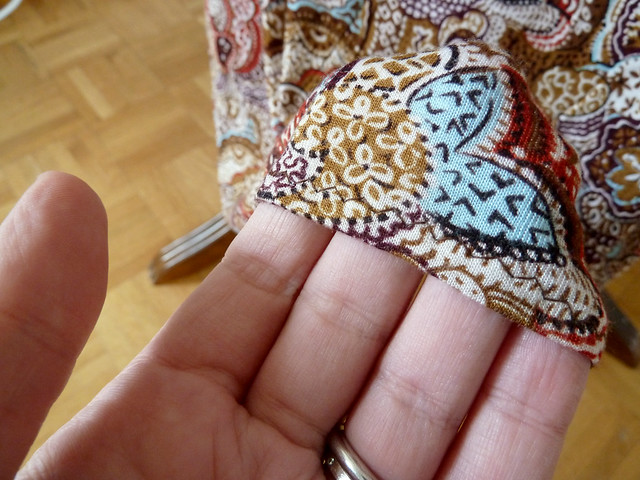
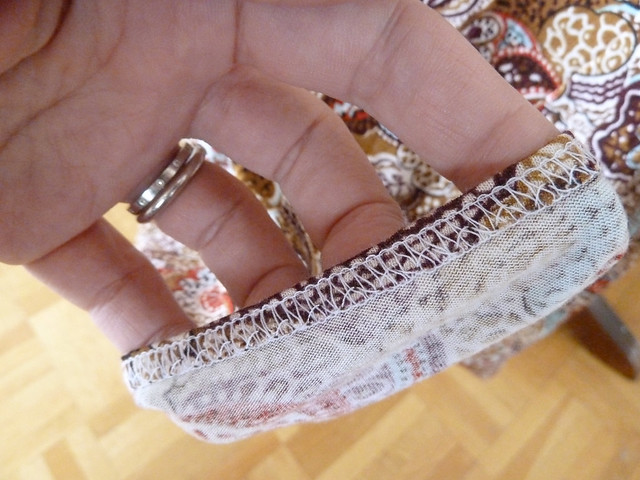
The sleeves were hemmed with a 3-step zig-zag to keep them stretchy. I needed a minimal hem on the skirt to keep the length (I'd underestimated a bit how much the weight of the fabric would pull it downwards). I serged the edge to give some heft to the hem, and then simply turned it under and top-stitched with a narrow zig-zag.
Would you sew it again? Would you recommend it to others?
I'm definitely going to use the bodice part again, the neckline is super flattering, and (with minor changes) the draft is very good for me. I think it's also a great starting point for more hacks and alterations. I would really like to make the bodysuit, but I don't really know whether I would wear it before losing some weight - maybe for the winter so it's nice and cosy under other layers. I would definitely recommend this to others though - the draft is good and very flattering on apparently everyone who's made this!Conclusion
I'm super pleased with this dress. I love the neckline and the fit - I was concerned that the weight of the skirt would pull the back waist away from my body, but the cut and fit seems to keep everything in place perfectly. It is pretty close fitting, but snug rather than sausage-y (I'm not sure snug things are entirely flattering for me at the moment, but I don't care, I like it). The mid-back neckline is super comfortable to wear and feels quite sexy too... There are a couple of small errors in the pattern (beware that there are two number 13 matching points when assembling the PDF - although it's pretty obvious which goes where, given what's on them), I have let Heather know about them, and asked about the sleeve. But this is something that is both a drawback and great about independent patterns: there are not the "professional" pattern testers and drafters the big 4 might have (although these still have errors and poor drafts!), but when there are problems, it's much easier to contact the patternmaker and ask questions!This is super quick to make (apart from my fiddly way of stabilising the neckline), which has worked out well as I think I've just squeaked in before the deadline to enter this in the pattern hacking section of Sewing Indie Month. Here's a final photo of me looking exceptionally cool and pretending it's hot and sunny:
