Showing posts with label success stories. Show all posts

Friday, 4 January 2013

A silk Sorbetto

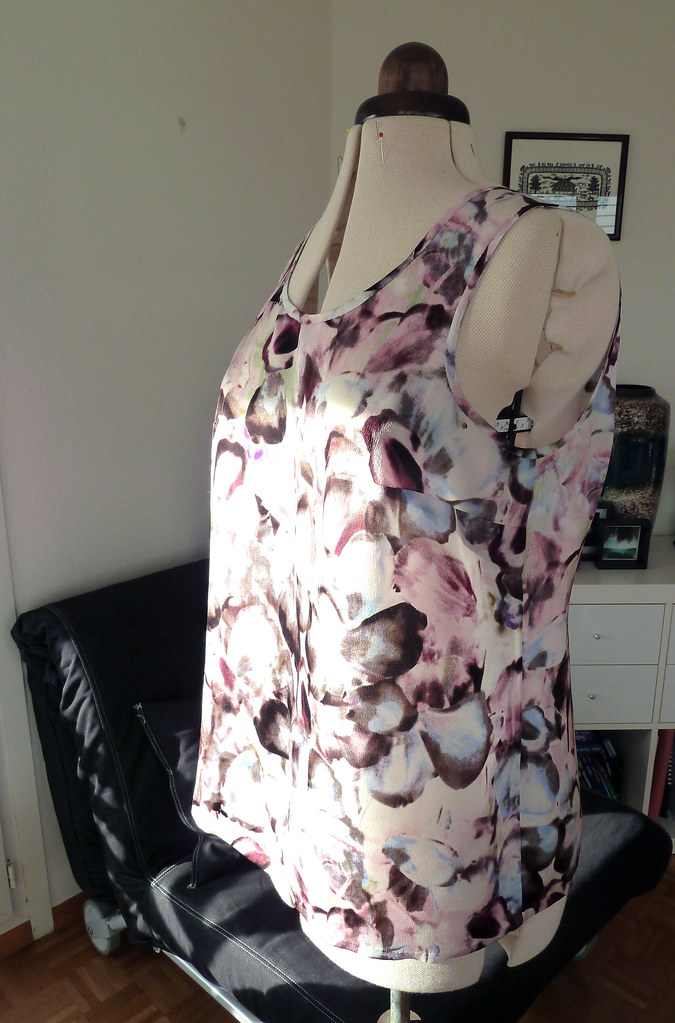
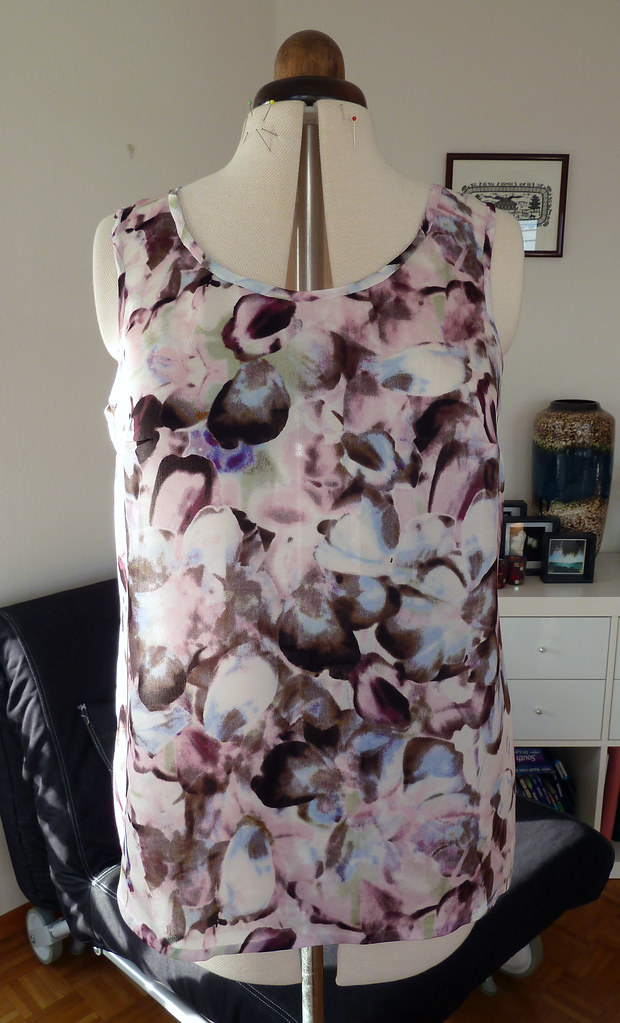
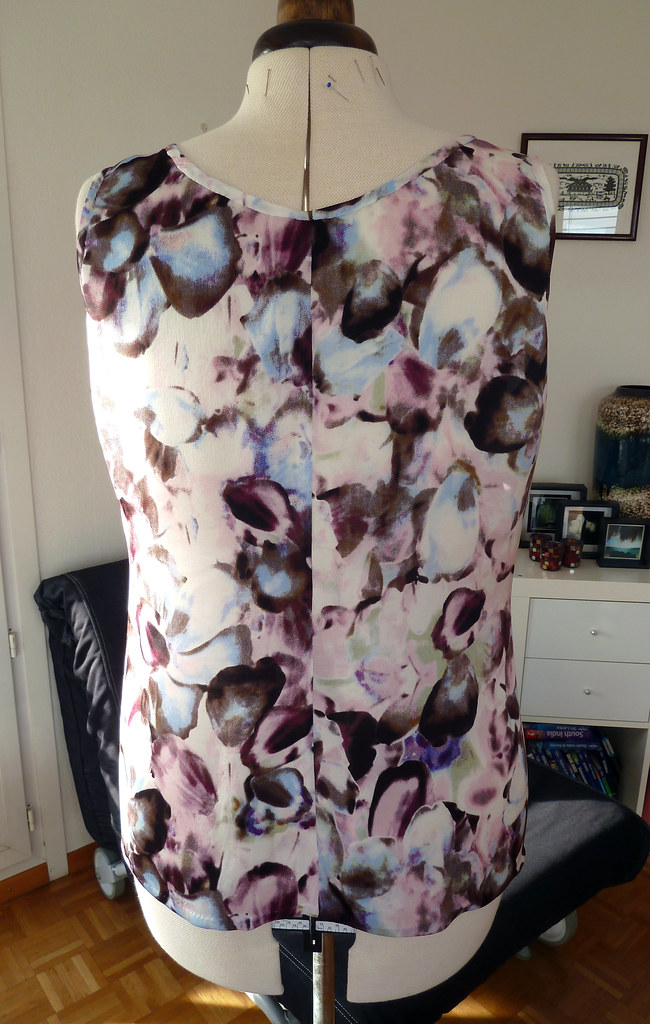
Yet another Sorbetto variation for me (See my previous versions here, here and here), made before the previous peplum top, but I'm very behind with my blogging. This one is back to the original shape, but without the front pleat. I used the fitting refinements at the hip that I made for the V&A Sorbetto, and remembered to finally add the seam allowance on the centre back... I'm not going to do a full on review for this, as I think you must know all my thoughts on the standard Sorbetto by now!

Part of my sewing plan is to make more pretty "going out" tops, so this was made to help fill that hole in my wardrobe. It's turned out to be quite versatile as it's cool enough to wear when it's warm (i.e. when summer returns, or currently in the overheated Swiss winter interiors), but also works for layering when it's cooler.

The fabric is a very lightweight silk crêpe de chine from Fabric.com with a lovely subtle sheen. It's actually slightly sheer, so I tend to wear it with a cami underneath - I didn't want to interline it as I didn't want to lose the fluidity. Although a little fiddly to sew as it's slightly "bouncy", because of the crêpe texture it's not too slippery, and it presses beautifully. (As an aside, I'm really quite hacked off with Fabric.com lately - has anyone else had problems with them? They used to be excellent, but now everything is so slow, and half the order has gone out of stock by the time they send it... Ah, I will save a whole post to rant I think!)

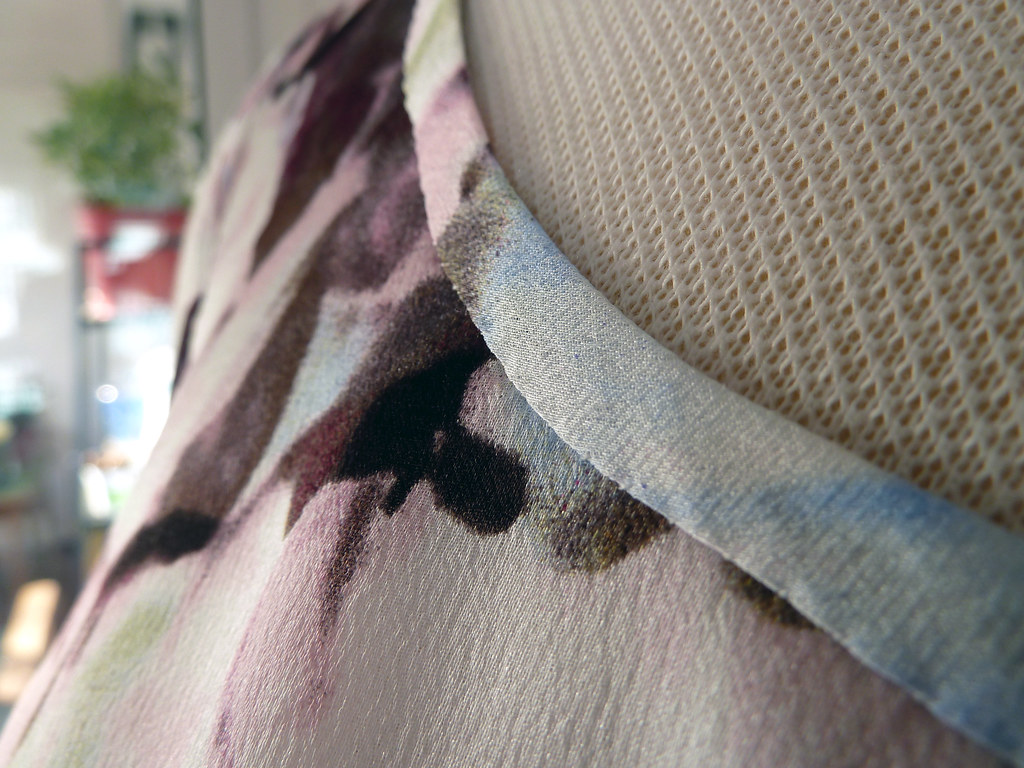
This top is sewn with French seams, and the neckline and arms are finished with bias strips. I missed off the side slits at the hip as I couldn't work out how to do them with French seams, but it would have actually benefited from having them. If you follow me on Twitter, you will already know that the binding was... fiddly. I wanted it fairly narrow, so I cut it 2cm wide: 1cm plus 2 x 5mm seam allowance. However, it didn't occur to me that the crêpe would be very very very stretchy on the bias, meaning it became very narrow as I sewed it. Urgh. This meant it was super hard to control when making the first pass to sew the binding to the bodice, and impossible to turn under and press as usual to sew the second pass by machine.

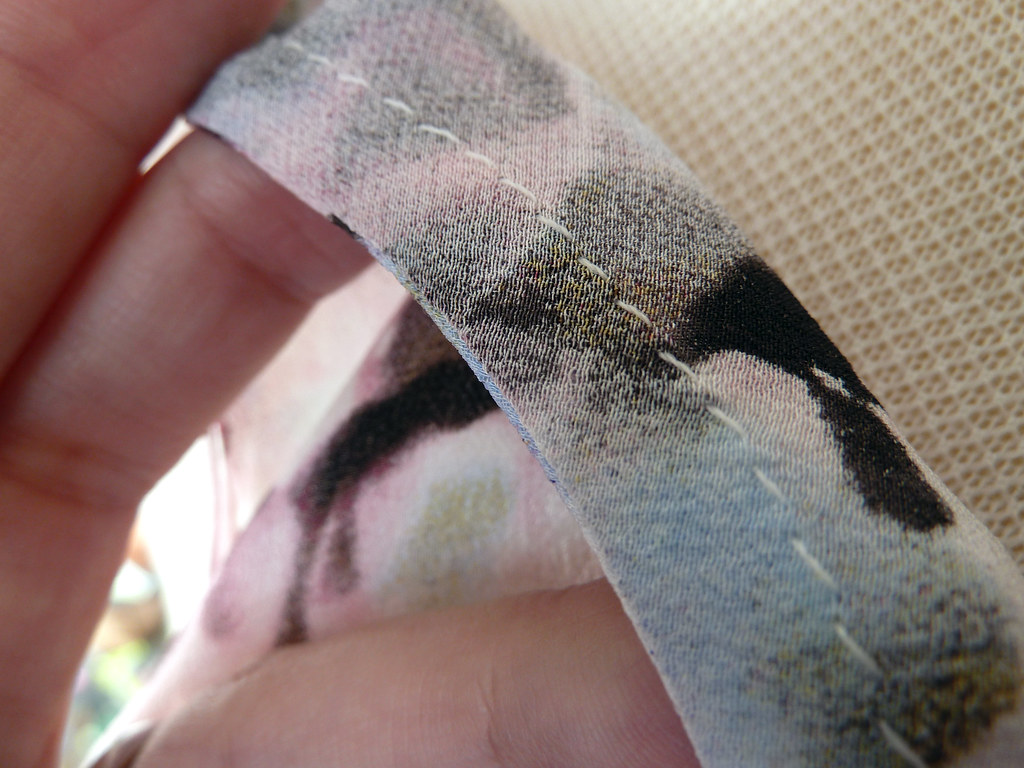
I ended up doing an awful lot of hand basting: sew the first pass by machine, right side of the binding to wrong side of the bodice, stretching slightly but not too much; press the binding away from the bodice; fold the binding to the outside and baste close to the fold; press; fold the edge under and baste; slipstitch down; remove basting; press. I didn't take any photos of this process. I was too busy swearing. At least the benefit of doing so much handsewing meant I could sit at the dining table and watch Masterchef whilst I did it...

The hem was also sewn by hand: pin up about 7mm; press, removing pins as you go; fold up again to enclose the raw edge and baste; press lightly; slipstich the hem, picking up only a couple of threads on the bodice each time; remove basting; press. I'm actually quite glad I ended up finishing it by hand, as it's pretty invisible so gives a very clean finish.

I used a couple of new techniques with this top. The first was using the walking foot for my machine. For the rest of the sewing I used the teflon foot, but when I was staystitching the neck and arms, I just couldn't get the tension and feed right when sewing a single layer and the fabric was just puckering up. The walking foot stopped this completely, but I think next time I will try using tissue paper to stabilise it whilst sewing, as I found the fabric very difficult to control with the walking foot, especially when sewing curves. Those who use them regularly: is this something inherent to walking feet, or is this just something I will improve at with practice?

The second new thing was a revelation. Normally when basting, I use cotton basting thread as it's super cheap, and breaks easily which is useful when removing it. However, it's also quite thick, so there's a limit to the smallness of the needle you can use before it is impossible to thread. Here, I wanted to use a fine needle with the delicate fabric, so I dug out the silk thread I'd bought ages ago for basting (partly after seeing that it is all Melissa uses), but had never used (mainly as it seemed very expensive to "waste" on basting). My goodness, I don't think I'll go back to cotton! It's so much smoother to use - none of the catchiness when pulling it through or removing it. Now I just need to find a reasonably priced source to buy more.

This top is definitely a success. It's super comfy to wear but also very pretty - it's had several outings already! I just need to remember to take some photos of me wearing it...
Thursday, 3 May 2012

Lace dartless dress

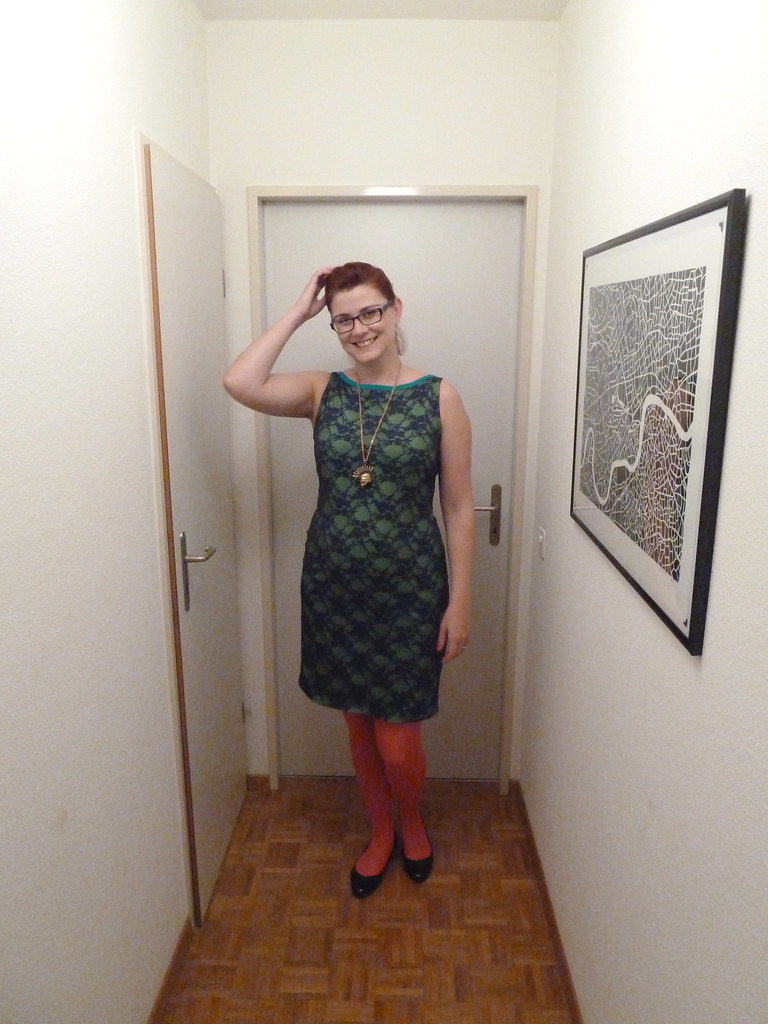
Following on from my knit drafting adventures, I made this! It was supposed to be a "quick" project, but as always seems to happen, my ideas ran ahead and it ended up needing hand basting and pattern matching...

I've been wanting to make something with lace for ages (I have a number of laces in my stash), and realised this sort of design would be great as I wouldn't have to deal with too many breaks in the pattern as there are only side and CB seams and no darts.

Pattern description

Dartless sleeveless sheath dress with bateau neckline.

Fabric used

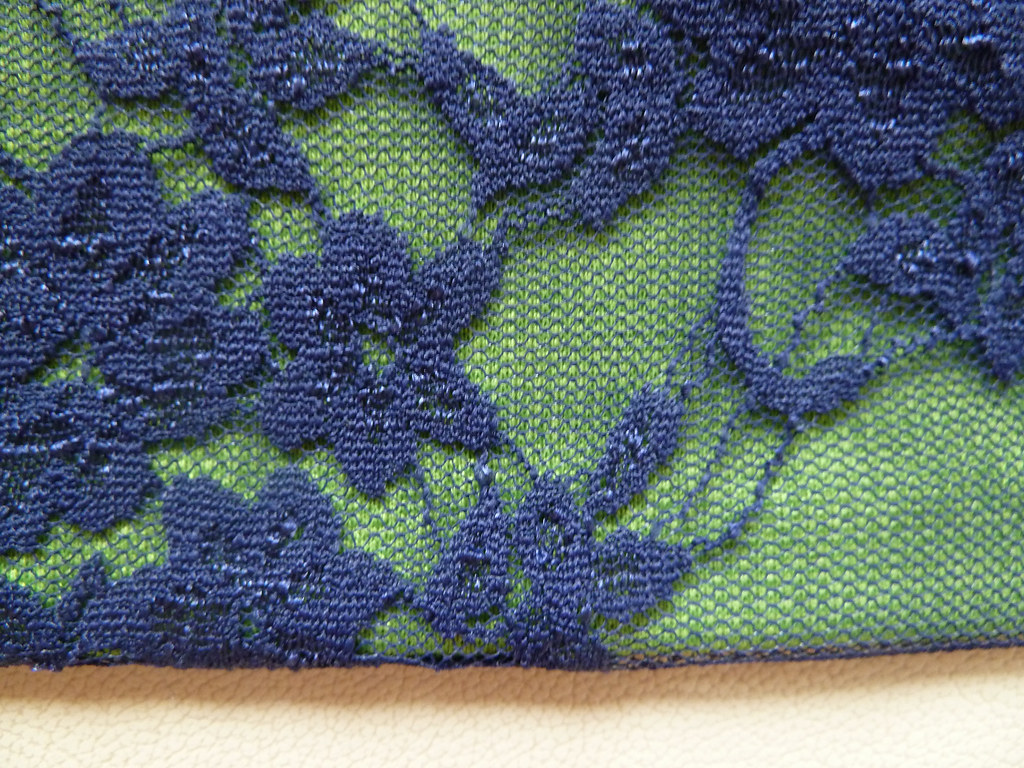
This was two fabrics, both from Fabric.com: lime green "Sofia" doubleknit (poly/rayon) and a navy stretch poly lace. The trimming at neck and armscyes is cotton jersey from a sheet (bought in a sale to make clothes with because of the lovely colour).

Did it look like the sketch/idea when you were done?

Yes!

What did you particularly like or dislike about the pattern?

The fit is super, and (if I wasn't faffing around with lace) it's a super quick make - and will be a great starting point for many variations.

Drafting details

I used the knit block I drafted as a starting point. The neckline was raised at the front, and widened into a bateau neckline. I lengthened the block by simply squaring down from the hipline - I wasn't sure if it would need to be pegged slightly to give a good shape, but it actually worked just fine with the straight shape.

Construction details

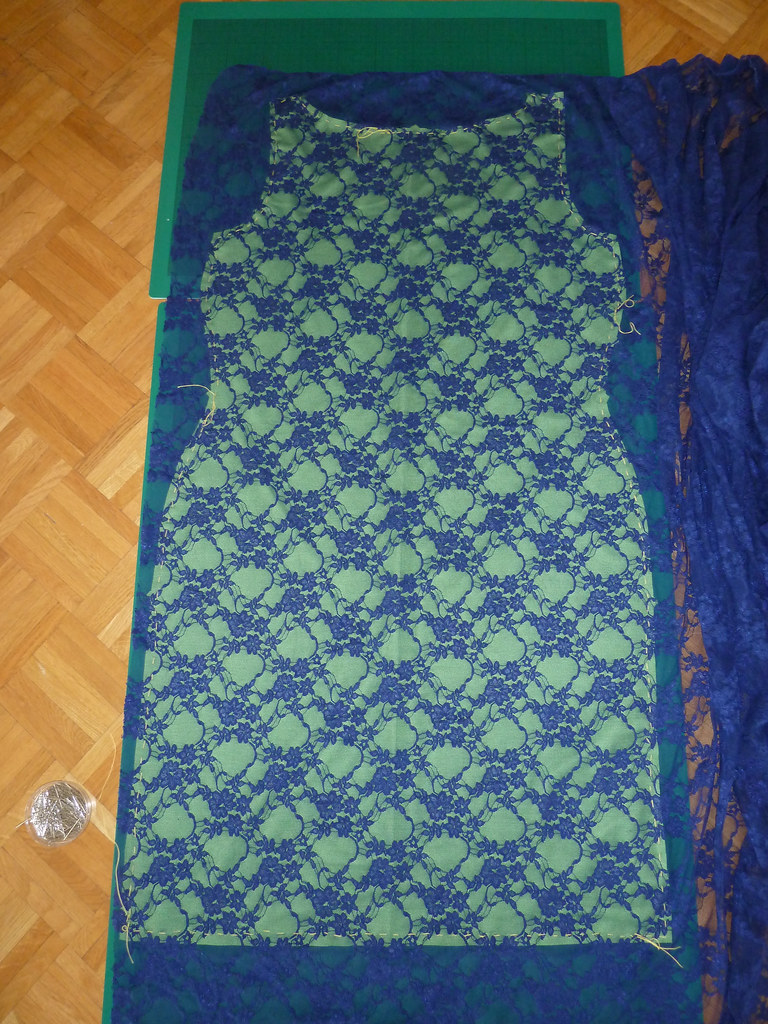
I cut the doubleknit using my pattern pieces, then laid the lace over these, adjusted the pattern placement, pinned and hand basted round the edges, then cut the lace. I need to practice this sort of hand basting a bit, as I tend to pull it a bit tight, which can distort the lay of the fabric a bit (I had this problem previously with this dress). I cut the lace on the cross-grain as it had most stretch lengthwise, and I wanted this going around my body. I pattern-matched the lace, but didn't bother with any couture techniques of disguising the seams.

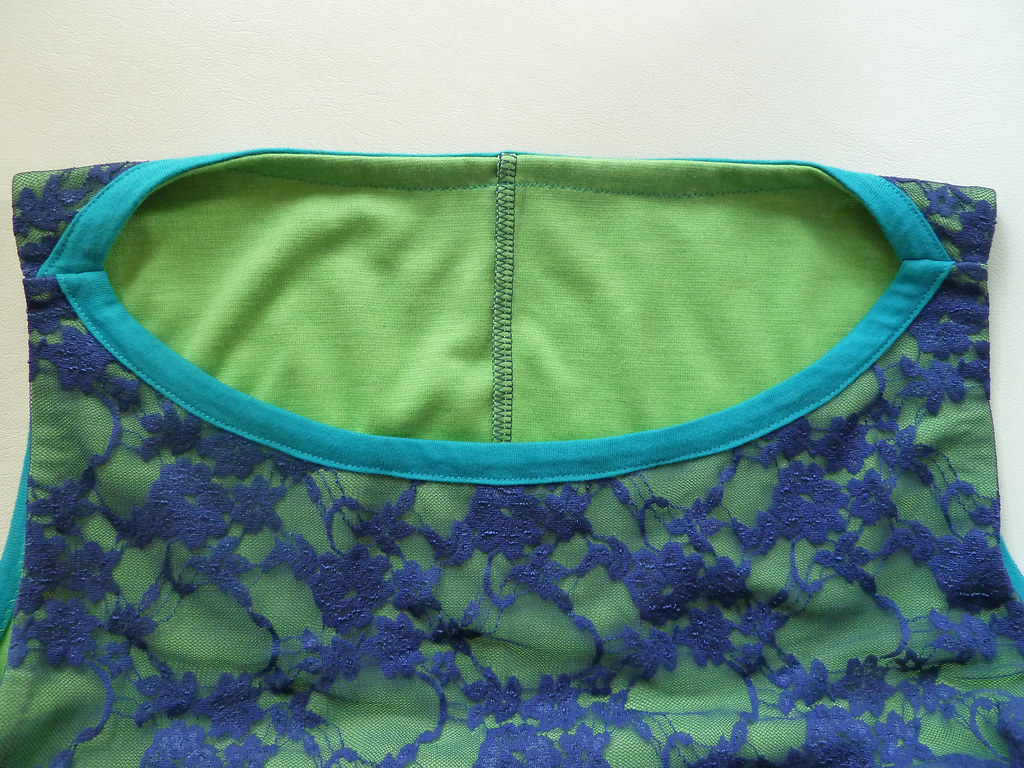
Because of the sharp angles at the sides of the neckline, I actually finished the neck before sewing the shoulder seams. I used a strip of cotton jersey cut cross-grain (for the most stretch) and serged this onto the neck edge with the right side of the jersey strip facing the wrong side of the dress. As I serged it I stretched the jersey strip slightly to snug up and stabilise the neckline (I probably could have pulled it a bit tighter). The binding was then flipped to the outside of the dress, the raw edge tucked under and topstitched. This matched up reasonably well at the shoulder seams (although one is better than the other!)

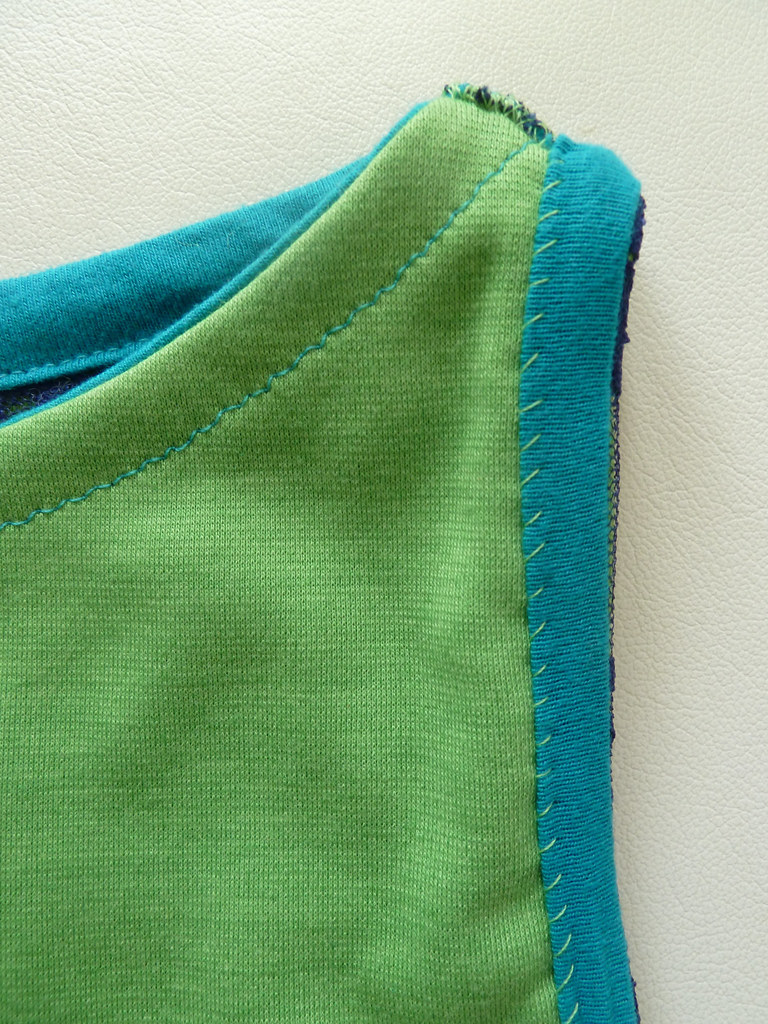
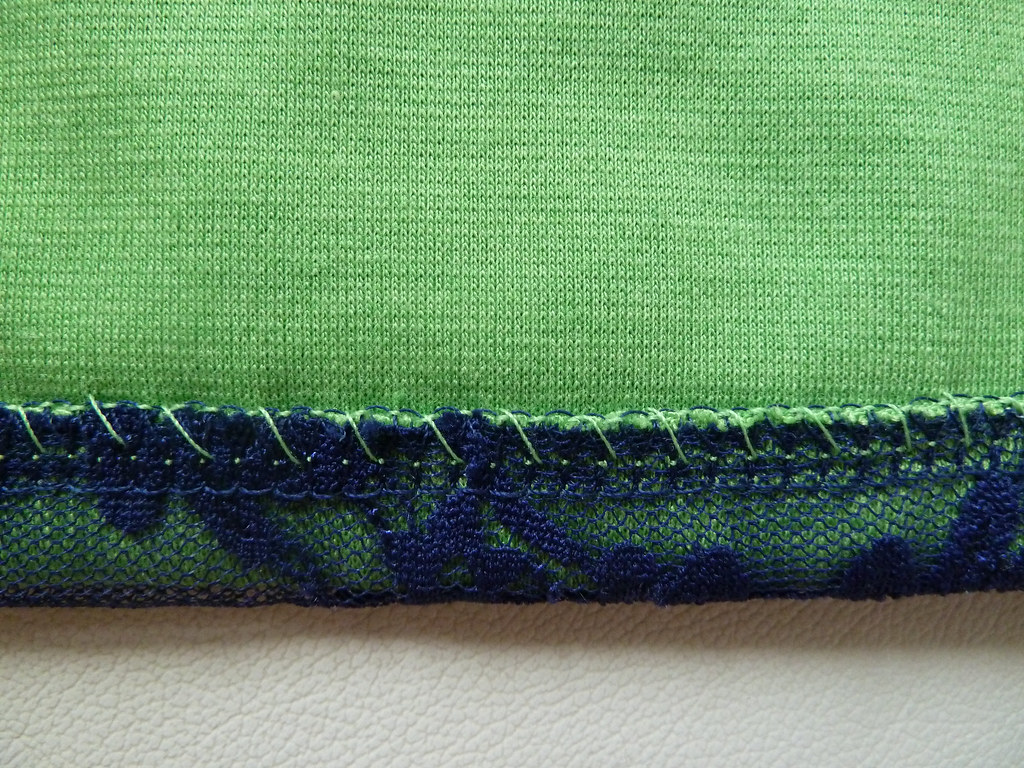
I was going to finish the armholes in the same way, but decided I liked them without the extra colour there, so put the binding on the inside (i.e. serged the binding on right side to right side of dress then flipped it inside) and stitched it down by hand, catching just the doubleknit layer so the stitches do not show through to the other side. The hem was finished by serging the two layers together, turning up and stitching by hand through just the doubleknit layer again (although I realised when I finished that some of the stitches caught the top layer so aren't totally invisible. I was watching snooker whilst hemming it...).

This isn't totally finished - I plan to put a (decorative) bright orange exposed zipper down the back, but decided the one I was going to use is too long. I could shorten it, but it would look a bit messy - I want it to finish a few centimetres above my waist. I know some people aren't so keen on exposed zips, but I really like the look of them, and I also wanted that detail to help keep the all-over lace pattern dress from looking too old fashioned (although I think the contrast binding and bright colours help too!)

Would you sew it again?

Not to the same design as I'm not sure I have the need for two lace dresses in my wardrobe. However, I do plan to make variations on the design - watch this space!

Conclusion

I'm soooooo happy with this dress, both the look and the fit. I wore it out the same day I finished it and it's super comfy to wear. I'm looking forward to sewing some variations now.

Friday, 6 January 2012

Alphabet quilt - finished at last

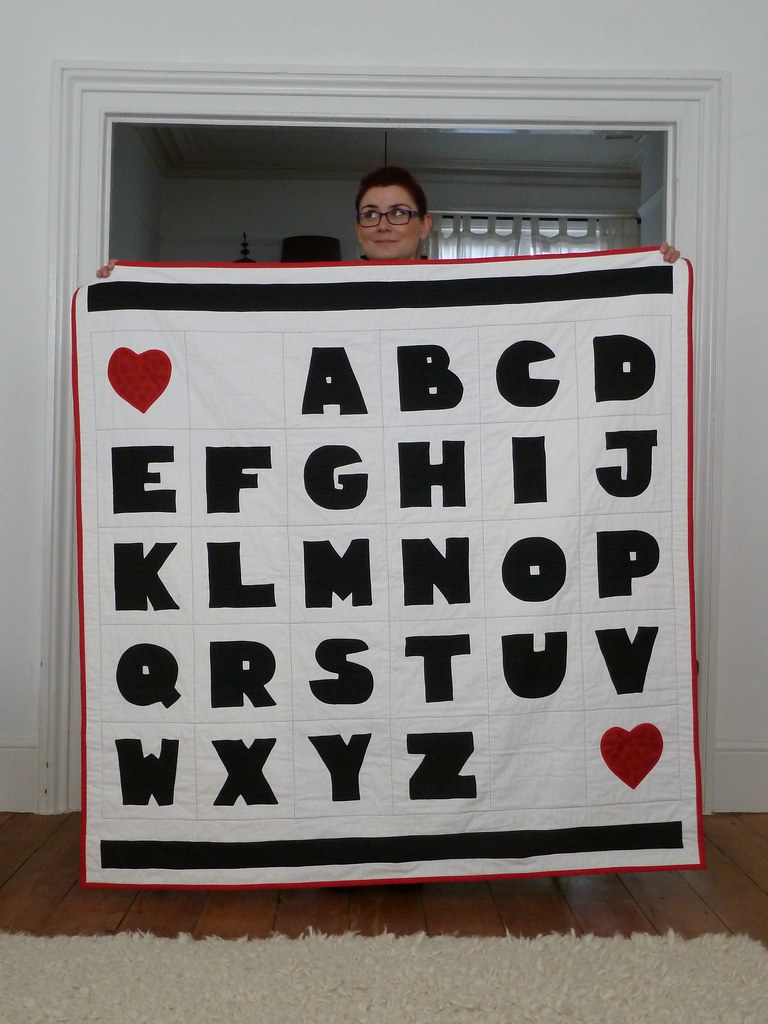
So, about 18 months after starting it, I've finally finished the alphabet quilt for my nephew - I gave it to my sister as part of her Christmas present.

Not much to say about the finished item, apart from that I'm really rather pleased with it. Although I might make the next one slightly smaller...

Front:

And back:

My sister loves it - although she's going to put it on the wall rather than the floor or bed until he's a little older.
Thursday, 18 August 2011

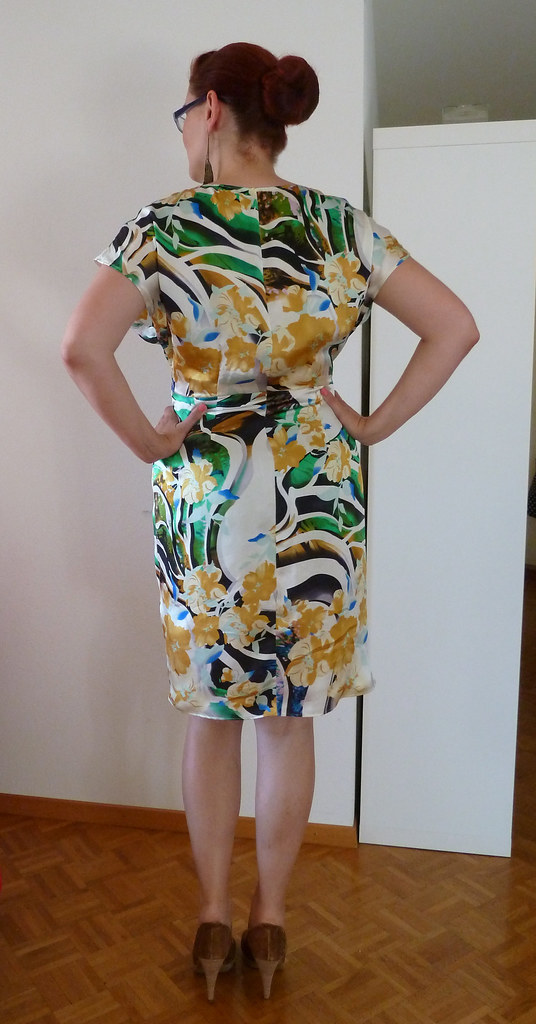
Pattern review - silk charmeuse wrap dress

OK, before I start, a slight caveat that this might not be an entirely fair review of the pattern - I made it in slippery slide-y silk charmeuse (my first time sewing with it) that was really hard to handle and did weird things on the bias grain, so it wasn't the easiest garment by which to judge the pattern.

Pattern description

Vogue 8631 - Wrap dress with extended shoulders, front pleats and back darts.

Pattern sizing

6-22. I cut the 18.

Fabric used

Silk charmeuse I bought from eBay many years ago. The pattern wasn't as pretty in real life (or rather looked crazier), so I wasn't too sad if this ended up looking really bad (and I have nearly 6m of the stuff so would still have plenty left for other things!)

Did it look like the photo/drawing on the pattern envelope when you were done?

Pretty much, a few minor differences.

Were the instructions easy to follow?

Yes! Although it's such a simple pattern that I only just glanced at them to check there wasn't anything unusual - if you have basic garment construction skills you don't really need the instructions.

What did you particularly like or dislike about the pattern?

This seems to be drafted very well, all the pleats and darts line up perfectly. The shape is very flattering, and I like the kimono style sleeves. The wrap also crosses over enough that you aren't constantly worrying about flashing unsuspecting members of the public (and I wore it on a fairly breezy day). It came out the perfect length on me, just above my knee, but bear in mind I am just under 5'10".

A couple of cautions though: the armholes are quite low so you can see the side of your bra as you lift your arms up, and it is very low cut in front (but does fit quite snugly along the neckline so doesn't gape). I'm not particularly bothered by either of these though, but might consider wearing a slip underneath, depending on the occasion.

Pattern alterations or any design changes you made

I have a bad habit of altering patterns before trying them out, despite not being an expert on fit, and then finding they still don't fit, but I don't how to correct it and how much is caused by the alterations I made. So I'm trying to make up patterns "straight up" either by making a muslin or a test garment and then making any alterations I need.

This was then effectively my test garment, although I'm not sure of the wisdom of doing this in silk charmeuse as it made it very slow to sew up and pretty hard to evaluate the fit! I'd also researched this pattern on Pattern Review, and the general consensus was that (a) it came up very big and (b) a FBA wasn't necessary. Marvellous. Bearing this in mind, and after some flat pattern measurements, I cut a straight 18, which turned out perfectly (even though by the body measurements on the envelope, I should have been cutting a 20 on my hips!).

I changed the direction of the wrap (i.e. my dress wraps left over right) as for some reason the pleats fell really weirdly on the right hand side (I think maybe this side was cut slightly off grain). In general, I've discovered that this fabric doesn't really like draping and folding, and does very weird stuff when you try any of that nonsense along the bias grain. I also left my pleats stitched in as I wanted it a bit less flappy over my middle (and also partly because of the aforementioned weirdness of the charmeuse).

As most others have done on Pattern Review, I didn't use bias binding around the edge, but instead did a baby hem (using the tutorial on Burda Style). I was going to use a snap (instead of the recommended hook and eye) on the outer wrap, but decided I preferred the look (and adjustability) of ties, so made an extra set.

I omitted the pockets partly because this was a test garment, and partly because I couldn't face fiddling around sewing them in with this fabric...

Construction details

The first couple of seams I sewed were super hard work to control, but then I remembered I'd recently bought a non-stick presser foot, which made things soooooo much easier!

Because of the horrid ravelly nature of the charmeuse, I used French seams throughout (even on the curved side seams! For these, I pinked the seam allowance after sewing the first pass of stitching. I can see this might not work on a close-fitting or frequently used garment, or a very curved seam, but it seemed to work fine here). This was my first time sewing French seams, I'd always been a bit scared of them before (I think because of the fact you can't really alter them for fit once you've sewn them), but was very pleased with them - and only managed to sew one seam together the wrong way (it's hard to get your head round sewing WS to WS...). Incidentally, I discovered that in French, French seams are called coutures anglaises, i.e. English seams.

It was also the first time I tried doing a baby hem, and again was please with how it turned out. It could have probably been a bit narrower, but it was hard to control the charmeuse properly. The edges also stretched out a bit as I sewed the hems (except the bodice neckline, which I had staystitched to prevent gaping), but I don't really mind, I've decided that the slightly ripply effect makes the dress more feminine... I had intended to try out another new foot, my narrow hemming foot, but I just couldn't make it work. I think maybe the fabric was just too slippery and stretchy to work properly.

I made the ties with pieces of selvedge. I folded the raw edge in, folded again and then topstitched.

Would you sew it again? Would you recommend it to others?

I'm definitely going to sew this again, in a slightly more cooperative fabric. I like the style, and this could be sewn up super quickly if I'm not fiddling about so much. Next time (depending on whether it fits on the layout) I will cut the back bodice and skirt on the fold. I would definitely recommend this to others.

Conclusion

Halfway through construction, I nearly gave up completely as the fabric was such a pain to work with, the pleats looked weird and bulgy, and I managed to snip a hole in the sleeve whilst trimming the SA for the baby hem (fortunately small and on the underarm, so fixed with fray check and fusible backing, not the prettiest method, but I didn't care at that point and you can't see it). I'm glad I persevered though, as I'm surprisingly pleased with the results - I wore it out the same evening I finished it and will definitely wear it again (although I haven't worked out how I'm going to wash it yet though...). Although it's far from perfect, given that it was my first time trying so many things (the pattern, the fabric, French seams, baby hem), I think it turned out pretty well.

Friday, 17 June 2011

Pattern review - Cowl neck jersey dress (plus a bit of Me-Made-June action)

Dress: Me-Made (reviewed below) / Belt: eBay / Earrings: Accessorise / Shoes: M&S / Jacket (also worn that evening, but not seen in this picture): Me-Made

I'm going to catch up on my Me-Made-June outfits with a couple of review posts - unless it's something new, then daily outfits aren't terribly interesting! However, this is actually the Me-Made outfit for 16 June, that I wore last night to my husband's work summer party - I unfortunately forgot to get a photo taken so had to recreate it this morning (well, actually this afternoon - it was a very good party).

Pattern description

Self-drafted casual dress, a modified version of a previous dress. Loose fitting with cowl neckline, elastic waist and side seam pockets.

Fabric used

Smooth jersey, I think it's probably polyester.

Did it look like the photo/drawing on the pattern envelope/sketch/idea when you were done?

Pretty much, I think I was wanting the cowl to drape a little lower, but I'm happy with it as a first attempt at drafting and making one.

What did you particularly like or dislike about the pattern?

Quick to sew, and I think the cowl neck is flattering.

Pattern alterations or any design changes you made

The skirt is exactly the same as the previous dress. I took the extra length out of the bodice, and apart from that, the back bodice is identical to the previous dress. For the front bodice, I kept the dart excess in the shoulder area, but put in pleats instead of gathers. I then slashed and spread the bodice along three curves from the shoulder area to the centre front just above the bust point until the top line was at right angles to the centre line, and added a cut-on facing. The facing is caught in the shoulder seam (but doesn't have pleats in order to reduce bulk), and in the top of the armscye.

Construction details

Construction was pretty much the same as the previous jersey dress. I used narrower elastic on the waist (about 6mm I think), and made sure I trimmed enough from the armscyes before applying the binding. When I tried it on the cowl wasn't sitting quite right. I think one of the reasons was that it's cut on the straight grain rather than the bias (as it's jersey), but I was expecting this. I think the other reason is that the fabric isn't quite heavy or drapey enough, so I decided to add some weight to the bottom of the facing. I wanted to add some proper lead weights or chain, but couldn't find any, so added three metal buttons, which works pretty well.

Would you sew it again?

Entirely likely, but I will almost certainly be adapting it again - well, definitely, as I'm currently working on a dress with a lace overlay based on this bodice.

Conclusion

I'm very pleased with this dress and have already worn it several times. The combination of this fabric and style has meant it's a little dressier than I intended, but that's actually ended up being a good thing, as it's a perfect summer party dress, and can be made more or less dressy with choice of shoes, accessories and hairdo!

Sunday, 5 June 2011

Pattern review - Gardening apron (and Me-Made-June: Day 5)

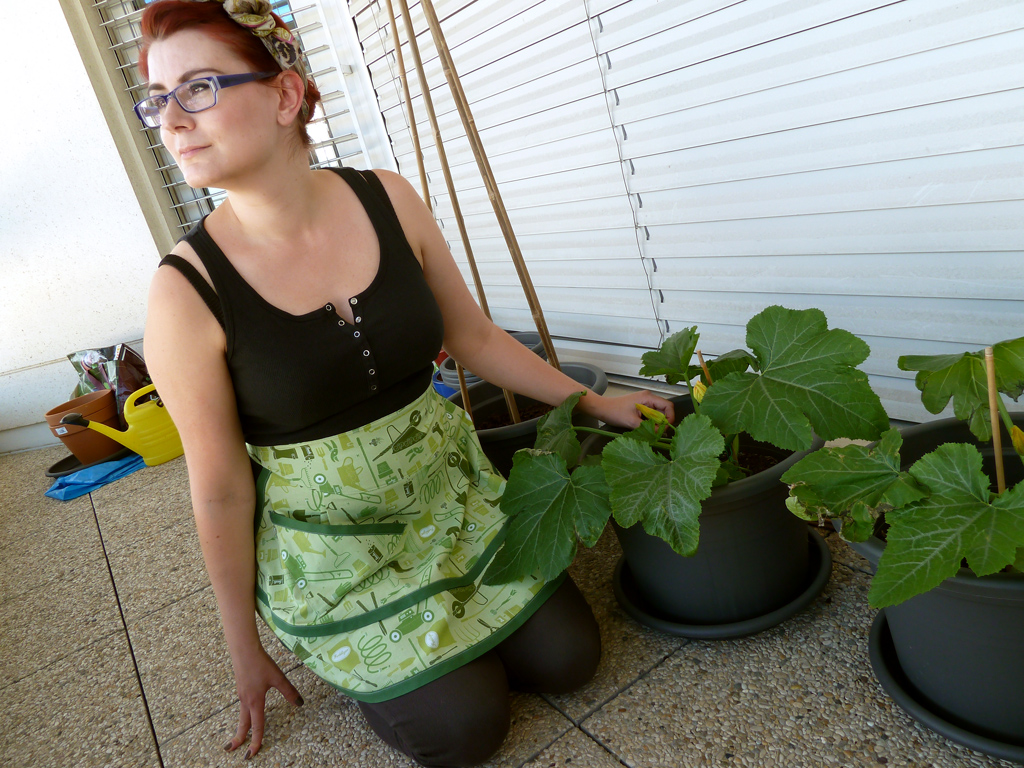
Apron: Me-made / Top: H&M / Jeans: Uniqlo / Scarf: Accessorise / Courgettes: Migros

I've realised I need a few aprons for a while now after several messy episodes whilst cooking and gardening, but I refuse to buy them as they are so simple to make. So, at long last I've made one! This is (obviously) for gardening, I plan to make a full apron for cooking soon. This post is also Day 5 for Me-Made-June

Pattern description

Woman's Day, April 1951: "Ripply apron". Half-apron with contrast bias binding and triangular pocket. This is a free pattern.

Pattern sizing

One size.

Fabric used

Quilting cotton with a print of garden miscellanea by Robert Kaufmann. Bought a while back from eQuilter.

Did it look like the photo/drawing on the pattern envelope when you were done?

Yep, pretty much, but in colour rather than black and white :)

Were the instructions easy to follow?

They're a little cryptic in places, but it's pretty straight forward to make up (although having said that, I was just looking at them again whilst getting the link to the pattern, and realised I think the waistband was meant to be sewn on the other way up...)

What did you particularly like or dislike about the pattern?

This is super quick to sew up - I drafted the pattern, cut and sewed it in less than an afternoon.

Pattern alterations or any design changes you made

As my bias binding wasn't terribly wide, I folded it in half and sewed that on, rather than actually binding the edges properly, so my mitred corners aren't perfect. As I mentioned above, I think I sewed on the waistband the wrong way up, but this made much more sense to me, as it adds length to the apron, which would otherwise be very short (although I guess it means it's a little less ripply at the centre).

If I did sew this again, I would definitely make the apron itself a bit larger, both widthwise and lengthwise - I forgot my waist doesn't quite equate to a 1950s waist measurement, so it doesn't wrap quite far enough at the sides of my waist (it's perfectly useable though!). I made it up with the pocket as designed, but I had my doubts about how practical this pocket would actually be. I tried it out with some gardening after I finished it, and I'm definitely going to take off this pocket and replace it with something deeper and a bit squarer.

Would you sew it again? Would you recommend it to others?

I doubt I'll sew this particular pattern again, although maybe as a present. I would recommend it to others, but with the advice to widen the apron/waistband pieces at the centre, unless you are very slim.

Conclusion

A useful apron that's also a pretty fun shape - I will wear it whilst doing my gardening when I want to feel like a proper housewife! Ooh, and I've just remembered I need to go and sew one of my labels on this too.

Wednesday, 25 May 2011

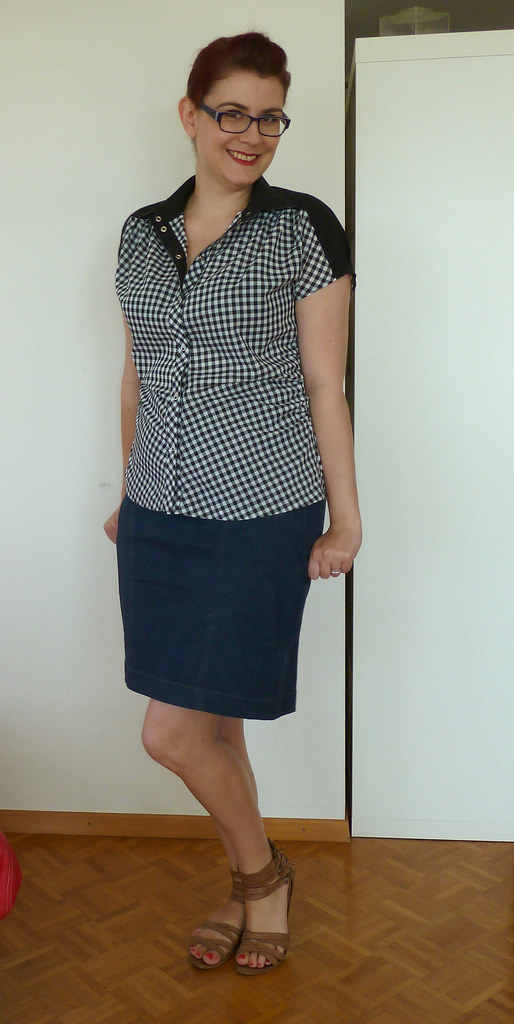
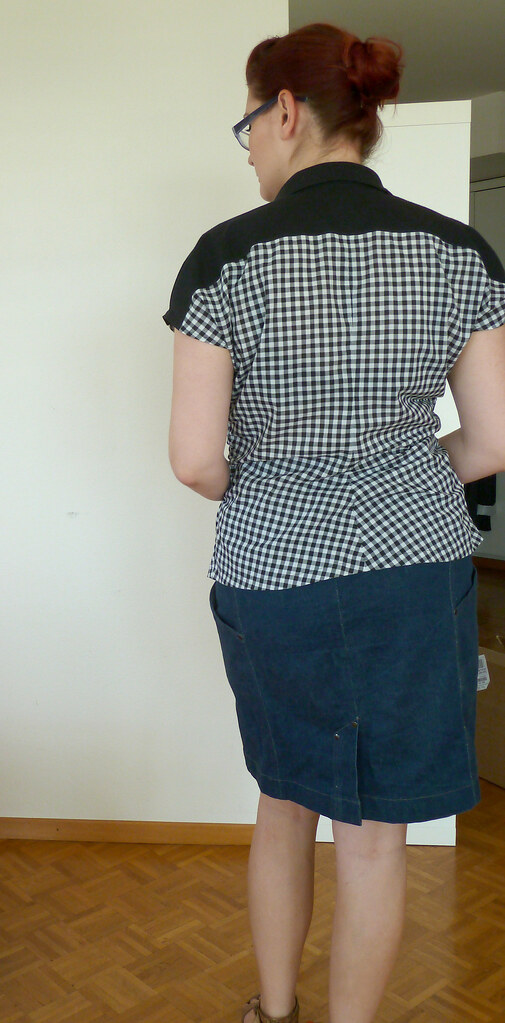
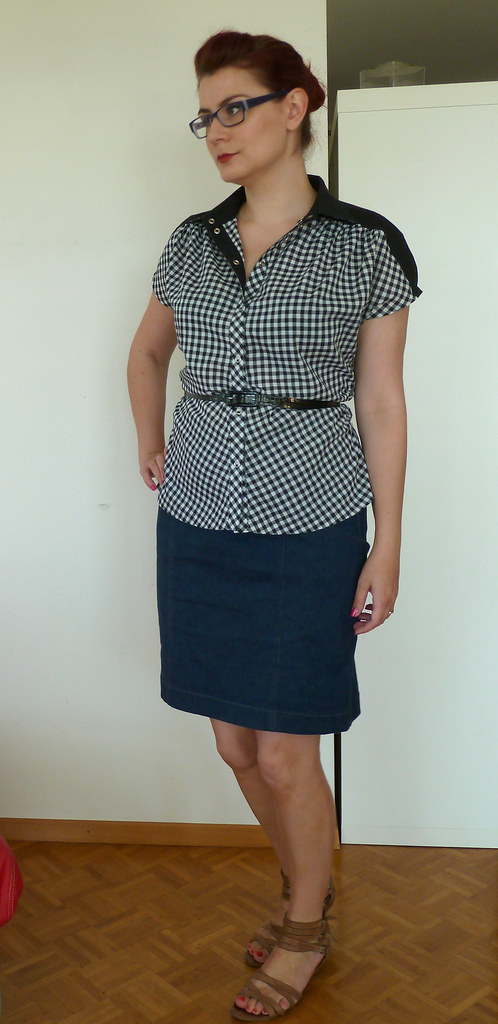
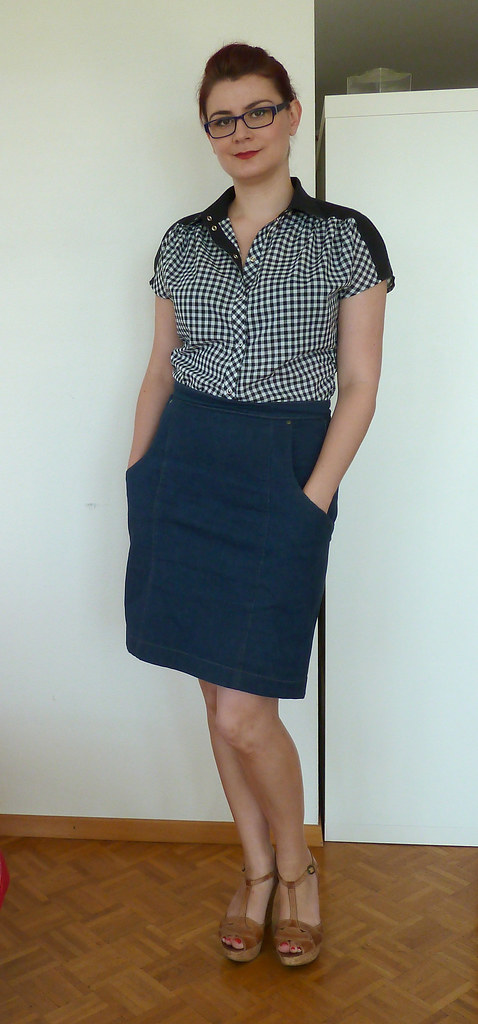
Pattern review - gingham blouse

Pattern description

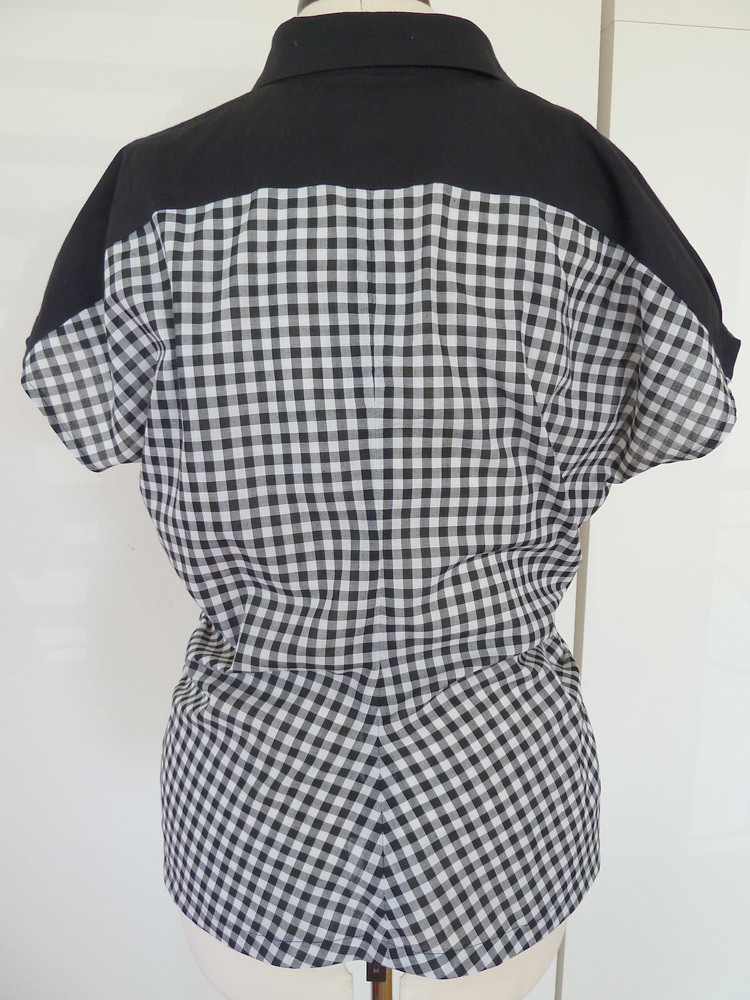
BWOF 06/2008/105A. Blouse with extended shoulders and side seam gathers at waist level.

Pattern sizing

38-46. I cut the 44, made a 1.5cm FBA and curved in the CB seam 1cm at the waist.

Fabric used

Black and white gingham with black cotton for the yoke, collar stand and upper collar, and placket facing.

Did it look like the photo/drawing on the pattern envelope when you were done?

Yep pretty much (but in a different fabric obviously!)

Were the instructions easy to follow?

Yep, very straightforward. This pattern was the special feature "sewing course", so the instructions were much more in-depth than usual. It's super simple to make though so you don't need to study the instructions too much.

What did you particularly like or dislike about the pattern?

I like the way the darts are rotated into the waist gathers - as well as being very comfortable to wear, it also does interesting things to the grainlines, so it's especially nice made up in something with stripes. The pattern is drafted with just a single layer yoke (i.e. no facing/lining piece). I kept it like this as I didn't want too much bulk (the main body of the blouse is in very lightweight gingham, but it would be simple to add this if you wanted a more traditional finish.

Pattern alterations or any design changes you made

I made a 1.5cm FBA, rotating the extra fullness partly into the front shoulder gathers and mainly into the waist gathers, and scooped in the CB seam at the waistline to compensate for my narrow lower back. I divided the placket into top and facing, and cut out the top part and the under collar on the bias for visual interest. I used the pleats on the sleeves from view B as without them the wide sleeves looked a bit weird on me. I left off the front loop and tie band as I knew I would be wearing it with a purchased belt, or tucked in.

Would you sew it again? Would you recommend it to others?

I would definitely recommend it for a cute and interesting blouse that's super quick to sew up. I doubt I'll sew it again in the near future as I have many other tops I want to sew!

Conclusion

I'm very pleased with this blouse. It was super easy to make (and I was especially pleased with the ease it went together as this was my first attempt at a stand collar), and very nice to wear. The gingham was a good choice of fabric as it's light and summery, and it can be styled a number of ways.

Tuesday, 10 May 2011

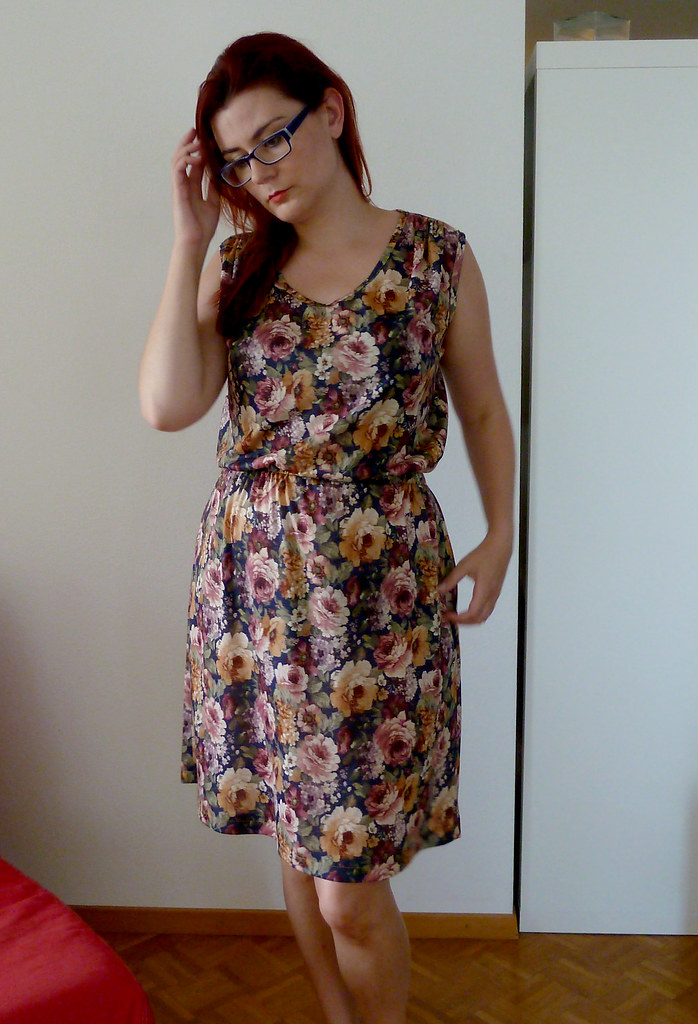
Pattern review - jersey rose-print dress

Pattern description

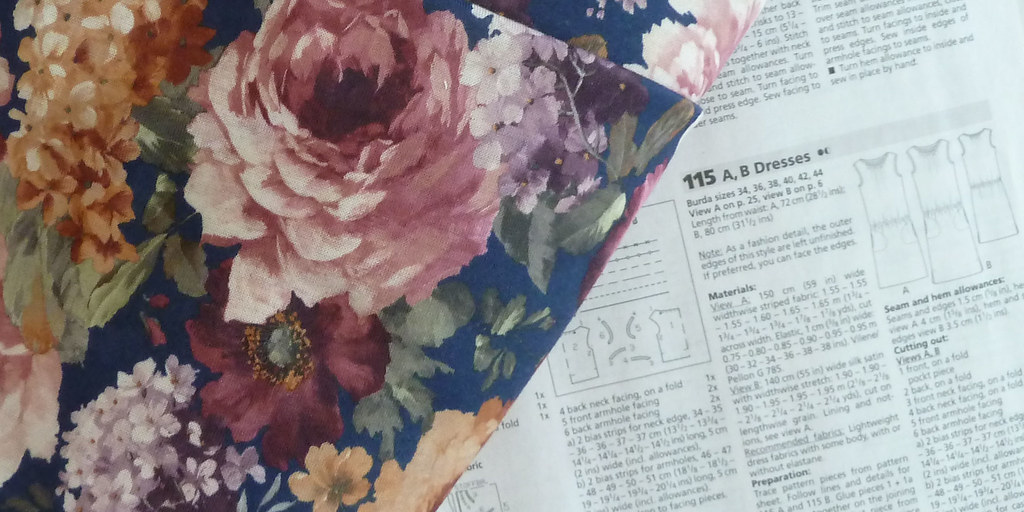
Self-drafted casual dress, based on BWOF 04/2011/115. Loose fitting with gathers at front shoulder seams, elastic waist and side seam pockets.

Fabric used

Smooth jersey, I think it's probably polyester.

Did it look like the photo/drawing on the pattern envelope when you were done?

I was about to trace off the aforementioned BWOF pattern, but wanted to make several changes and figured it would probably be quicker to simply draft it from scratch, especially as I wanted to practice more drafting. So, it looks kind of similar to the BWOF dress, but also kind of different!

What did you particularly like or dislike about the pattern?

Quick to sew (even quicker now I've sewn it up once).

Pattern alterations or any design changes you made

From my blocks I added width at the side seams at waist and hip. The centre back waist was shaped slightly to avoid too much fullness, but all other waist darts were omitted, with the fullness gathered by the elastic. I extended the shoulders by about 1.5cm, and curved them slightly downwards. The neckline was lowered, and the shoulder dart rotated into gathers at the front shoulder. The bodice was lengthened by 7cm to give the drapey fullness, and side seam pockets were added.

Construction details

I would have serged it completely, but I'm not very good at going round corners on my serger (and this fabric was giving it fits for some reason), so the pieces are finished with the serger but sewn together with a narrow zigzag on my normal machine. If I had made this without pockets I would have serged it all. The neck and armscye edges are bound with self-fabric strips, cut on the stretchy grain (i.e. across the fabric). I did it this way rather than serging on folded strips as I wanted the contrast topstitching. I think the armholes ended up slightly tight under my arms, possibly due to the finishing being slightly inaccurate. As this is some sort of polyester, I'm slightly concerned this might mean it ends up a little, erm, stinky, but we'll see how that goes... I also had a little fun by putting in one of my new labels!

Would you sew it again?

Yes. I will probably make some slight alterations, but this is a very handy dress to have in a few colourways.

Conclusion

I'm very pleased with this dress. I need to make a selection of dresses that are comfy enough to wear around the house, but nice enough to not need to change if I need to pop out, and this certainly fits the bill. I will probably dress it up with a belt and nice jewellery for going out and about.

Friday, 29 April 2011

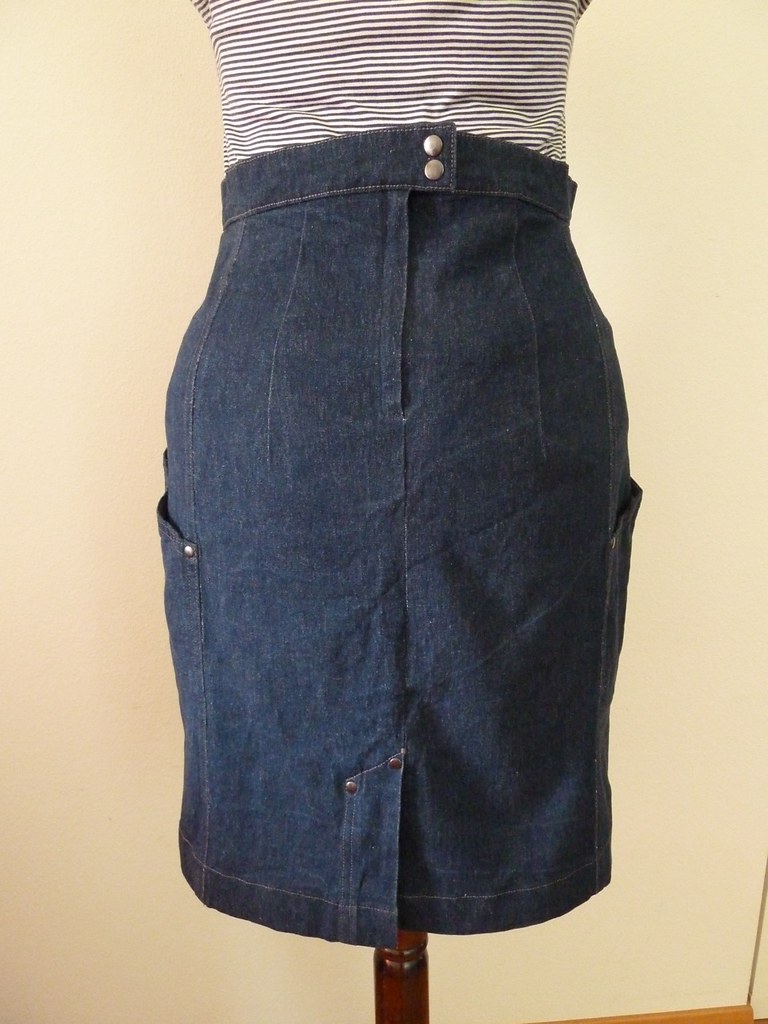
Pattern review - jeans skirt

Pattern description

Self-drafted jeans skirt.

Pattern sizing

This was drafted to my personal measurements, using a slightly modified version of the technique in "Metric Pattern Cutting" learnt at the custom pattern course at London College of Fashion.

Fabric used

Medium-weight stretch denim from A-One Fabrics on Goldhawk Road, with grey topstitching and dark grey rivets. The waistband facing and the pocket bag are made from grey cotton salvaged from a pillowcase.

Did it look like the photo/drawing on the pattern envelope when you were done?

Well, it looked like by sketch! (Incidentally, photographing this skirt on Wilma has alerted me to just how differently she is shaped compared to me. The skirt looks like it fits terribly on Wilma, but actually fits me perfectly.)

Were the instructions easy to follow?

I obviously didn't have any instructions, so before I started sewing I sat down and figured out the construction order, and wrote it all down so I didn't get confused. This was only my second attempt at a lapped zipper (the first was a disaster), and I'm very pleased with it.

What did you particularly like or dislike about the pattern?

The perfect fit! This has given me more confidence in using my self-drafted patterns - I'm going to psych myself up to tackle a self-drafted top next time...

Pattern alterations or any design changes you made

As drafted, the back vent was way too high, so that was lowered in construction, although I think I probably lowered it a couple of centimetres to far. When I tried it on for fitting during construction, I noticed the centre back was jutting out, so I raised the side seams on the back section.

Would you sew it again? Would you recommend it to others?

I probably won't sew this exact same skirt again, but I'm definitely going to use my skirt block to draft more skirts for myself. I would highly recommend others drafting their own skirt block - fitting on this is very easy (much easier than the bodice), and alterations for a variety of styles are simple too.

Conclusion

I'm very pleased with this skirt. It was another wardrobe-hole filler and has been very successful, and has already got a lot of wear.

Wednesday, 27 April 2011

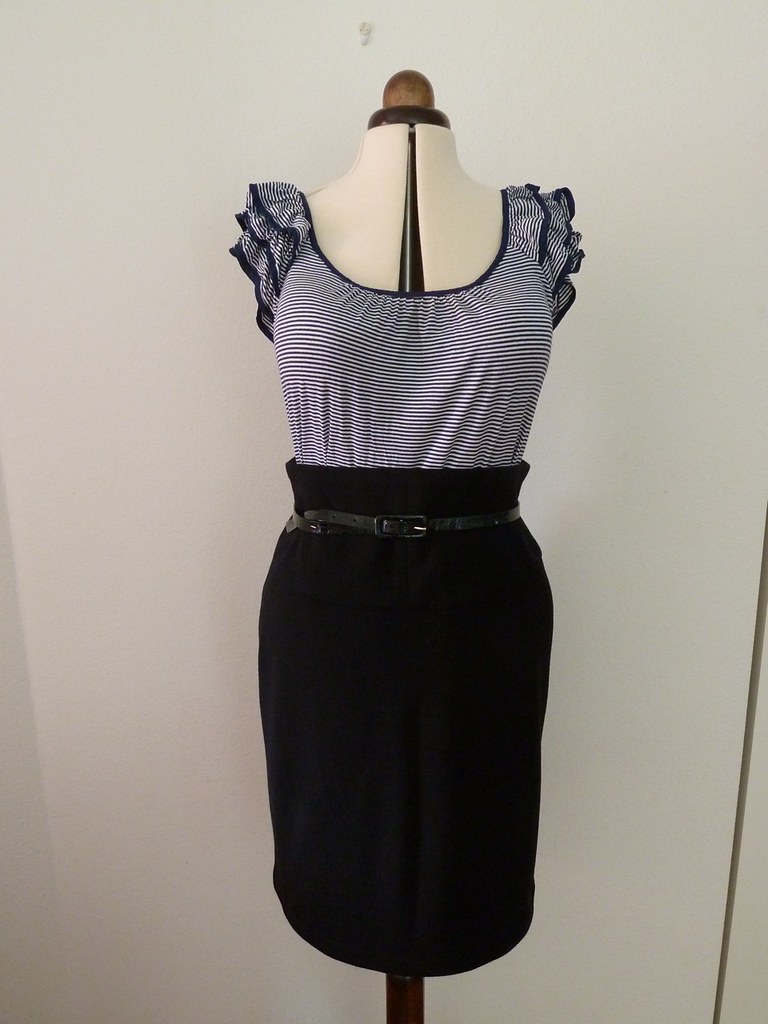
Pattern review - high-waisted black skirt

Pattern description

BWOF 1/2009/112

Pattern sizing

36-42. I cut the 42, but with a bit extra at the side seams - I measured the pattern flat and figured it would be ok as I was using a stretch fabric.

Fabric used

Black doubleknit bought in A-One Fabrics on Goldhawk Road. This was actually bought about 3 or 4 years ago for the express purpose of a high-waisted skirt, and I've finally got round to it! The yoke is interfaced with tricot fusible, and faced with lightweight black jersey.

Did it look like the photo/drawing on the pattern envelope when you were done?

Yep, pretty much, with a few tweaks.

Were the instructions easy to follow?

Yes, they were very clear, but it's a particularly easy pattern. I winged it on the exposed zip, using a RTW dress as a model.

What did you particularly like or dislike about the pattern?

The silhouette is very flattering, and making it in stretch means it's very comfortable. The shaped and panelled yoke is a nice detail.

Pattern alterations or any design changes you made

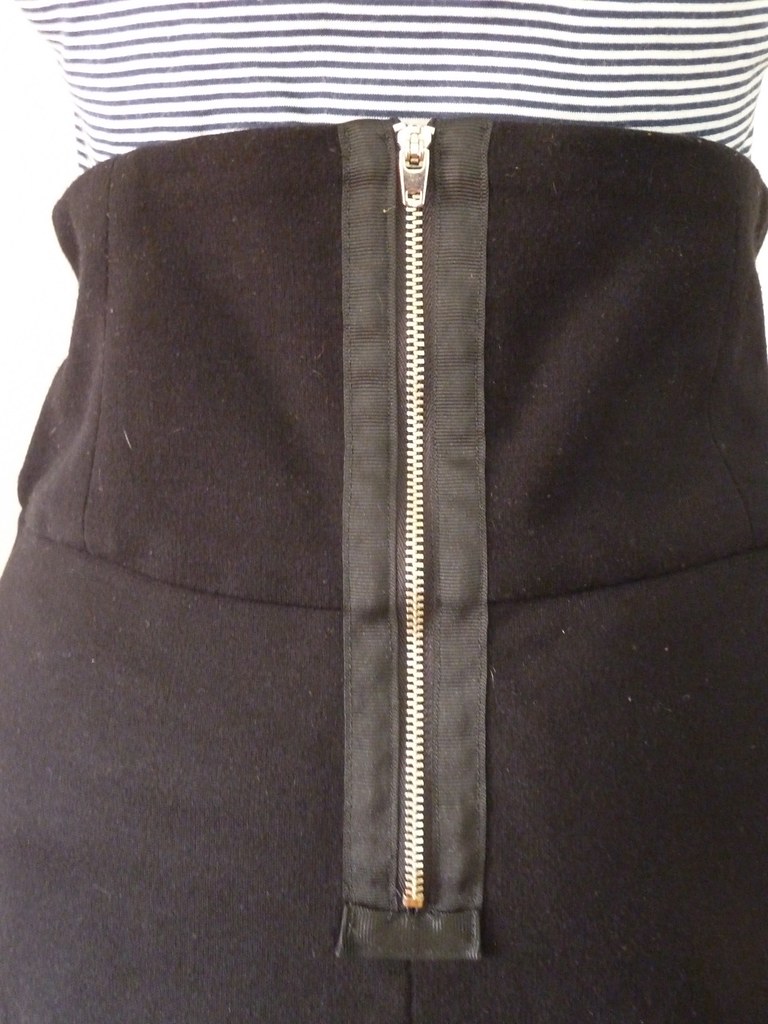
I added about 2cm total at the side seams, but since making it I've lost a little weight (woohoo) and now need to take it in a bit). I think it could do with being pegged a bit more at the side and back seams as it's not quite as "pencil" shape as I was intending, so I will do this alteration when I take it in. The waistband facing is cut slightly smaller than the actual waistband to keep it from stretching. I added an exposed metal zipper, neatened with grosgrain ribbon. I didn't add the belt loops as I didn't want to add bulk to the waistband as I knew I wanted to wear a tops untucked with it. However, I might add thread chains as when I wore it with a belt I had to keep moving it around to keep it in place.

Would you sew it again? Would you recommend it to others?

I might make a variation on this design, maybe in a brightly coloured twill. I would definitely recommend it, it's a very flattering skirt, and very quick to cut and sew up.

Conclusion

I'm very pleased with this skirt. It was made to fill a hole in my wardrobe, and succeeded in that. I've worn it many times, and it's also versatile - worn with a pretty top tucked in it's great for evening, with a jersey tank it's a comfy daytime look.

Thursday, 17 March 2011

Birthday fun

Well, I went to London for a week in the middle of February to see friends for my 30th birthday celebrations (eek! where have my 20s gone?). There were a few fashion and sewing related things to report here.

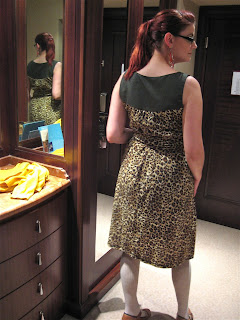
I wore *two* dresses I made (not at the same time, silly) - my leopard and green Budapest dress, as featured on these pages previously, and a new green silk/cotton BWOF dress (review coming up).

I had been intending to wear the one I wore on my actual birthday to meet my parents, rather than the leopardy one, but when I put it on, there was something just not right about it. I don't know if maybe it had shrunk in the wash (the fabric had been pre-washed before sewing it) or if all the birthday drinks had gone to my subcutaneous lipid cells, but it really wasn't comfortable any more. I needed to make alterations anyway, so that is going in my reworking pile.

The next day, my lovely husband (get a room!) organised a party for me at a surprise venue, and my glamorous dress turned out to be very appropriate, as we went to the Tassel Club, a burlesque and cabaret club!

It was a tremendous amount of fun, especially as I hadn't seen some the friends that came for many many months. Burlesque has had a lot of press in the last few years and has become quite a fashionable activity to both do and watch - in fact I went to a burlesque dancing lesson last summer as part of a hen party. I'm not entirely convinced by the argument that it's empowering, as it's still defining women by their sexuality, but at least it is a much more democratic sexuality than what is overwhelmingly seen nowadays, in that it celebrates a more natural body (well, discounting the makeup, hairspray and depilation), and a variety of body shapes.

On a shallower note, OH MY GOODNESS THE HAIR! THE MAKEUP! THE CLOTHES! One of the (immaculately coiffed, immaculately made up and immaculately dressed) ladies who worked there complimented me on my dress, and I was enormously pleased to be able to say "I made this!" We were standing next to where all the performers walked through, so I was able to have a good look at their beautiful costumes (and plenty of boobies too). And as for the clientele, well, that it one place I'm never going to feel overdressed...

Oh, and I've got my first commission! No less than a bolero tail jacket for one of my best friends to wear at her wedding - oh my!

PS Apologies for the appalling quality of the photos in this post, I have resolved to take more pictures of the dresses on Wilma, and train my husband in better photo-taking!

Monday, 1 November 2010

Leopard dress finished and worn

I have to say, I really like this pattern - it's super fast to cut and sew, and pretty flattering and easy to wear too. And with a change in fabric, it's easy to make it dressy or casual. I think I forgot to mention in the previous post that this is made out of the fabric we used to decorate the hall where we had our wedding party, so it was actually quite appropriate for a weekend being whisked away on a surprise trip by my husband! The yoke is made from the same linen-look fabric that was used for the swing jacket a couple of posts ago - so I actually have a matching jacket if I feel like being extra refined. I interlined the sash with silk organza to help stop it crumpling and narrowing when it's being worn, and that works quite well.

So here's some pictures of the finished dress, being admirably modelled by Wilma on the balcony:

I took it on holiday, and actually wore it both evenings (we flew EasyJet so only had hand luggage, so I had to pack light). I was very pleased with it "in action" so to speak - It doesn't crease, isn't hot despite it being synthetic, and is super comfortable (apologies for the appalling photos, I need to train my husband in taking clearer and more flattering ones...):

And the mystery trip? We went to Budapest! It was beautiful and I had a wonderful time (I compartmentalised the horrifying issues surrounding Agnes Gereb...) - we found everyone very friendly, the food was delicious, and everything was very good value (although that might be a reflection of living in Geneva). And I can now say yes, no, hello, goodbye, please and thank you in Hungarian!