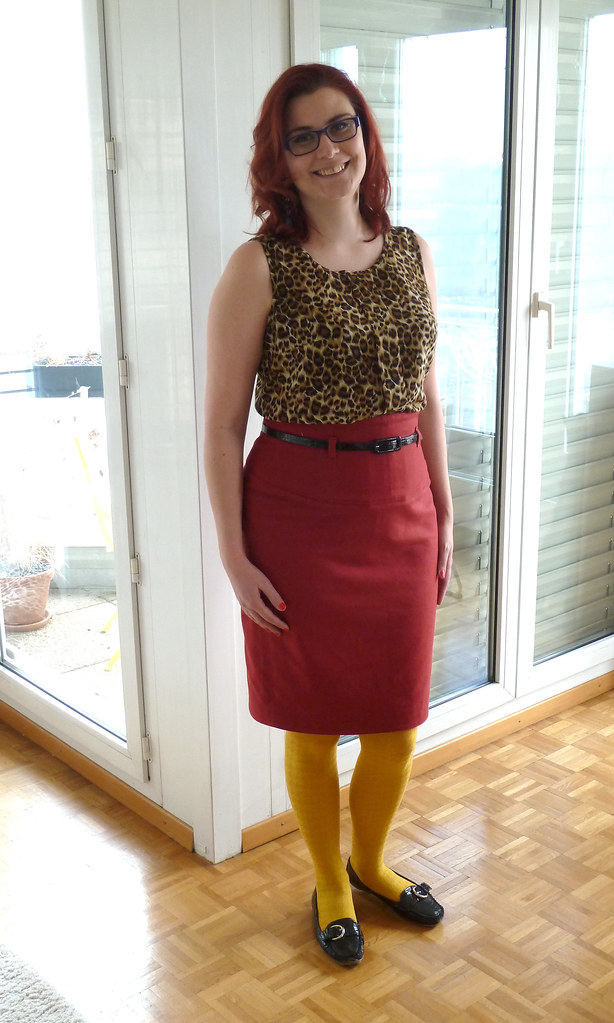
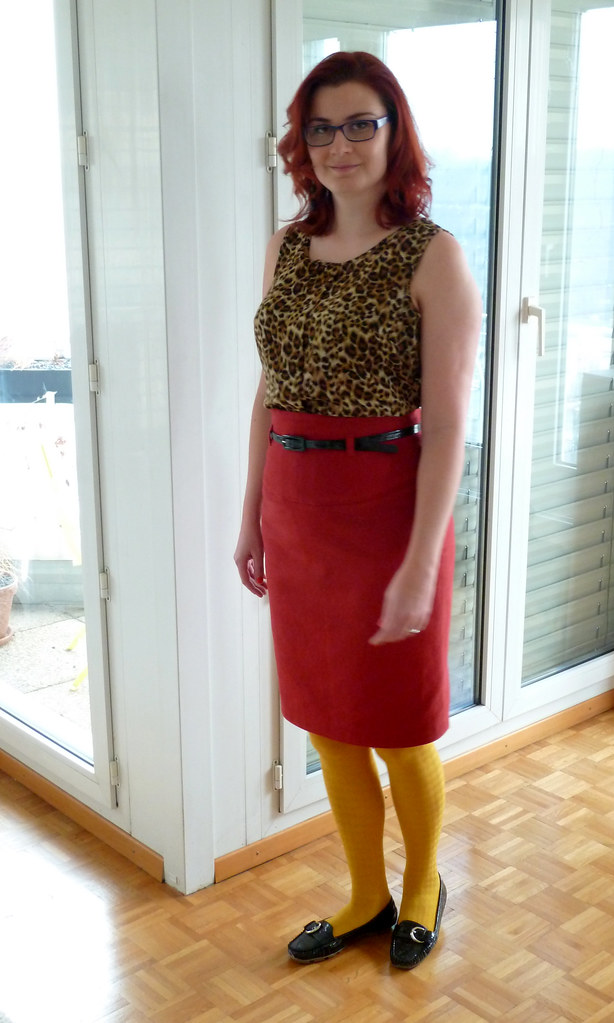
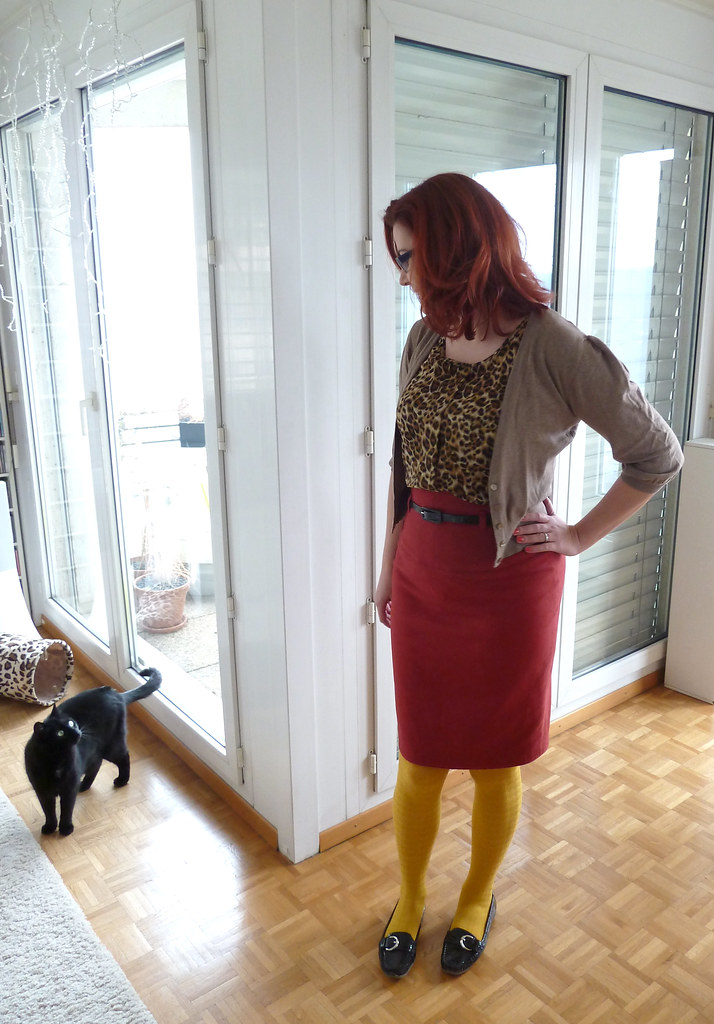
I am in desperate need of some more well-fitting and flattering separates in my wardrobe, particularly bottoms, so I decided the next few things I make need to fit this category. I had originally intended to make this as a denim skirt to replace my jeans skirt (which is wearing out in various places). However I want my next denim skirt to have similar jeans-y styling, including pockets, but this would have competed too much with the style lines of the waistband here, so I switched to this dark red twill and kept the design simple.
Pattern description
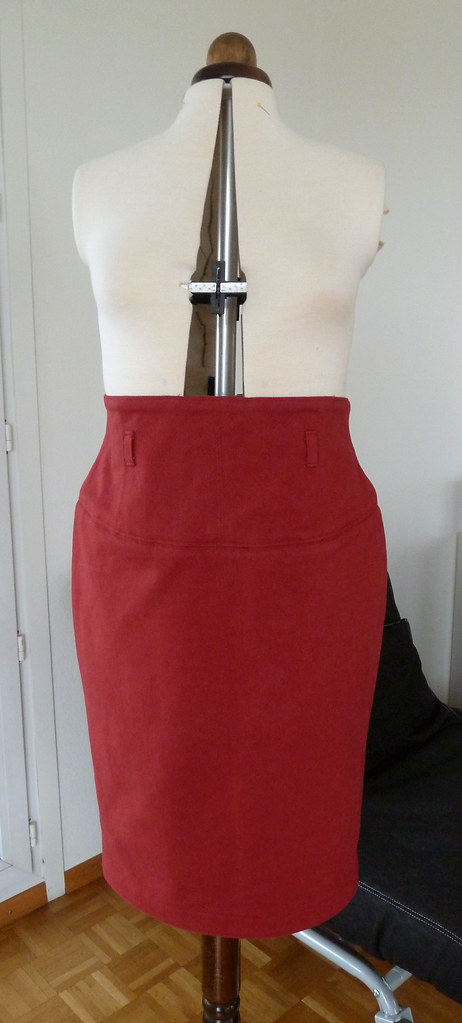
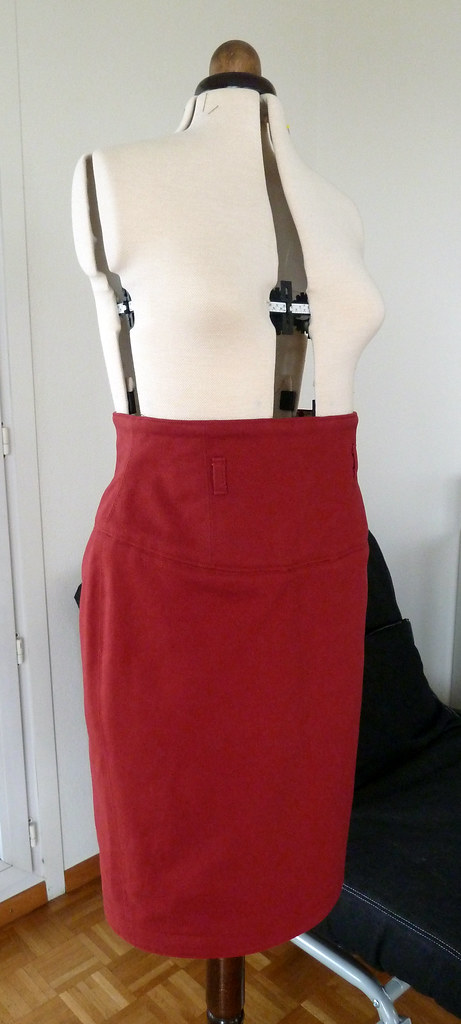
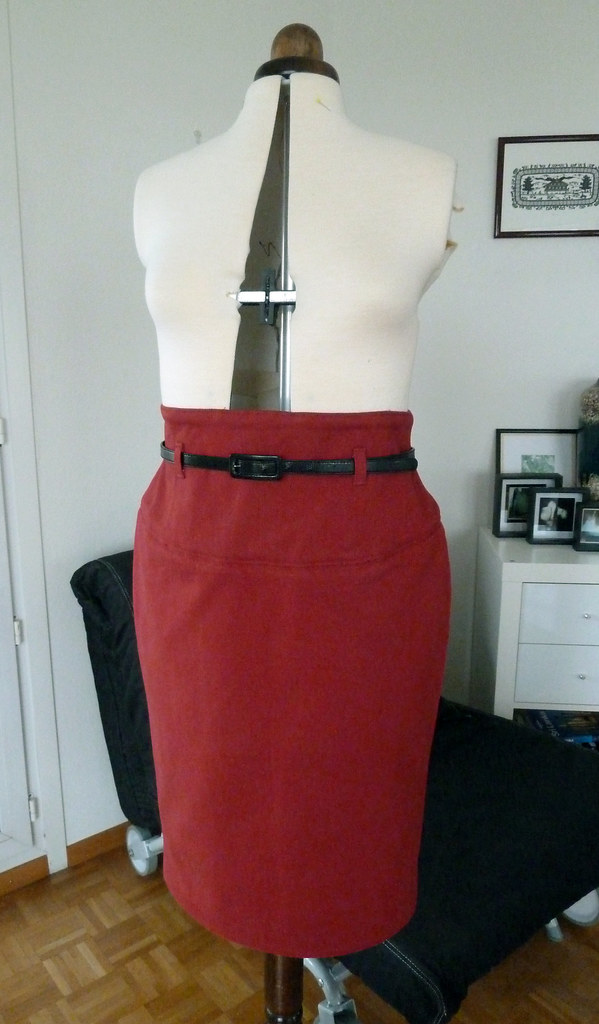
BWOF 01/2009/112: High-waisted pencil skirt with corset-style wide waistband.Pattern sizing
36-44. Previously I had sewn the 44, but this time I graded up to a 46 as I was using a non-stretch fabric.Fabric used
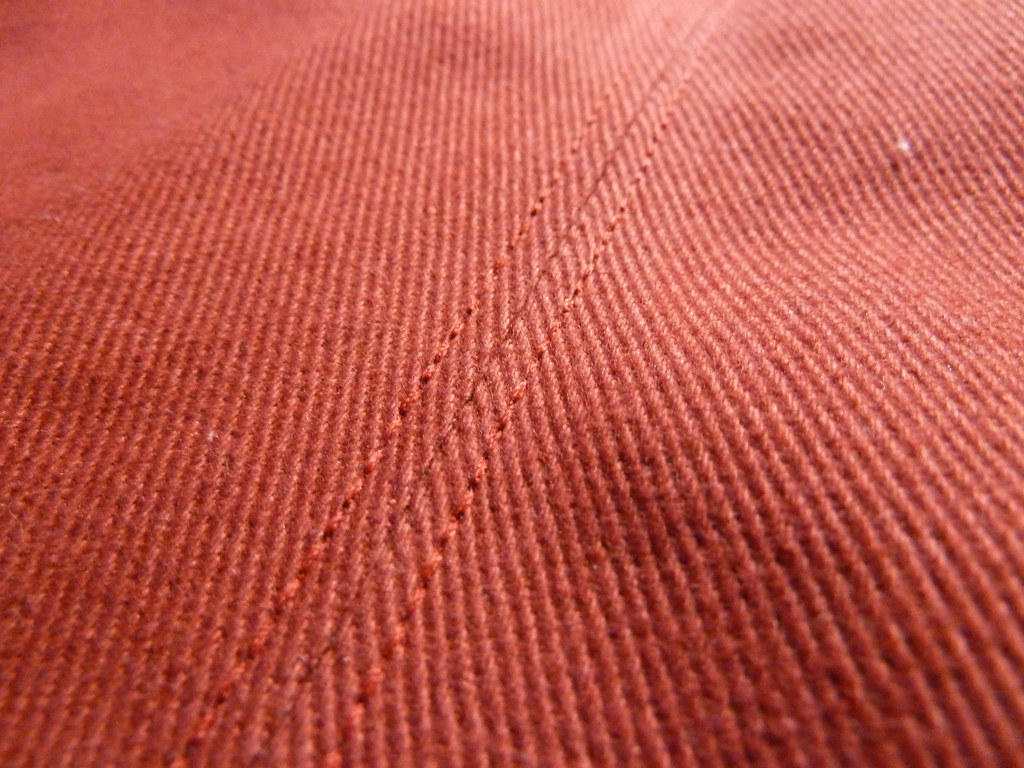
Fairly heavyweight cotton twill. Plus lighter-weight cotton twill for the "stay" layer with the boning channels, quilting cotton for the waistband facing, and some of my endless yellow probably-poly-lining.Did it look like the photo/drawing on the pattern envelope when you were done?
Yes, pretty much, although the internal structure is rather different.Were the instructions easy to follow?
I didn't really follow the instructions in the magazine - the basic skirt is very easy to make up. The more difficult bits were the additions I made, so I found various tutorials and inspiration on the wonderful world wide web.What did you particularly like or dislike about the pattern?
I like the corset styling of the yoke, I think it is very flattering for a wide range of body shapes. I've found it to be very well drafted and very simple to put together. Their use of a narrow facing for the waistband/yoke is bizarre, but it's simple to face it completely using the yoke pieces.Pattern alterations or any design changes you made
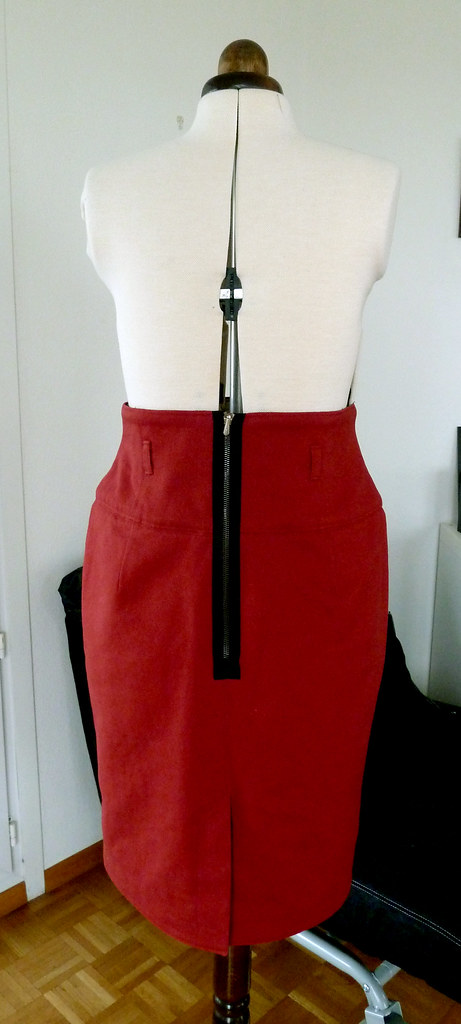
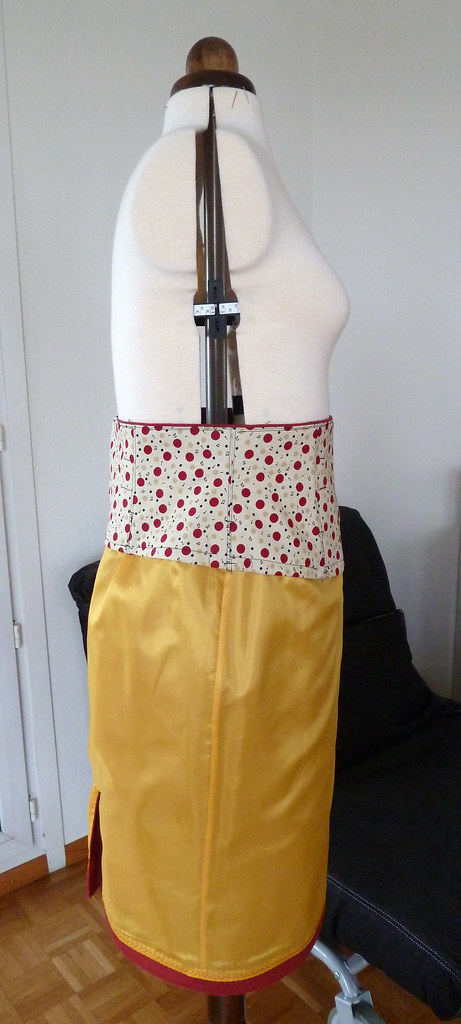
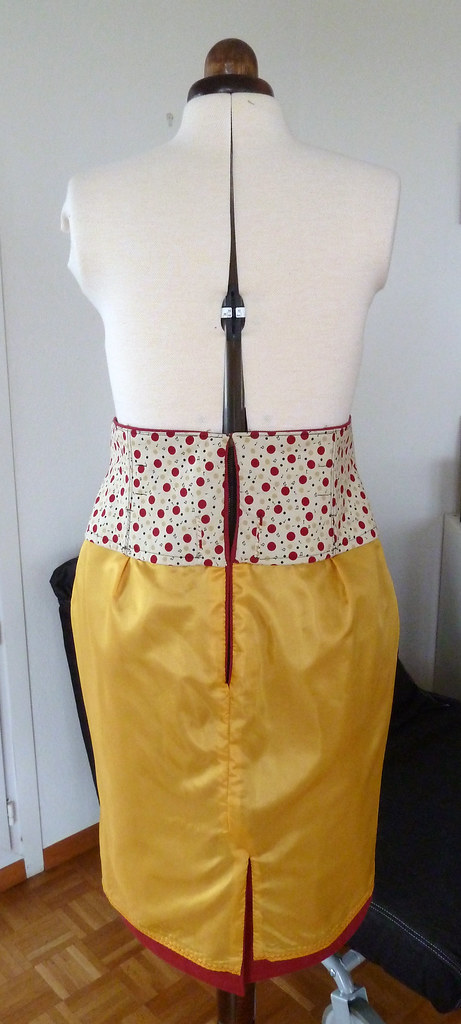
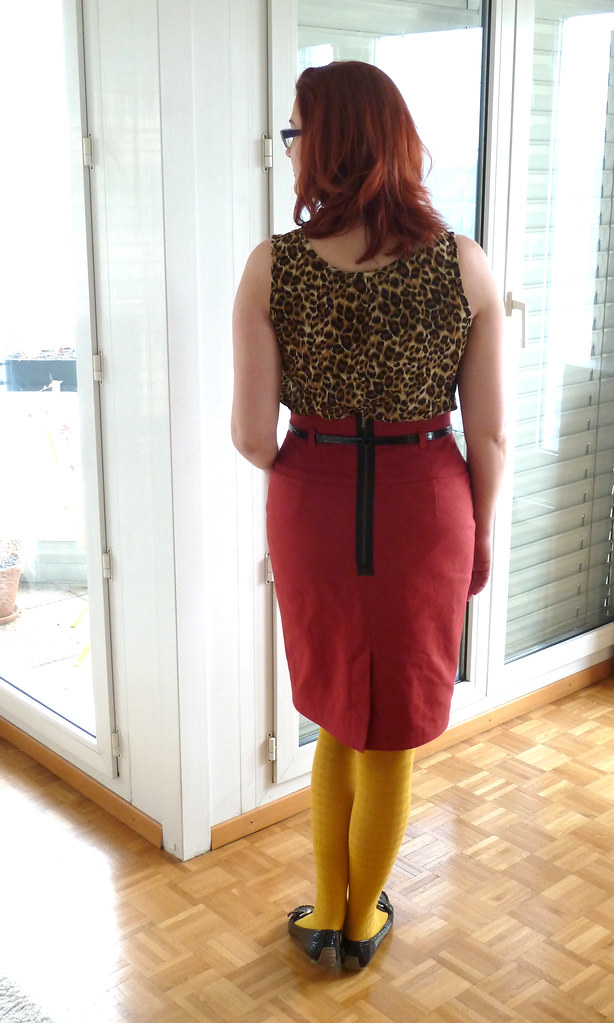
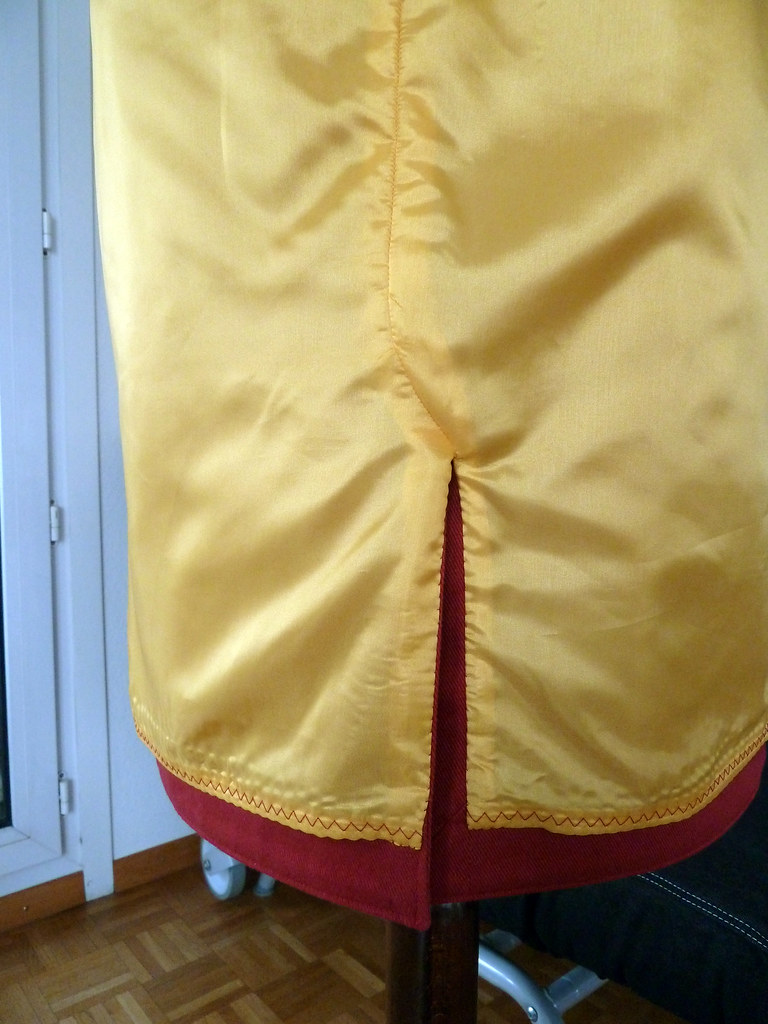
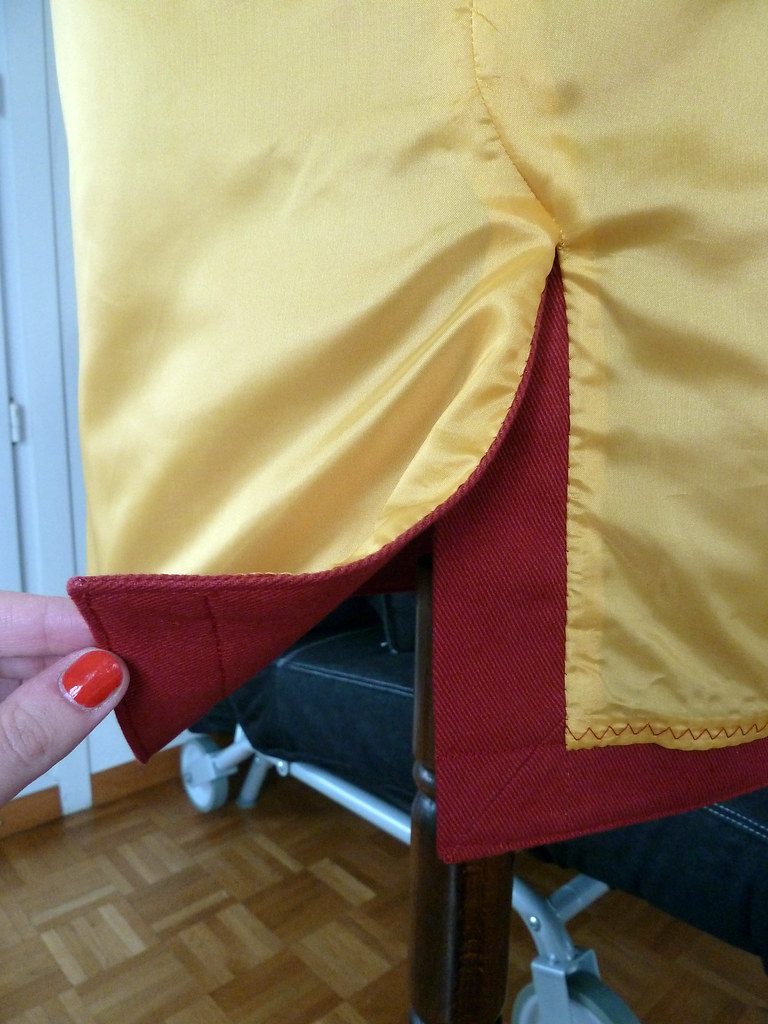
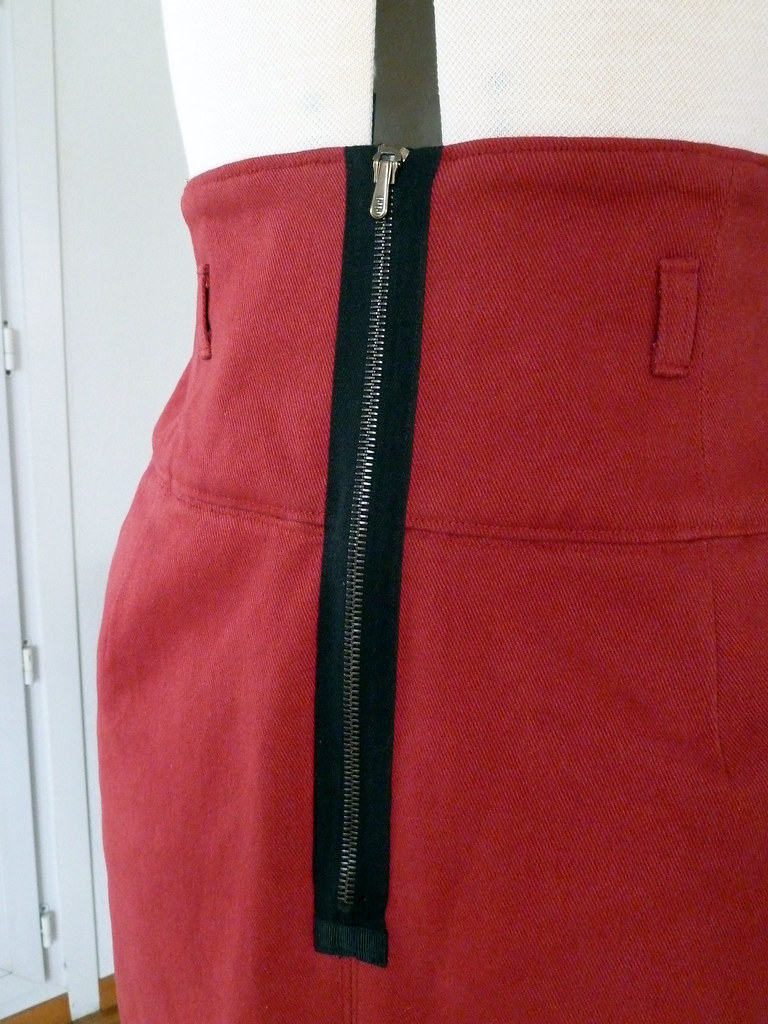
I pegged the bottom of the skirt by a total of about 6cm, and added a vent at the back for walking ease. I would highly recommend doing this for the larger sizes at least as otherwise it ends up being ridiculously wide and square. I used an exposed zip instead of an invisible one. As per my previous version, I fully faced the waistband - adding just a narrow facing as per the pattern seems really odd to me. However, I also decided I wanted to bone the waistband. This brought up a whole lot of... joy... when making it as I decided I wanted to somehow make the boning removable so I could machine wash it (dry cleaning here is stupid expensive and very slow, and I'm not forking out that much for a cotton twill skirt). I sort of winged this - notes on how I did it are below.Construction details
As I was making this version with a less forgiving non-stretch fabric than last time, I made a quick muslin of the waistband portion only. I needed to add a teensy bit to the lower part of the back seams (~1cm each side), and make about 5mm swayback adjustment to the CB. I actually forgot to then add this to the lower portion of the skirt, so the CB seam on the skirt portion ended up very narrow.So this is a condensed and ordered version of how I went about making this, i.e. how I would actually order it if I made something like this again. There was a lot of to-ing and fro-ing whilst working out what I was doing, so the actual make wasn't anywhere near as efficient... Seam allowances were pinked (with the exception of the lining, which was serged as it was super ravelly) and graded where needed to avoid bulk.
- The yoke and skirt pieces were cut in the shell fabric, and the zip opening and CB seam to the top of the vent were reinforced. The yoke pieces were sewn together, and the side seams of the skirt were sewn. These seam allowances pressed open and topstitched. The yoke was then sewn to the skirt, the seam allowances pressed upwards and topstitched on the yoke.
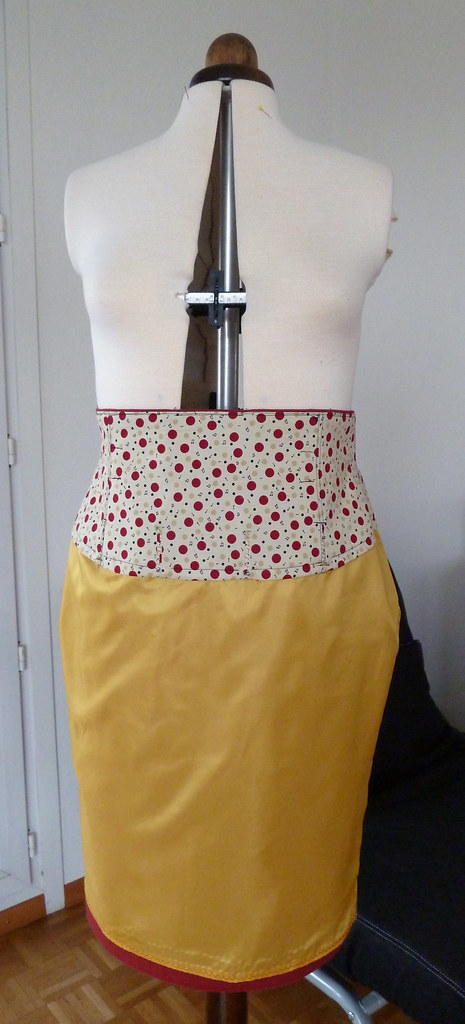
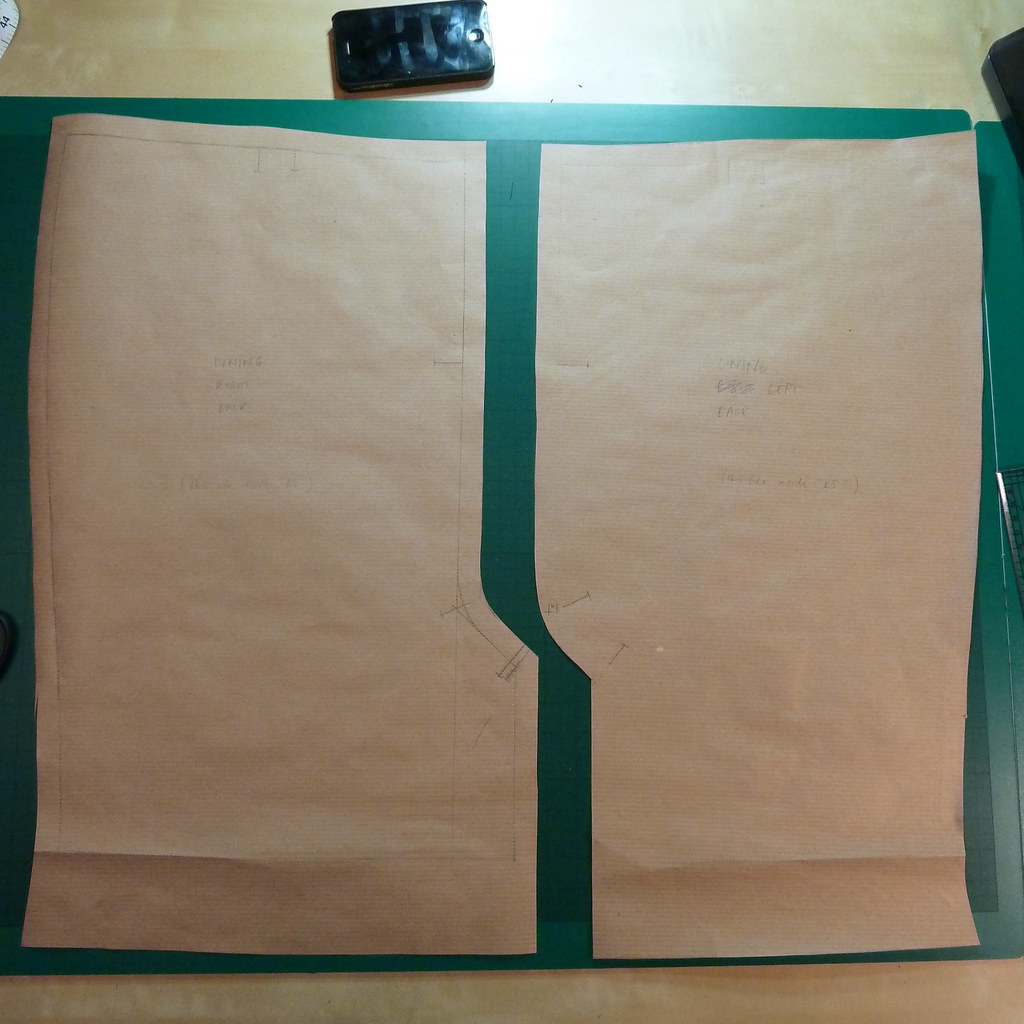
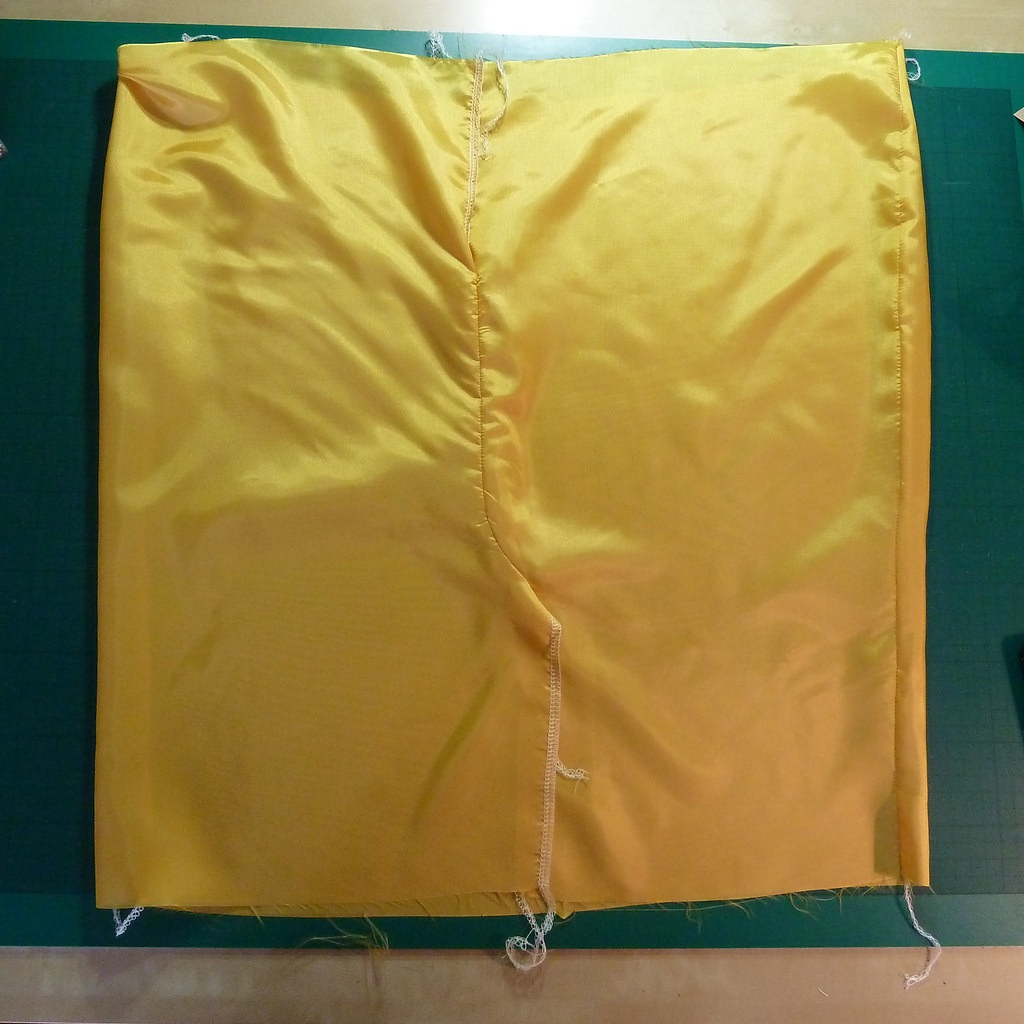
- The skirt pieces were adapted to make lining pieces for the skirt portion, using this tutorial (note that despite the picture, the vent portion is moved downwards only, not outwards as well). The side seams were serged, as well as the raw edges of CB edges. The CB seam was sewn only between the bottom of the zipper opening and the start of the vent opening.
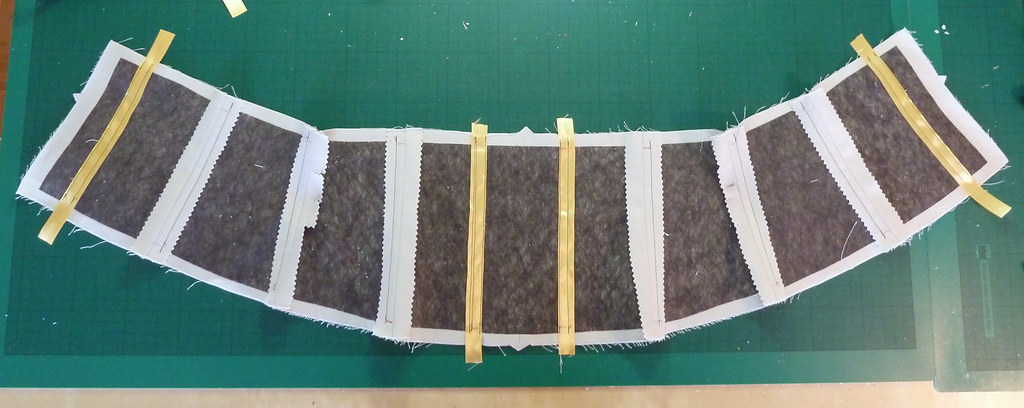
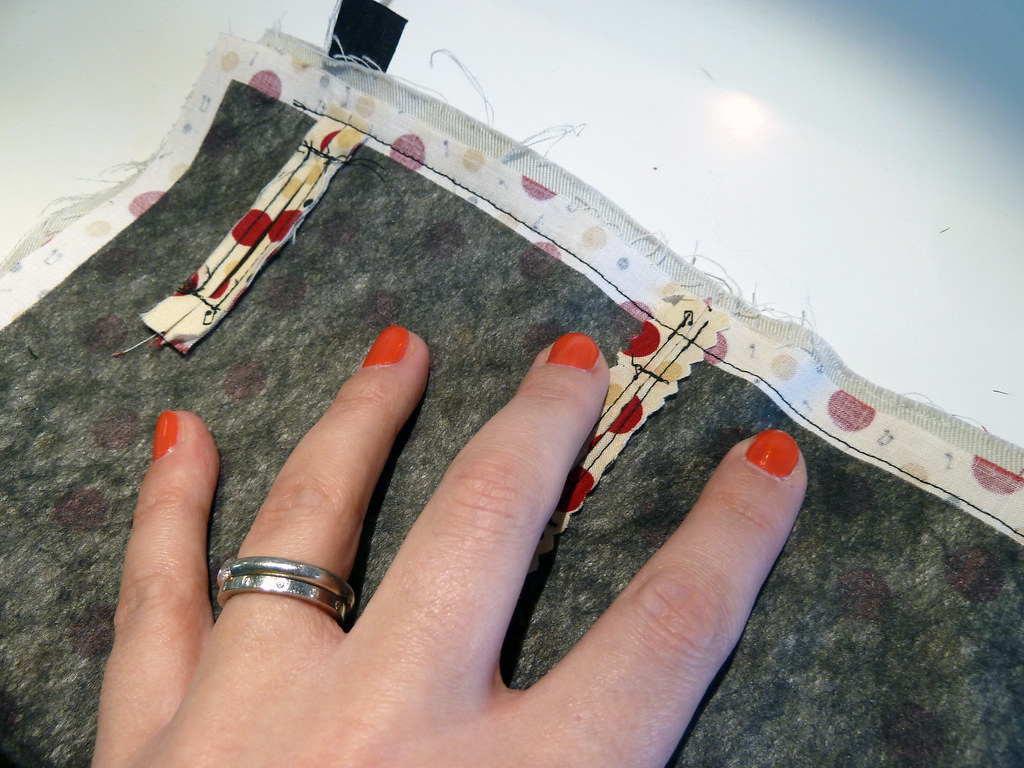
- A set of the yoke pieces were also cut in the facing and stay fabrics, with the CF cut on a fold in both cases. These were interfaced, each set assembled and the seams pressed open. The facing seams were topstitched, and boning channels were stitched in the stay layer using the seam allowances where possible. The extra boning channels were originally created with ribbon, but I bought some cotton tape and switched them out after the photo below was taken. The facing and stay layers were joined together at the top edge, just inside the seam allowance, starting and stopping at the seam allowance at each side.
- I measured the length of the channels and cut the spiral steel boning a few mm shorter using whatever the tool in the picture below is called (I had to make a special trip to the DIY store to get them as the boning just made dents in my wire cutters!). The end caps were secured with few squishes at the sides and flat-on with pliers. I actually ended up cutting the bones nearly 5mm shorter as I forgot to allow for the space needed for the "turn of cloth".
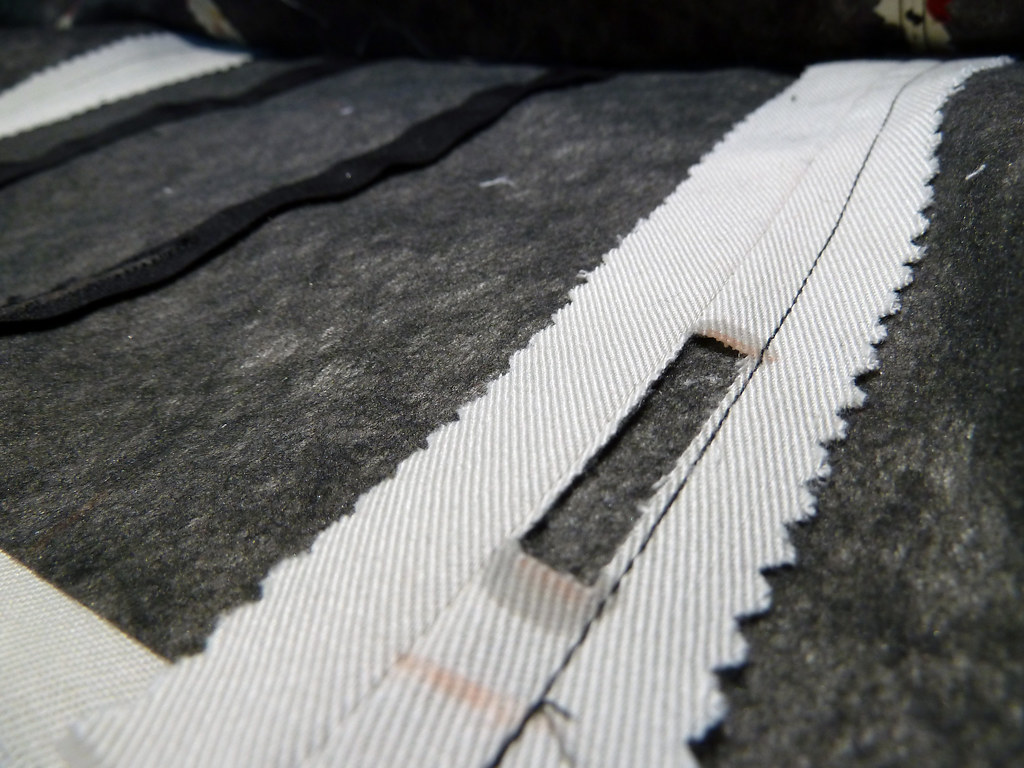
- I had originally intended to access the bones for removal through the bottom of the channels, but I couldn't work out a way to do this and keep all the raw edges enclosed (I think this would have been possible if I had neatened the bottom of the stay layer with the serger before sewing it together, and this way would probably reduce the bulk too). I had a little fiddle, and worked out a different way to remove the boning. Openings 4cm long were cut in the boning channels, starting 1cm from the bottom of the channel, and the edges treated with fray check.
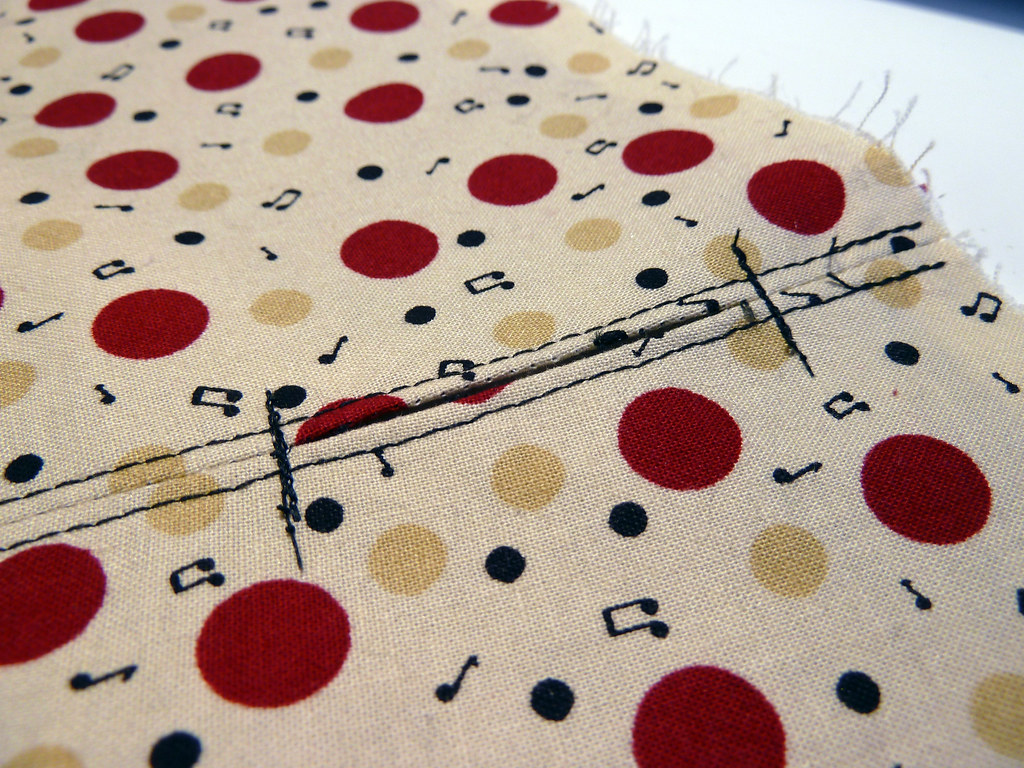
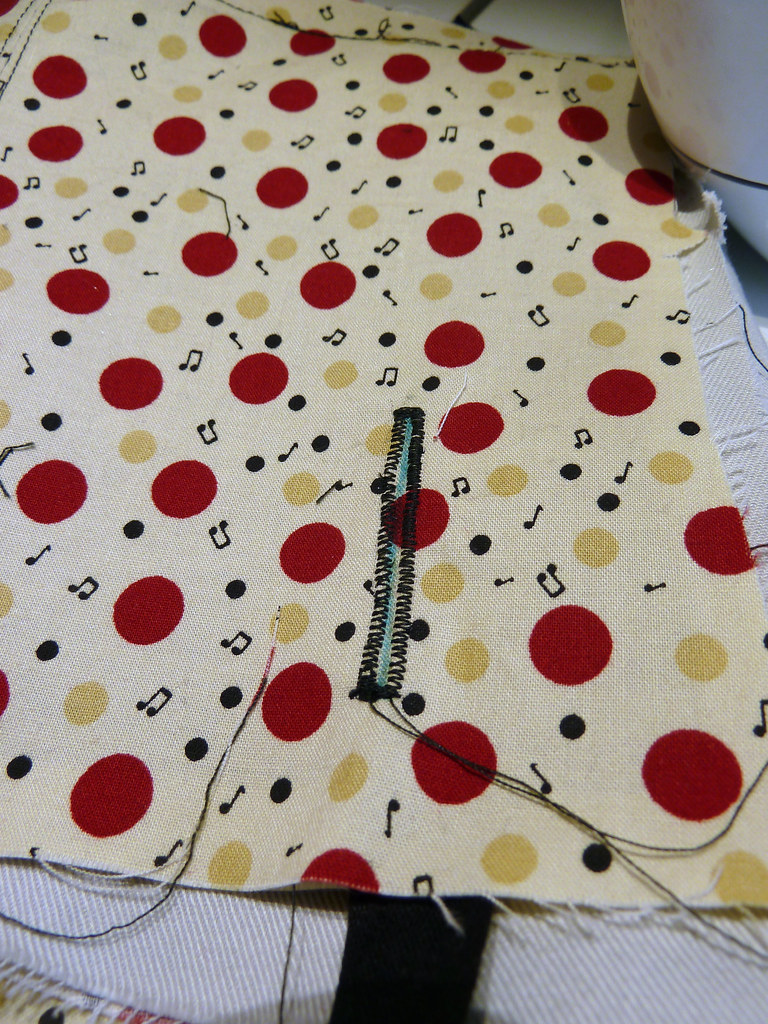
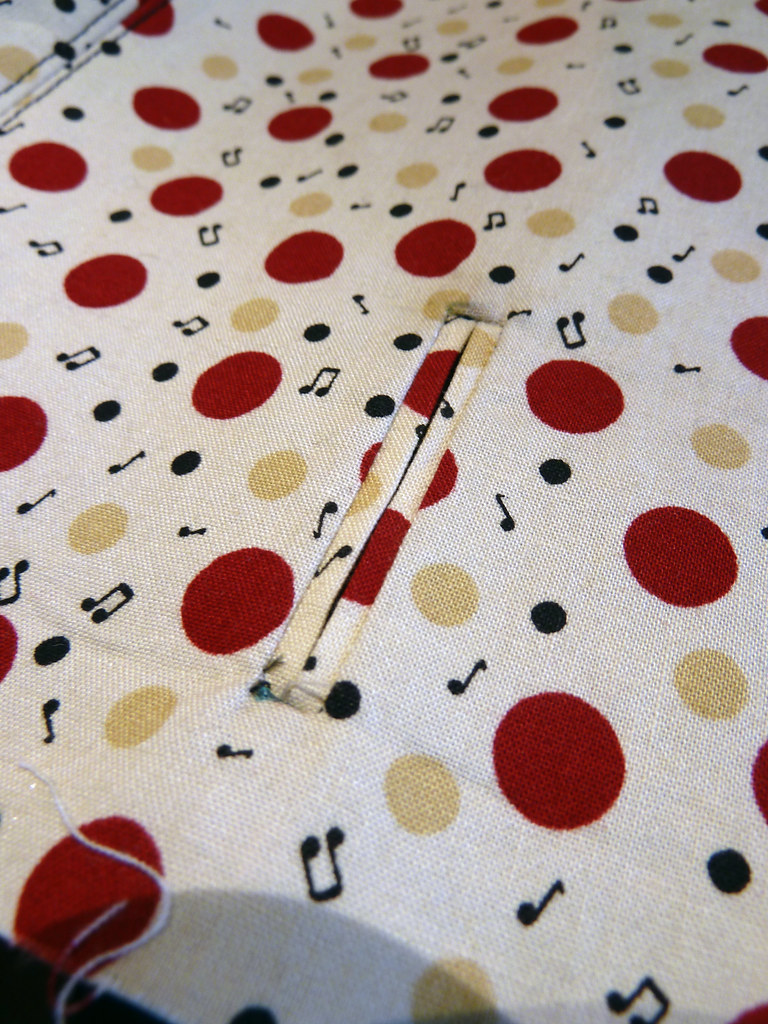
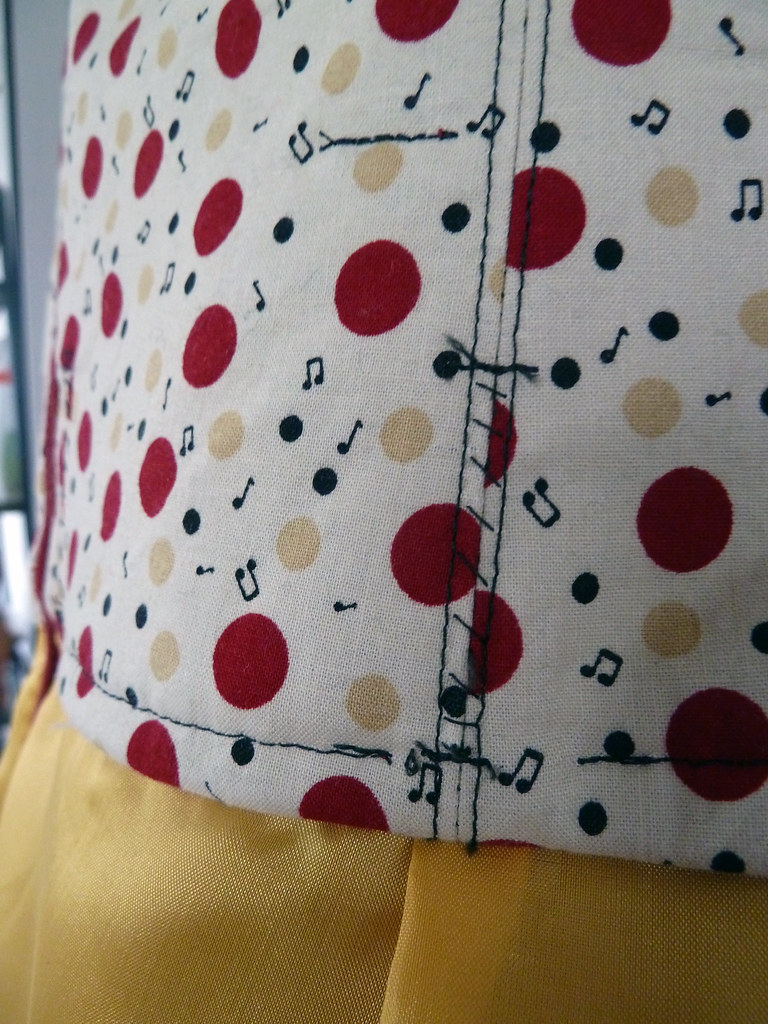
- For the lining layer, it was simple to create openings in the seams to access the boning there: the top and bottom of the openings were staystitched and then the stitches between were cut. To access the extra channels required a bit more thought. I had originally thought to make machine-stitched buttonholes, but the openings were 4.5cm long, longer than my buttonholer foot, which meant I had to stitch them "freehand". They were awful. So some time with my seamripper and some internet searching later, I made narrow bound buttonholes, which were so much better. I used this tutorial - it is absolutely excellent, and has totally removed my fear of bound buttonholes; I will definitely be making them in other garments.
- To finish the inside of the yoke neatly, the facing and stay layers were flipped and sewn right sides together, starting and stopping at the side seam allowances. The facing layer was offset slightly, so that when it was flipped back the right way the stay layer didn't show. I think I must have done something odd with the seam allowances, as this should only have overlapped by a few mm at the bottom of the yoke, but ended up being nearly 1cm over. Hmm.
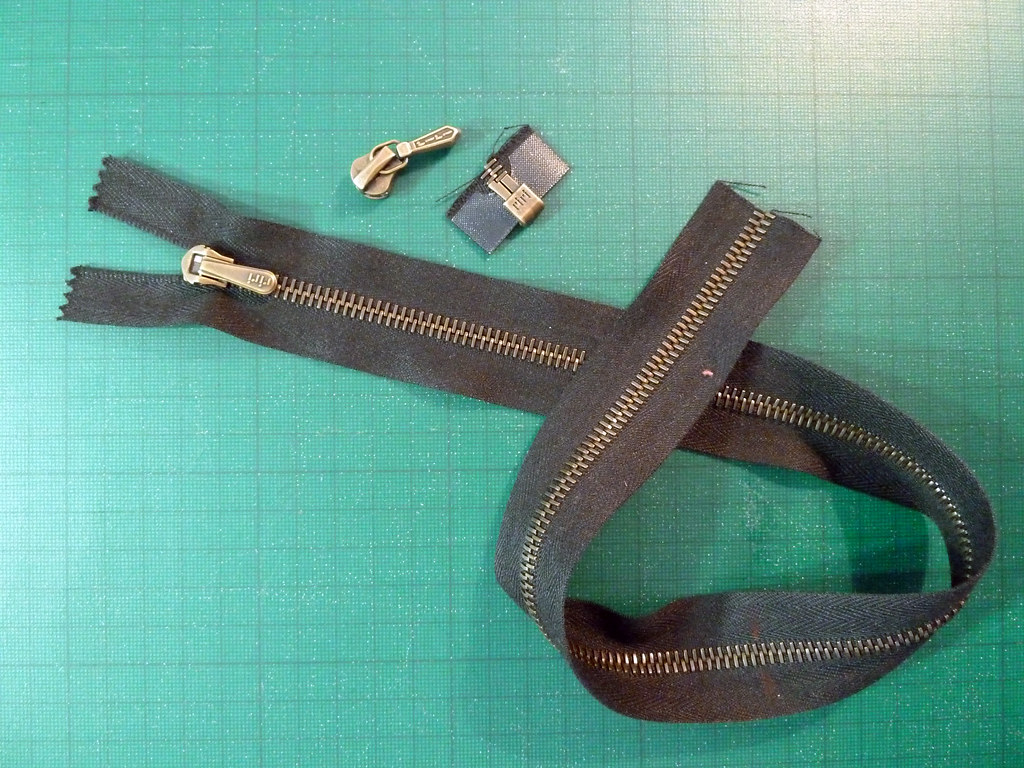
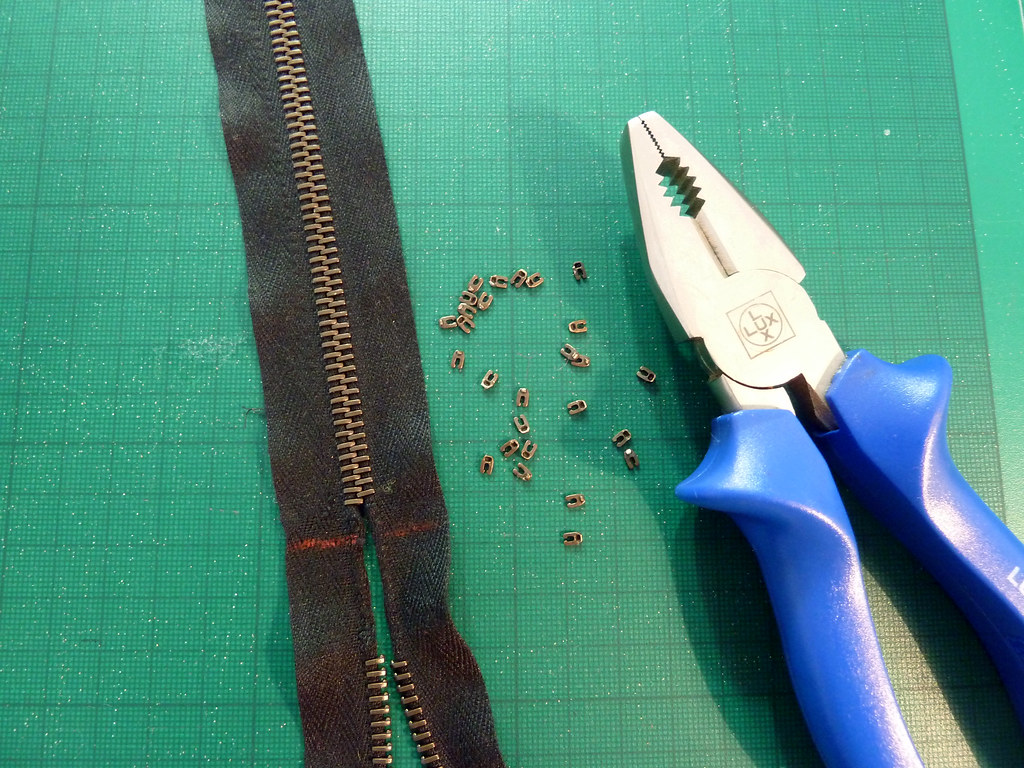
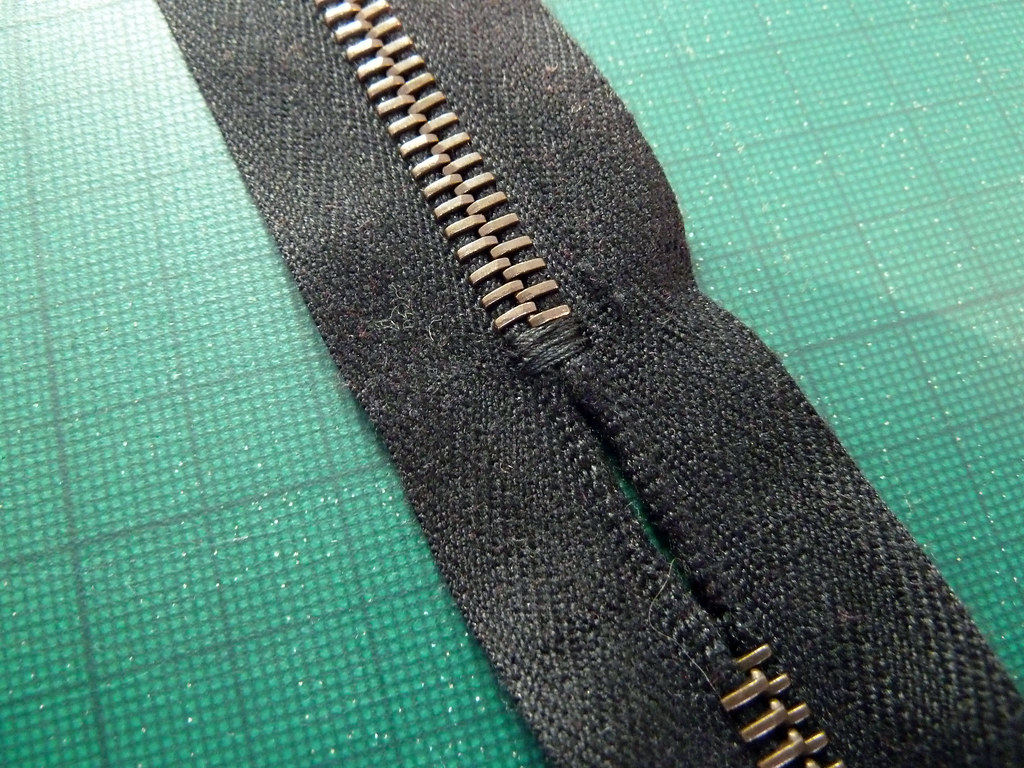
- The zipper installation came next, but I needed to do some fiddling to prepare the zip first. I knew I wanted an exposed zip, and also wanted a fairly chunky metal zipper, both for looks and for the extra strength as it would be under stress with the tight waistband. However, the only available chunky metal zips long enough were the sort that separate at the bottom, which was no good - they also didn't have the "locking" type of slider used in jeans zips, which I wanted so that it wouldn't come undone. So I did a bit of zip DIY... I bought the shortest jeans zip and a long separating zip, and chopped the stops off the jeans zip so the slider could be removed. I obviously wanted to keep the top stops on the longer zip, so in order to swap the sliders the bottom stops were chopped off, the original slider was removed and replaced it with the locking slider, carefully to match up the teeth correctly so the top stops ended up level. The length required was marked on the back of the tape and a section of the teeth below this were removed using pliers and a bit of brute force. A new bottom stop was made with a thick bar tack, and the excess tape chopped off. The raw ends at the bottom were neatened with a piece of petersham ribbon.
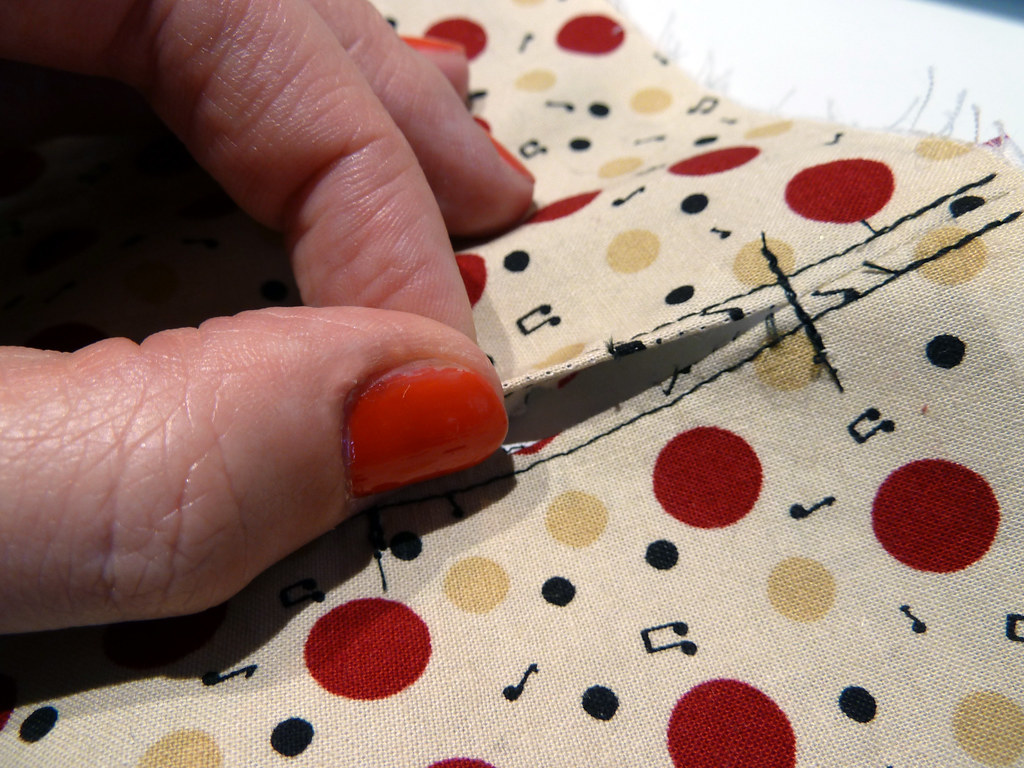
- The CB seam was sewn from the bottom of the zipper opening, pivoting at the top of the vent extension, along the top of the vent and stopping at the seam allowance at the side of the vent. The zipper opening was basted shut, and the CB seam was pressed open between the top edge and the start of the vent, clipping at the top of the vent so that the seam allowances at the top edge of the vent extension laid flat together. The bottom of the zipper opening and top of the vent were reinforced with bar tacks and the seam allowances between these topstitched. The seam allowances of the zipper opening were topstitched (with just a regular straight stitch) to keep them flat, stopping about 1cm short of the seam allowance at the top.
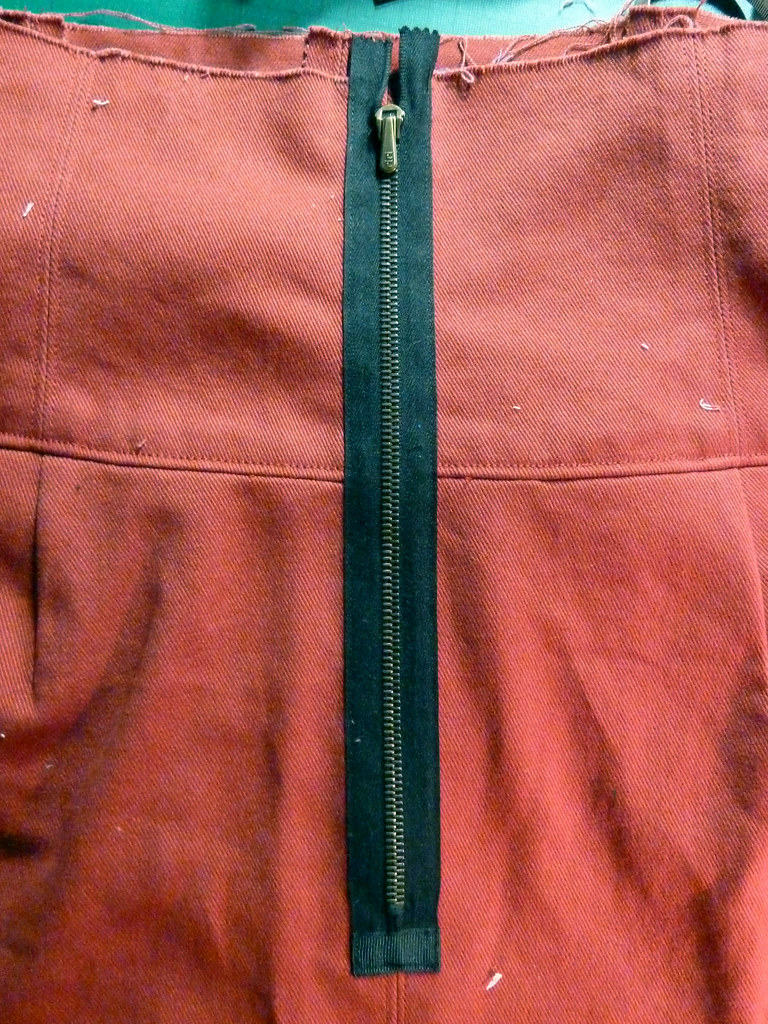
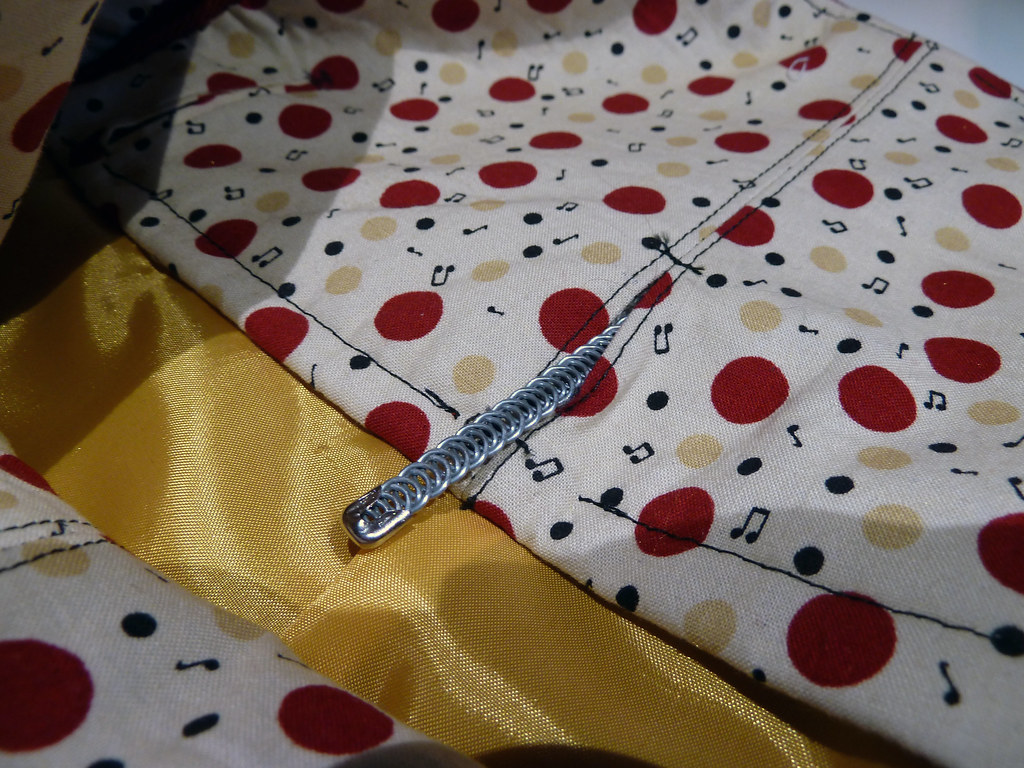
- The zipper was laid on top of the opening, making sure the teeth were centred over the seamline, and the top stops were a few mm short of the top seam allowance, and it was sewn on around the edges. You can see some extra staystitching on the back in the photos below - I had originally intended to apply it using my usual method so that the edges were hidden, but then I realised that this would be way too bulky with this fabric. I left the staystitching in though as I figured it would help reinforce the zip area.
- The yoke and facing/stay were sewn together along the top edge. I originally topstitched the yoke and understitched the facing separately, leaving gaps in the understitching for the boning channels. However, this meant the top edge didn't lie terribly flat, so I went over the topstitching with a regular straight stitch going through all layers and shortened the boning.
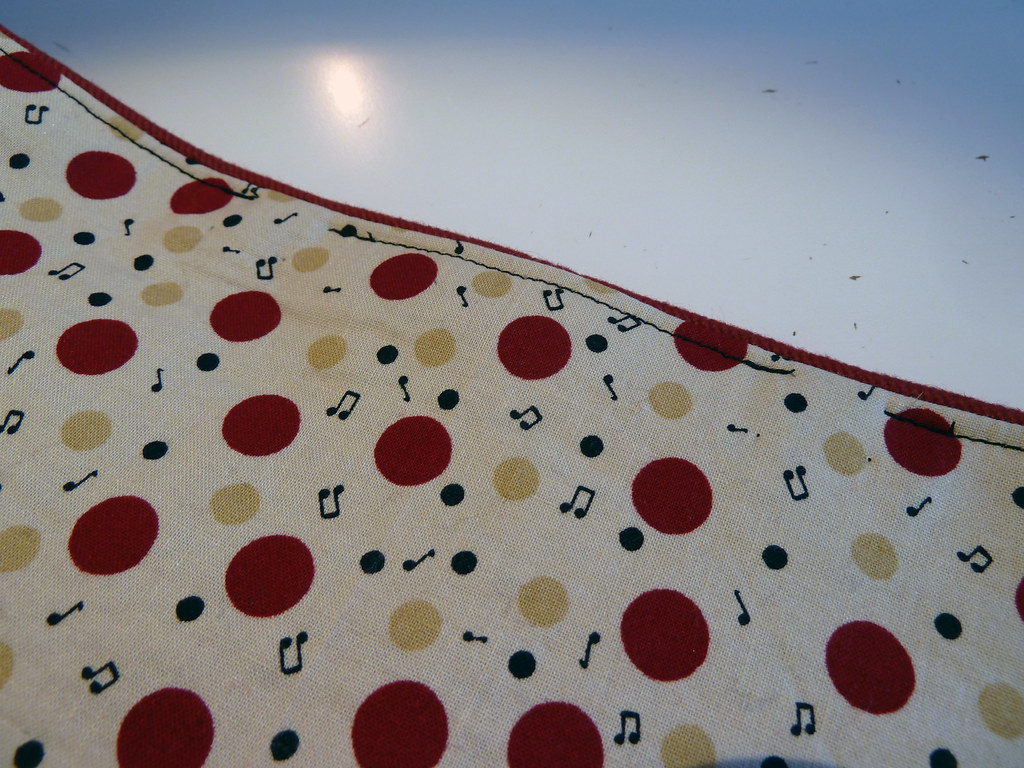
- The lining was pinned and basted into place and then sewn on with a second line of topstitching along the yoke seamline. The facing was then flipped down, pinned and basted, and held in place by stitching in the ditch along the yoke seamline. The sides of the facing were folded inwards and slip stitched in place.
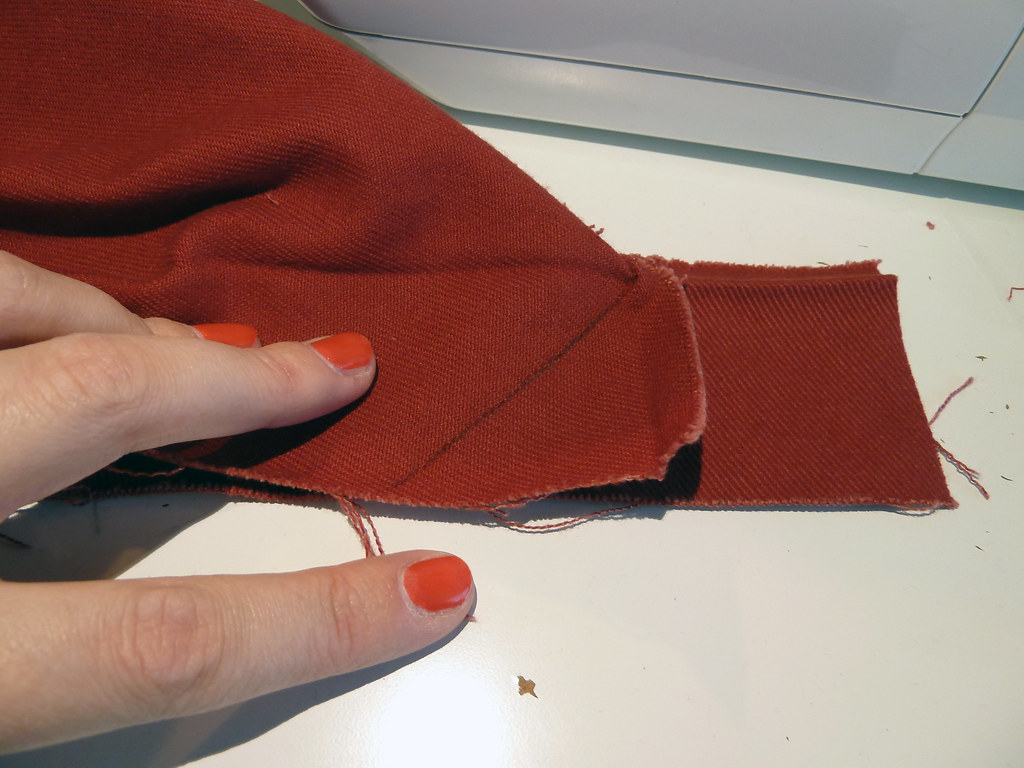
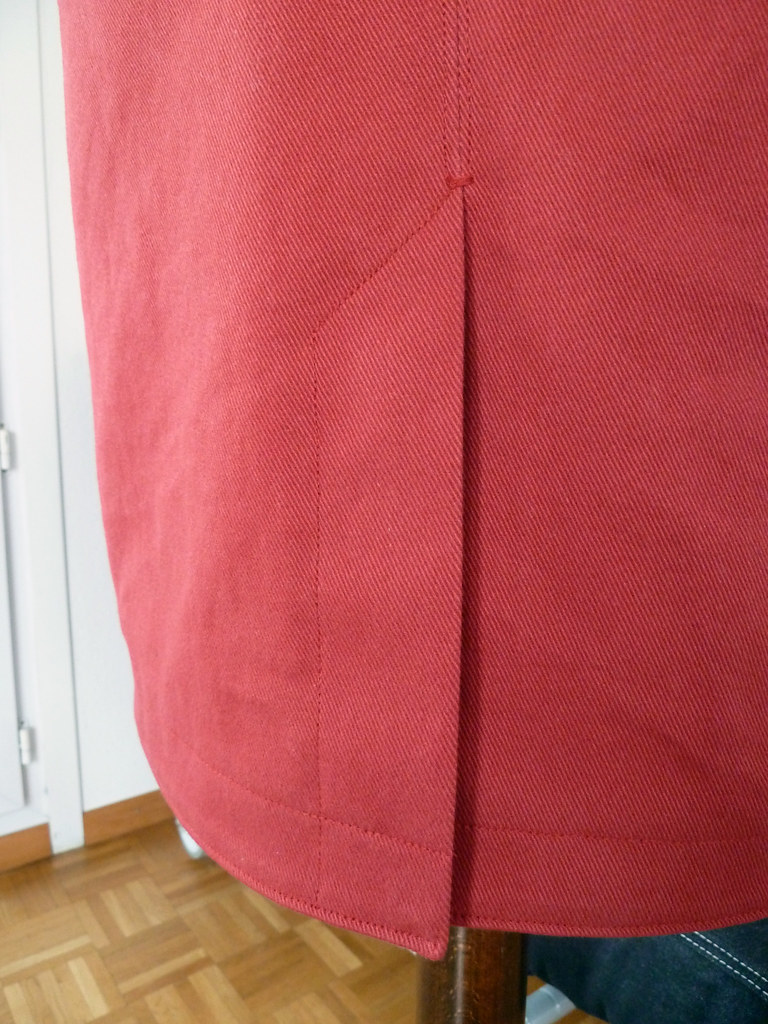
- I had added 5cm hem allowance, but when trying on the skirt without the hem folded up, it was pretty much the right length. I could have just turned up a very small hem allowance, but this sort of skirt really needs a more substantial hem to help keep the shape. I slept on it, and realised I could add a hem facing! Marvellous. The corner where the hem facing joins the vent overlap was mitred. I couldn't get my head around how this should be sewn, so I folded the pieces as they would lie when finished, marked with pins where the seam would be on each piece, flipped them over, pinned along this line and marked an exact 45˚ line to sew along. When turned the right way out this gave a nice neat square corner with minimum bulk. The hem was topstitched twice, and the vent was also topstitched.
- The bottom of the lining was serged off to the same length as the skirt, then folded up twice so it was slightly shorter than the main skirt. I decided to use a wide zig-zag stitch to sew the lining hem, partly because I was bored of switching thread colours by this time, and partly because I thought it would look pretty. It actually turned out quite nicely as it gives a slight scalloping to the hem edge (dodgy thread tension FTW!). The vent seam allowances were turned in and the lining slipstitched to the skirt vent.
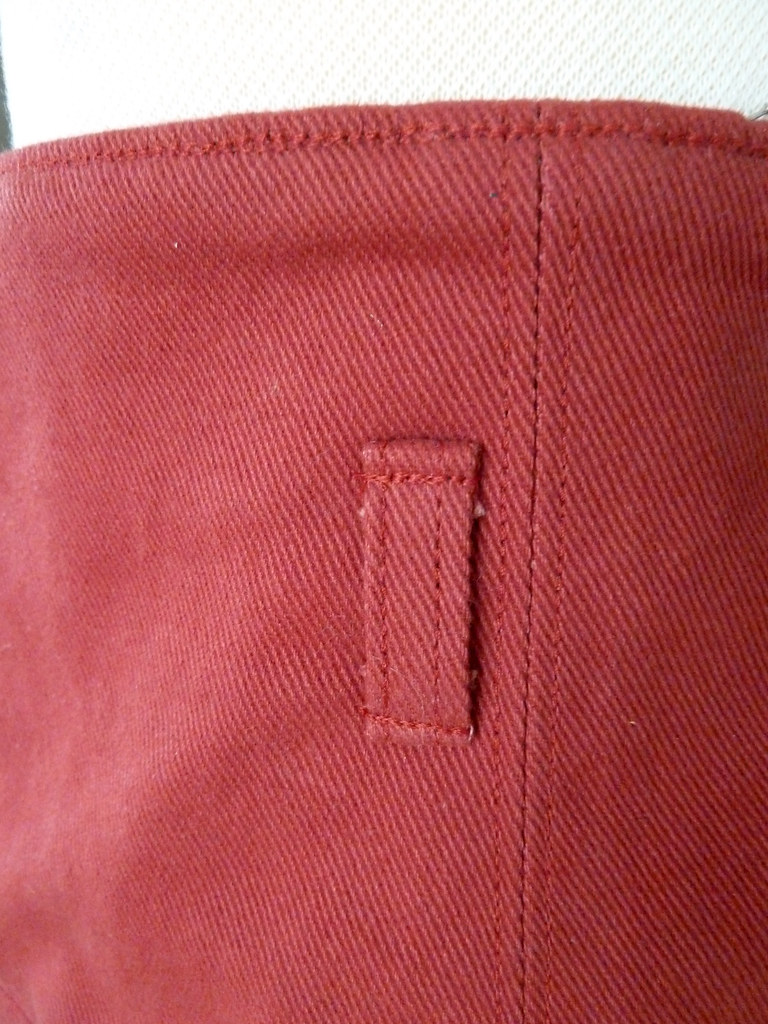
- The belt loops were a long strip (I used the dimensions given in the magazine) folded in three and topstitched with the raw edges underneath. This strip was cut into four, the ends of each loop pressed under, and then topstitched into place on the skirt. I had to handcrank my machine to sew these as it was going through so many layers of fabric.
- The skirt was finished by slipstitching closed the openings in the facing.



This is a fabulous skirt. Thanks for the details you've shared on construction.
ReplyDeleteI love your styling with the yellow tights too.
Thank you! If I'm ever unsure about an outfit, I try it with some yellow tights and it always looks better :)
ReplyDeleteWow! There are a lot of details in this. I love the way the lining looks slipstitched to the vent. I never know how to treat the lining at a hem vent, so I'm going to give your method a try next time. What a fab skirt!
ReplyDelete