Thursday, 18 September 2014

Fall AKA autumn essentials planning

I happened across Sarah's FESA (Fall Essentials Sew-Along) over at The Creative Perfectionist (formerly Rhinestones and Telephones), and this got me thinking about planning what I will be making over the next few months

I'm not a fan of cold weather dressing, I much prefer pretty summer dresses and sandals to layers of woolly jumpers and boots. It also doesn't help that here in Switzerland they really love their central heating so you're constantly going between cold fresh air and stuffy overheated buildings and buses. So, I need to sort out some separates and layers that fit me and can be mixed and matched. When I came across this sewalong, it helped me put my thoughts in order, which will hopefully give some structure to my sewing plans.

I really don't think I'll be able to make all of these, and certainly not within the sew-along time period, but I'm using this more as a reminder list to keep me on track and try and help eliminate those moments of "I don't know what to sew next".

Fashionable Foundations for Frosty Weather

Trousers, skirts, legwarmers and more! Anything that keeps your lower portion fashionably cozy fits perfectly here! The chilly weather necessitates the donning of bifurcated bottoms and sassy skirts!

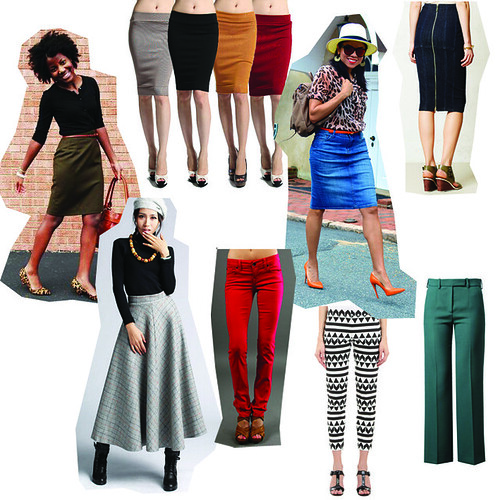
This is probably the things I need to sew most. I tend to spend most of the cold weather in jeans and various tops, but one of my favourite pairs of jeans wore out irreparably at the beginning of this year, so I need to at least replace those. It would be nice to have some other non-jeans trousers (and some skirts) too, to break up the monotony of my winter wardrobe, although I think I will need to have a think how I want to style these.

  • Basic ponte skirts in various colours
  • Jeans skirt that fits me now
  • Blue denim jeans
  • Red twill jeans
  • B&W graphic sateen cigarette trousers
  • Woollen wide leg trousers
  • Winter midi- or maxi-skirt

Picture sources: knit skirts, zip-back pencil skirt, light denim pencil skirt, red jeans, b&w trousers, wide-leg trousers, winter maxi skirt

Chic Chemises for Cool Climates

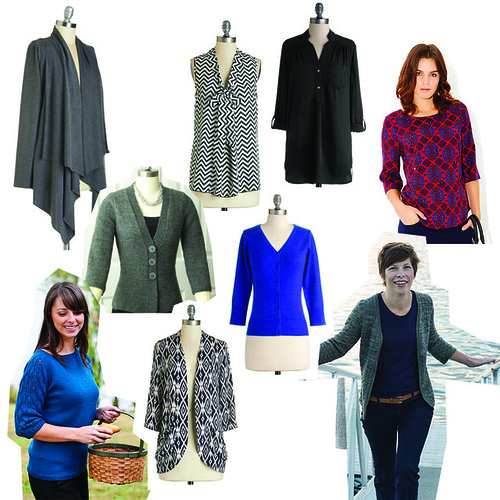
Blouses, tops, vests, cardigans, and sweaters! These wardrobe essentials can carry you from day to night, not to mention provide necessary layering to keep out the chill.

I have a couple of hand-knits that are close to completion, both of them sort of transitional, so my next hand knit will be something a bit more wintery. I also really want to make some more sewn cardigans, as I like wearing these and they're super handy for layering.

  • Knitted cardies
  • Finish up hand-knit yellow jumper
  • Finish up hand-knit blue cotton cardie
  • Sewn cardies, cropped and draped
  • Scarf-neck T-shirts
  • Tunic-length blouses
  • Pretty blouses/woven tops/T-shirts

Picture sources: grey open cardie, grey drape cardie, ikat cardie, black tunic blouse, chevron topblue lace sleeve pullover, dark grey textured cardie, grey v-neck cardie, red and purple top

Fabulous Frocks

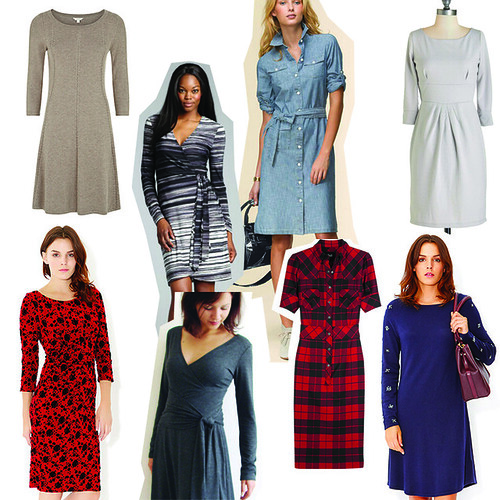
Dresses of all styles; mini, midi, or long! Keep yourself warm in your modish designs, layering with tights and boots!

I really like wearing dresses, so would like to have a few more cold-weather appropriate ones (although I hate wearing tights, so this isn't the highest priority category unless I make some more leggings).

  • Chambray shirt-dress
  • Long-sleeved wrap dresses
  • Ponte/doubleknit dresses

Picture sources: grey seamed wrap dress, striped wrap dress, purple sequinned-sleeve dress, red and black dress, ecru sweater dress, chambray shirt dress, plaid dress, ecru midriff dress

Underneath It All

When you're spending months covered from the neck down, a glamorous underpinning of your choice adds a secret, luxurious touch that chases the cold away!

I'd like to make up some Netties as the bodysuits for some extra layers that won't bunch up or be draughty. I also need to replace a lot of my regular wear knickers, and it seems much more logical to make some rather than buy yet more (I even have some too-small vest-tops that I've been saving to recycle too).

  • Nettie bodysuits
  • Cotton jersey knickers
  • Leggings
  • Slips

Tender Tootsies

Let's not forget your frosty feet! Socks, slippers and the like are the order of the day. Keep those tootsies warm and dry!

I have a pair of knitted ballerina slippers that I bought last year that I really like wearing in the winter. I'm planning on making a second pair to alternate when the others are in the wash. Socks aren't a necessity, but are nice small projects to knit in the evenings or when travelling.

  • Knitted or sewn slippers
  • Woolly socks

Those Cozy Nights

Is there anything better than snuggling up in a cozy pair of pajamas with a hot drink and a book whilst Jack Frost works his magic outside? I think not! Sleepwear of all types are the way to go here!

Much of my sleepwear needs replacing, and I have most of the fabric I need for the garments on here from last year's plans.

  • Pretty nightie
  • Flannel pyjama bottoms
  • Dressing gown
  • Jersey sleep tops with shelf bras

Baby It's Cold Outside

Coats, hats, and mittens donned to keep the cold at bay, especially when out enjoying the spectacular fall colours!

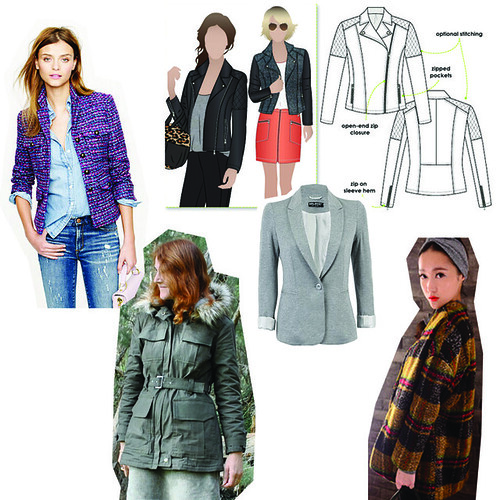
My (RTW) winter coat is still going strong, so I don't really need to sew anything to replace this (although I do need to sort out dry-cleaning it and re-sewing some buttons). However, I do need some lighter coats or jackets, but I just need to decide which of the ones I have planned to work on.

  • Plaid flannel hooded jacket
  • Grey wool lightweight coat
  • Purple bouclé wool jacket
  • Green flannel swing jacket
  • Rain jacket
  • Leather jacket
  • Parka
  • Jersey blazer
  • Finish up vintage hand-knit grey hat
  • Merino hand-knit hand-warmers

Picture sources: grey jersey blazer, purple tweed jacket, plaid swing jacket, moto jacket, parka

Some of these might seem a bit vague, but I have fabric and patterns in mind for many of them, just don't want to spend the time photographing/scanning these to add here. The pictures are inspirations of the sort of things I want to make and reminders for me. I've also recently just bought myself a (tiger-print!) Fashionary after waiting in vain several birthdays and Christmases for one as a present, so will be using that to plan the clothes in a bit more detail, plus I want to use a couple of vintage patterns for these garments to keep up with my Vintage Pattern Pledge. Fingers crossed, I'll be posting about some of these items soon! Although, as a Brit, I will from now on be referring to these as Autumn Essentials...
Wednesday, 17 September 2014

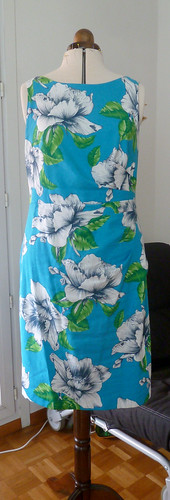
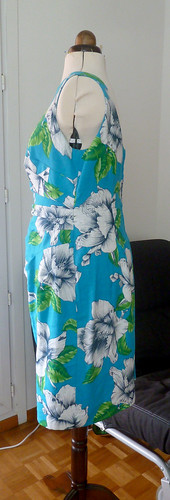
Tropical pleated dress

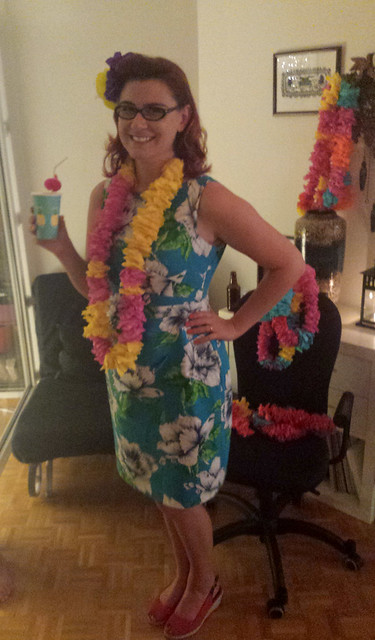
We needed an excuse to tidy our flat, so decided to throw a party! And of course that then gave me an excuse to make a party frock... Given the terrible summer we've had, we went for a tropical theme - so even more excuse for a party frock.

Pattern description

Simplicity 2053 - dress with pleated front bodice and skirt, choice of sleeves and length.

Pattern sizing

6-22 (Bust 30.5-44"). After looking at the finished measurements, I cut the 16 at the shoulders, 18 at the waist and 20 at the hips.

Fabric used

A linen blend (I think with cotton), underlined with rayon challis.

Did it look like the photo/drawing on the pattern envelope when you were done?

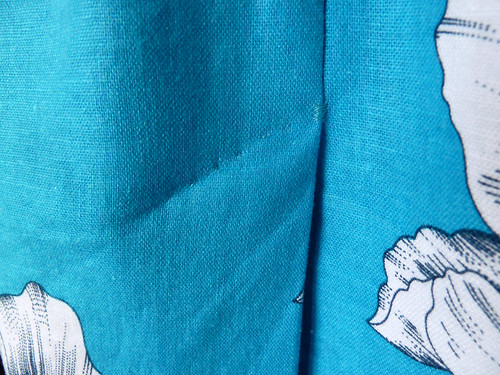
Sort of. I made some design changes to the neckline at front and back, but the main difference was the front skirt - I found it super difficult to get the pleats here to lie as nicely as they appeared on Simplicity's sample dresses.

Were the instructions easy to follow?

To be honest, I only looked at the instructions for the pleats on the front section (the waist seam on the front is sewn before the pleats are formed, then the side seams are sewn.

What did you particularly like or dislike about the pattern?

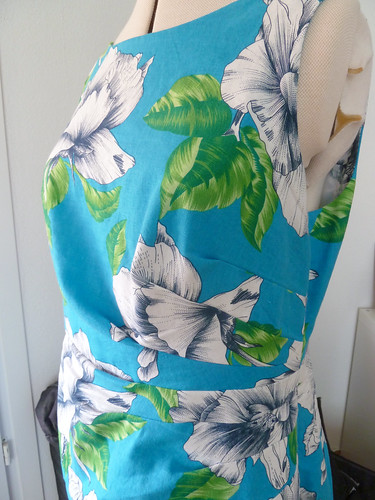
Like: the pleats on the bodice. The drafting of the pleats is generally nice (even if I did have to alter quite a bit to fit them to me).

Dislike: the pleats on the skirt. Also the huge amount of ease. The measurements give a whopping 3"/7cm of ease on the bust. Whilst that might be fine on a loose fitting and gently shaped garment, it's totally inappropriate here as a tighter fit is needed to keep the pleats in place. I think that's one reason the skirt pleats don't sit well since I kept the ease in the skirt to give myself some sitting space, but that allows the excess fabric to sag, rather than form nice neat pleats. Heh, neat pleats. The skirt pleats might also sit better in a slightly crisper fabric.

I also think it's madness putting the side zip in the side with all the pleats, as directed - it would be insanely difficult to get a neat insertion. I know the left side is the "proper" side for a dress zip, but if Simplicity desperately wanted to keep that, wouldn't it make sense to draft the pattern with the pleats on the right?

Pattern alterations or any design changes you made

I wanted a sleeveless dress, but with two straps (so I didn't have to wear a strapless bra), so I traced the bodice for the version with sleeves, but traced the armscye from the asymmetric sleeveless version onto both sides (mirrored obviously!). I also lowered the back neckline significantly to provide interest on the back and moved the zip to the centre back as I find these easier to get in and out of.

I pegged the skirt 6cm total, and increased the length of the back slit about an inch, as I felt it looked a bit stubby as drafted.

Hmm, the fitting was a little bit involved... Given the darts are all rotated into the pleats, I couldn't just do a standard FBA on the bodice - and I also didn't know how much the pleats would affect the fit. So... I made a muslin version of the unaltered pattern piece (unaltered for fit, it had my design changes), then figured out how much I needed to add in length and width by snipping into it and pinning extra fabric as required. Not the easiest thing to be doing to yourself, but I somehow managed not to chop up my bra or give myself any impromptu surgery...

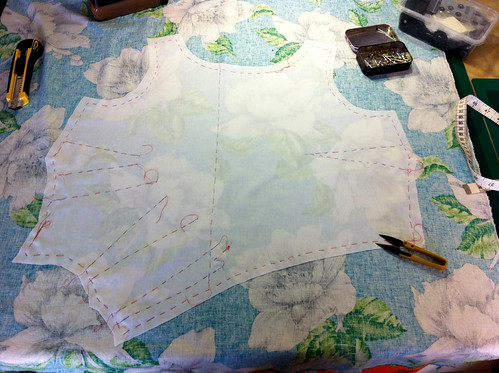
Once I had my bodice fitting approximately how I wanted it, I unpicked the seams, laid it on my sewing table, and...

Yeah, it wasn't so easy to transfer the changes to the flat pattern - as I'd been doing the fitting on myself, it hadn't been possible to always cut and pin in a way that could be unfolded so I couldn't lay it out completely flat. After a little while staring blankly at the pattern piece, I went and had a cup of tea to contemplate what to do.

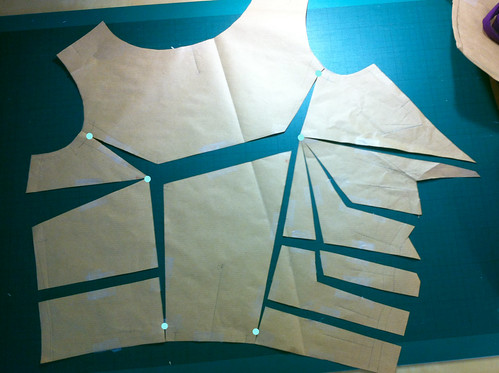
I decided to use the modified muslin piece as a guide for doing an FBA on the paper pattern piece. I could see how much length I'd needed to add at the bust point, and also how much width I'd needed to add on the plain (right-hand) side so did this as normal, adding a dart from the side seam (I wanted this as it would reduce the amount needed to add to the pleats and keep the dress closer fitting). For the left-hand side, I drew in approximate equivalent FBA lines (I'd marked bust points on the muslin), splitting the vertical length added between the pleats, and spreading the width the same as for the normal side.

Here is the unaltered pattern piece with the slash lines marked. There is extra width at the waist on the pleat side as the paper was difficult to fold and true so I did this on the muslin. The pale blue lines are the pleat fold lines and the other colours mark the equivalent cuts in each side.

After spreading it, I got this. The blobs are the hinge points - note that I made this alteration on a pattern piece with seam allowances, so the hinge points are on the seam lines, not the edge of the pattern piece.

After cutting this new pattern from muslin, I arranged the pleats approximately on Wilma, then adjusted the fit on me. My bodged FBA actually worked quite well, although I needed to take out a little width on the pleat side.

Other than this, I shortened the back piece, and took a small wedge out of each side of the back neckline after lowering it to stop it gaping. The skirt only needed minor changes, and a slight rearrangement of the pleats. I also took out about 1.5cm of length in the bodice - this put the waistline seam at the perfect place in the muslin, but I must have done something weird as this turned out to be a problem in the final version.

Construction details

The linen blend fabric is fairly loosely woven and lightweight, so I chose to underline with rayon challis to provide some structure and opacity whilst keeping the softness and drape of the linen. A cotton batiste or lawn might have been a better choice as the rayon has the same tendency as the linen to "grow" slightly when worn (although that made for a super comfortable dress). I cut the underlining first and put the markings on this, then used these pieces to cut the linen, which meant I could be careful with the pattern placement. I started off hand basting the markings and the edge, but after spending ages doing this on the first piece I realised I'd moved the underlining slightly whilst straightening it so had moved from where I wanted the pattern placement to be. ARGH. After that I hand basted the markings but machine basted the edges (having learnt from the yellow dress to make sure to keep these within the seam allowances so I didn't have to pick everything out...)

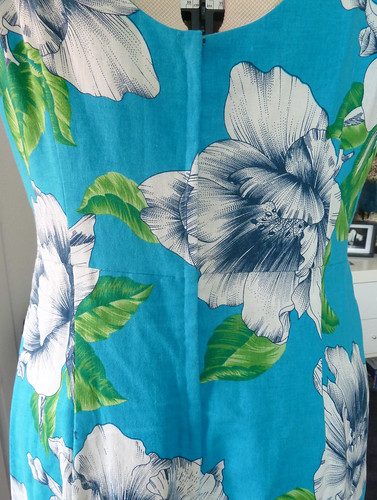
As for pattern placement, I managed to avoid bullseye flowers on boobs or butt! There's a bit of a crotch flower happening on the front skirt, but it's not so bad with all the pleats there. I also managed to match across the zip, and mostly match across the waistline seam.

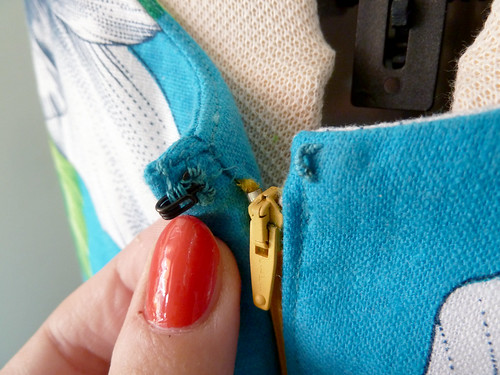
All the seams were sewn on the regular machine and then pinked to reduce bulk. These pinked seam allowances could do with being slip/catch stitched to the underlining, but I only did that along the CB zip and vent seams, and will come back to that for the rest of them. The zip was machine sewn on the underlap side and hand picked on the overlap side as I couldn't find a perfect thread colour match. I couldn't find a good colour match for the zip either so I went with a contrast zip (plus I'll go for the opportunity to use yellow wherever I can!). I finished it with a hook and thread loop at the top.

I went for a combined facing to finish the armscyes and neckline. Because the straps are quite narrow I didn't use the burrito machine method as I wouldn't be able to pull the dress through the straps. So I sewed the shoulders last and finished the facing shoulder seams by hand. The facing is under-stitched, and catch-stitched to the underlining.

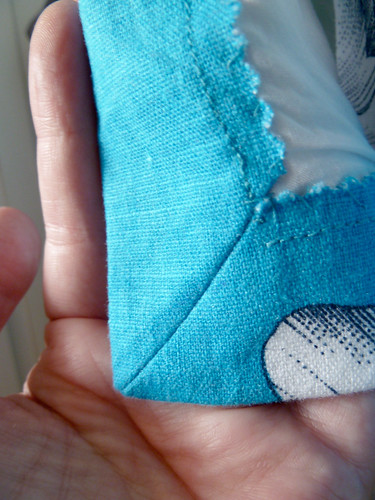
I mitred the corner of the vent overlap and hem, and did the stitching along the top of the event by hand pick-stitches to avoid visible stitching again.

Unfortunately, I didn't try on the final dress until after basically finishing the whole thing and trimming the seam allowances, assuming the fit would be mostly similar to the muslin. Oops. The shoulder straps were too short, the waistline was waaaaay too high, meaning the fit of the skirt (especially at the back) was completely off), and the bodice was too tight on the upper half. ARGH AGAIN. I had a little cry, had another cup of tea, then took a deep breath and channelled Tim Gunn. I didn't want to waste the fabric, and the basic idea of the dress was fine, so I figured I'd try to make alterations.

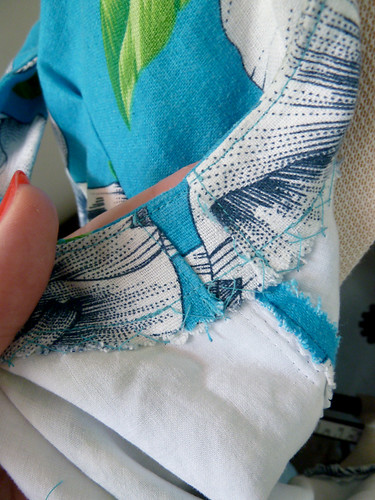
To add some breathing space in the bodice I let it out at the side seams from underarm to about halfway to the waist, slightly more in the back than the front. This left me with teeny tiny seam allowances, hopefully they won't entirely disintegrate over time. I'd trimmed the seam allowances of the facing narrower than the bodice pieces, so I patched in a spare bit of fabric. Not super pretty, but it's on the inside.

Because of the way I'd finished and trimmed the shoulder seams, I couldn't let these out, so I lowered the front neckline about 1cm at the front. This meant trimming through some of my stay-stitching, fingers crossed the seam stitching and under-stitching here will prevent it from stretching too much. I also couldn't lengthen the bodice as the pleats go over the waist seam, plus the zip was already in, so I just pretended it was always meant to be slightly high-waisted/empire line, and adjusted the darts in the back skirt to shape it properly at the natural back waist. It's really annoying that these alterations meant the dress isn't as perfect as I wanted, but at least it was wearable!

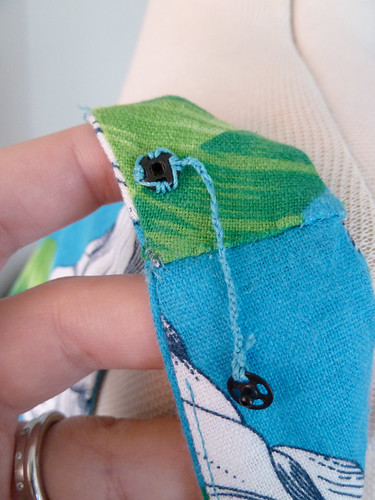
The slight tightness in the upper bodice meant that my bra straps showed a bit, so I also added thread chain lingerie holders, which worked well.

Would you sew it again? Would you recommend it to others?

I might use the bodice again (after adding back in the length...), but will either take out most of the pleats in the skirt or draft a new front piece. I would recommend it to others, but just pay attention to the printed final garment measurements when picking your size, and make a muslin to check the fit.

Conclusion

Despite the mess up with fitting, I wore this dress for the party and it was actually really comfortable - the fabric relaxed slightly during wearing, and is also super soft (the photos here were taken after wearing, hence a few wrinkles - I did iron it before taking the photos, but apparently not terribly well). I think I will take apart the front of the skirt and redo the pleats - either stitching them down more, or rotating some of them out, as it's pretty poochy across my belly as it is. The party, however, was super fun, there was lots of food and drink, and colourful decorations. Oh, and piña colada cupcakes...

Cheers! (Yes, that is a straw with a flamingo on it).

Wednesday, 10 September 2014

Last-minute yellow dress

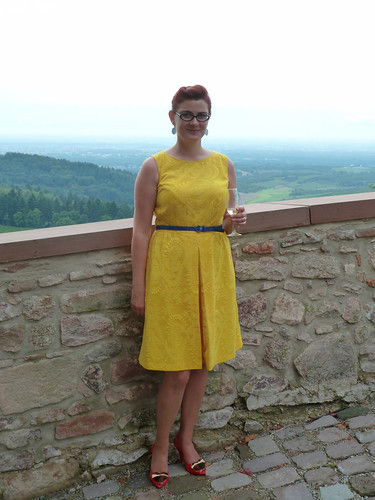
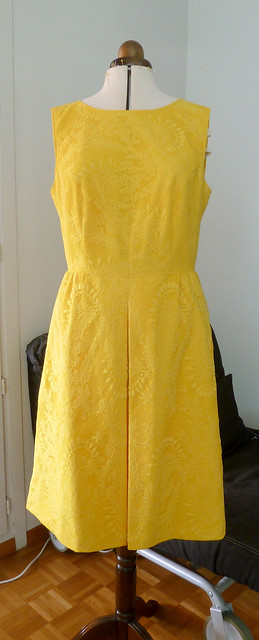
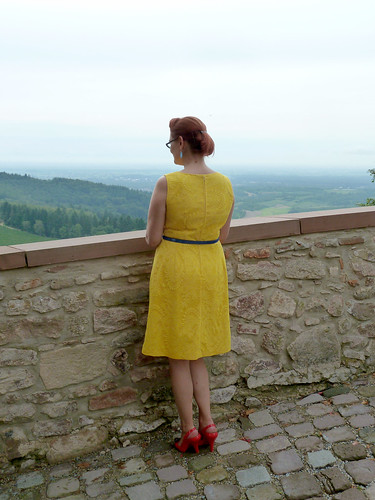
We went to a wedding at the end of July, and of course I wanted to make a dress to wear. I'd planned a second entry into the Vintage Pattern Pledge with a lovely dress with a draped bodice in feather print silk crepe lined with rayon challis. Yeah, well life got in the way and time ran out to make that. I had a back up plan of a RTW dress, but the day before we left I got a sudden inspiration and decided I was going to make a dress after all. As you do.

I went with the same pattern as my blue linen dress and my Sew Dolly Clackett dress, vintage Simplicity 5237 as I knew how it fit and could make it without doing a muslin first. Although having looked at these pictures I think the fit needs some work. Given I've already made this twice, there's more an emphasis on pictures than words in this post.

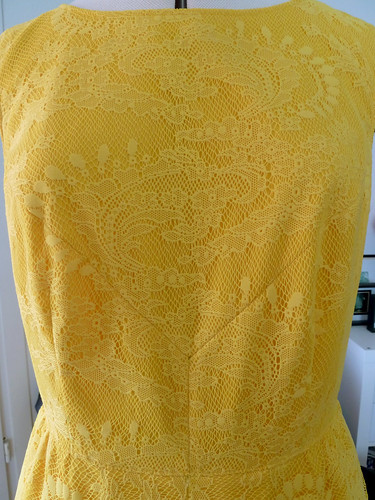
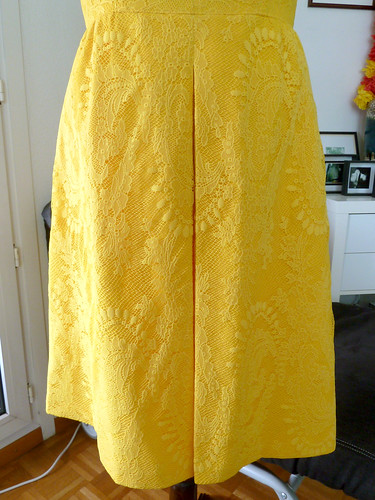
I used a yellow cotton twill, with a yellow lace overlay. Yeah, I like making things easy for myself... To make it even easier I tried to match the pattern - and actually did amazingly well given it was done by a wing and a prayer. The lace overlay does pull a bit giving the dress some odd wrinkles, I think because it's not entirely true to grain (it's just a cheapy nylon lace). I used the lace in different directions on the bodice and skirt as I thought it would give a nice effect, but it's actually not hugely noticeable in the finished garment.

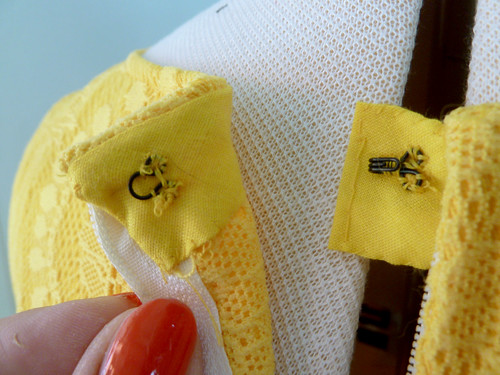
To save a bit of time I machine basted the two layers together on each piece. It would have been even quicker if I'd thought to keep the basting in the seam allowances as I wouldn't have had to unpick it all... I used a centred zip, but hand-picked it, and added a hook and eye at the top. The neckline and armholes were finished with pre-made bias tape and topstitching, and I also topstitched along the centre front pleat line to keep the two layers together. It's sort of pulling a bit weird though, so I might add topstitching along the inside pleat line too. I matched the pattern along the pleat as if it were shut, but whilst wearing it and realising the pleat is open most of the time, I should have maybe matched it along the seam instead. The insides and the hand-stitching aren't exactly beautiful, but it was functional and looked fine from the outside!
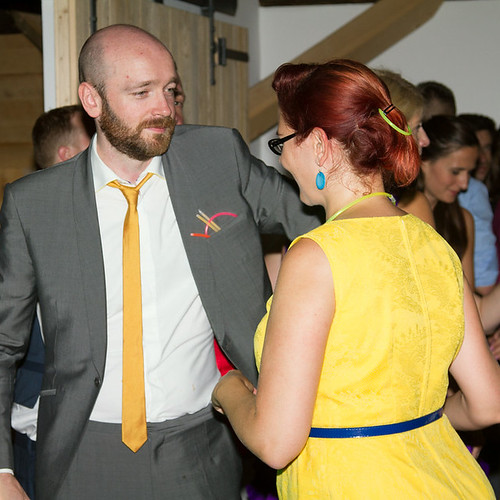
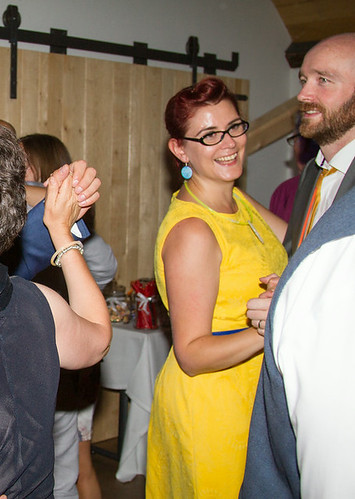
It's interesting how different something can look in your head/the mirror, and in pictures - I was really really pleased with the fit and thought it was super flattering, but then I saw the photos and was horrified! There's something odd happening between my waist and the bust, and also the armscyes are too high, causing funny wrinkles. The bodice is probably too large between the bust and waist too and maybe a smidgen too long, plus the neckline needs adjusting. Apart from that, it's fine! No, to be serious, most of these alterations should be fairly straightforward, and it's a dress I can see myself wearing again. I think also the photos don't look great as I did my hair and makeup in a rush as I was a bit hungover that morning (all the wedding guests had gone to a local wine Keller festival the night before...)

Despite the fitting issues, I count this dress as a success, and I'm super proud at how quickly I made this (whilst also fitting in packing!) - I started at 1pm on the Thursday and finished all the machine sewing by 1am that night. There was some intense hand-sewing done on the train, but I still had time for a nap :)

I'm not counting this as one of my Vintage Pattern Pledge makes as it's something I've made twice already! Still a couple of months to get these in though... I'll leave you with a couple more pictures of the dress in action.

Monday, 1 September 2014

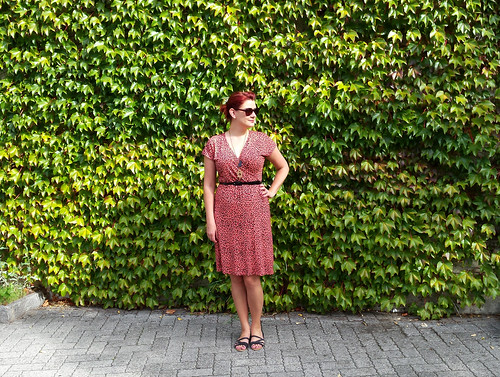
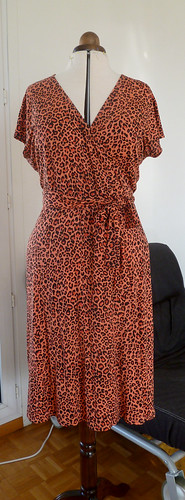
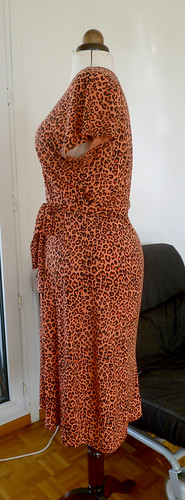
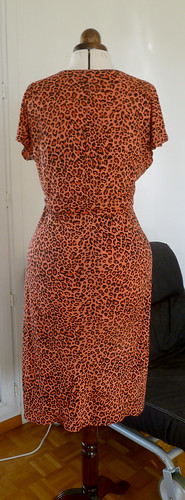
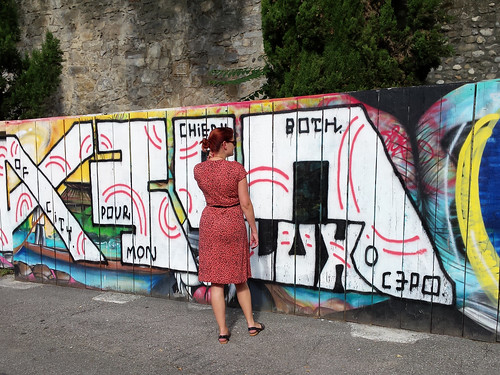
Leopard surplice dress

So, another jersey dress - QUICK! BEFORE THE SUMMER ENDS! Hang on, did the summer begin??! This is another self-drafted jobbie, but more experimental than the previous stripy one, so involved a lot of unpicking and hacking.

Pattern description

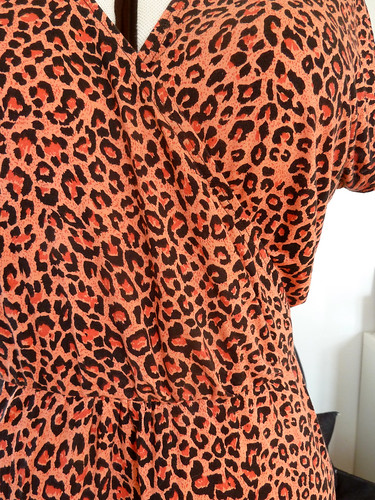
Dress with surplice bodice with pleats, cut-on cap sleeves and A-line skirt with gathering at the front.

Fabric used

Medium-weight jersey, I think a rayon-spandex mix. In a rather understated print and colour.

Did it look like the sketch/idea when you were done?

Not really. I wanted elegant pleats in both the bodice and skirt, draping diagonally out from the waist. Well, it didn't look like that. No pictures, sorry, it just looked awful and I needed to IMMEDIATELY get the seam ripper out as it was offending my eyes. I think this sort of thing needs to be drafted by draping to see how it hangs (especially with a knit, which is unpredictable in how it drapes and stretches), but I was just doing it on the flat pattern. It ended up with the front bodice being way too long and loose, and the pleats on the front of the skirt somehow both hugging my belly and blousing over it. Nice. In the end the pleats were much less pronounced and the skirt became basically an A-line. At least I kept the surplice front!

Drafting details

This was drafted from my stretch block, with the bodice overlap having pleats at the waist, and the underlap being plain. The pleats in the skirt ended up being eliminated, but a bit of extra ease was added by a little bit of gathering at the centre front waist of the skirt.

Construction details

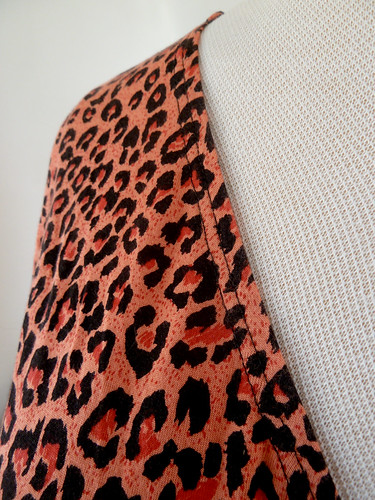
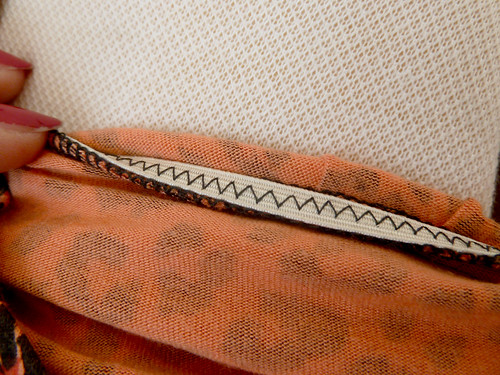
This was pretty much all sewn on my serger, with a bit of twin-needling thrown in. I made some bad judgements with my choices to stabilise the neckline, but I blame that on, erm, the hot weather. No, more likely the wine. The back neck was stabilised with bias tape, which meant it's not stretchy at at (normally I would have added a T-shirt style binding to this part). For the front overlaps, in a moment of madness, i decided to use clear elastic. Or to give it its full title Evil Elastic Of Doom. Do I have a crappy batch of elastic, or is it all lies that say you can stretch clear elastic as you sew and it'll rebound and gather up what you've just sewn? If I stretch it when sewing, it just seems to become permanently stretched out and ripply. Meaning using it in an edging is effectively a more annoying and bulky (if stretchy) way of interfacing the edge. What am I doing wrong?!

Anyway, moving on, the neckline, sleeve hems and skirt hem are all finished with a twin-needle, and I also added narrow (normal) elastic to the waistline seam for support, zig-zagging it to the seam allowance after serging the seam. I also made a tie-belt from the same fabric, although I've actually been wearing the dress with a plain black belt.

Would you sew it again?

Hmm, maybe. It needs rather a lot of refining to get to the vision I had of it. I might re-start with either a commercial pattern, or by draping (although the latter means I need to pad Wilma to mimic my shape a bit better). I do really like this style of dress on me, so it's probably worth persevering with. I think the pleats would be more flattering with the excess going into the side seams rather than the waist seam, so I will try this next time.

Conclusion

Although this didn't turn out as planned, and despite being rather hacked together in the end, I have actually been wearing this a fair amount. I really like this fabric, it holds up well to wearing and washing and is comfortable to wear. I'm taking it as a learning experience!

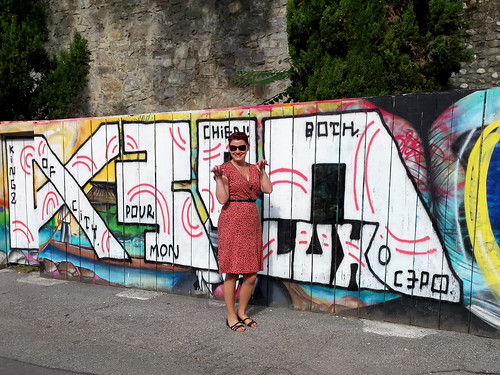
PS A word about the photos... I've been trying to take my photos in some more interesting places. These were taken on the way to an ENORMOUS brunch. The first lot were taken by some of the cool graffiti near the river, which include most of the best ones. But then I got worried that this meant something really rude in French, so I took some more in front of a lovely ivy-covered wall, although I ended up having a sour face in most of the second set because it stank of piss. But a pretty backdrop! Oh the sacrifices for art.