Thursday, 31 January 2013

Gathered raglan-sleeve T-shirt

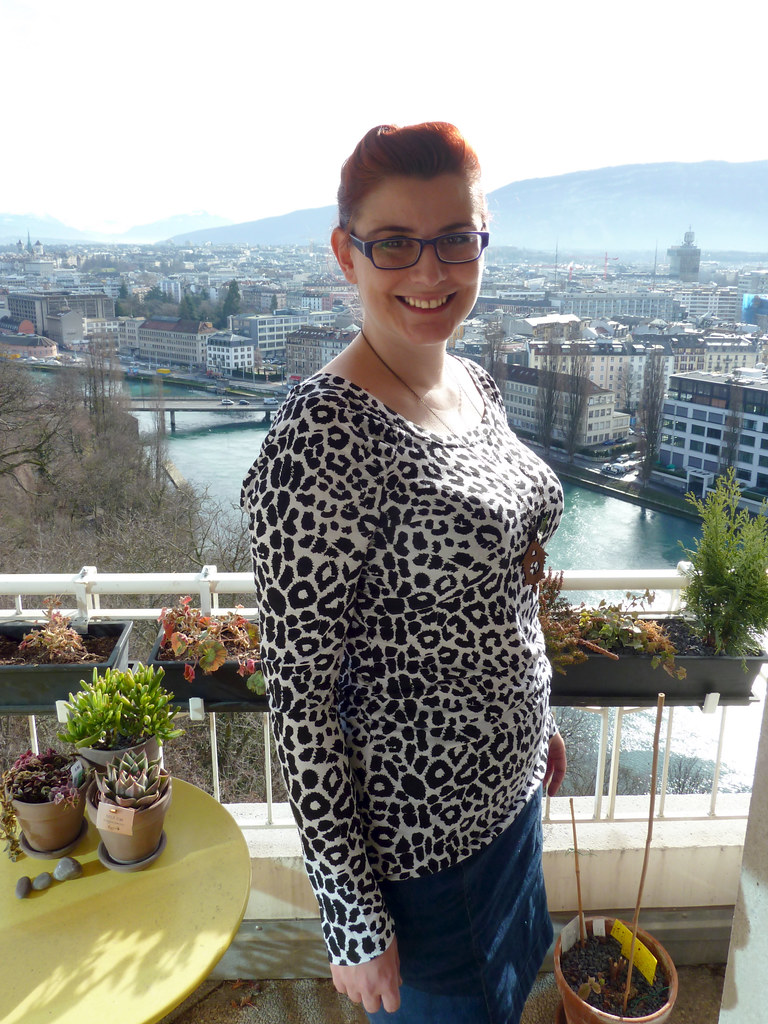
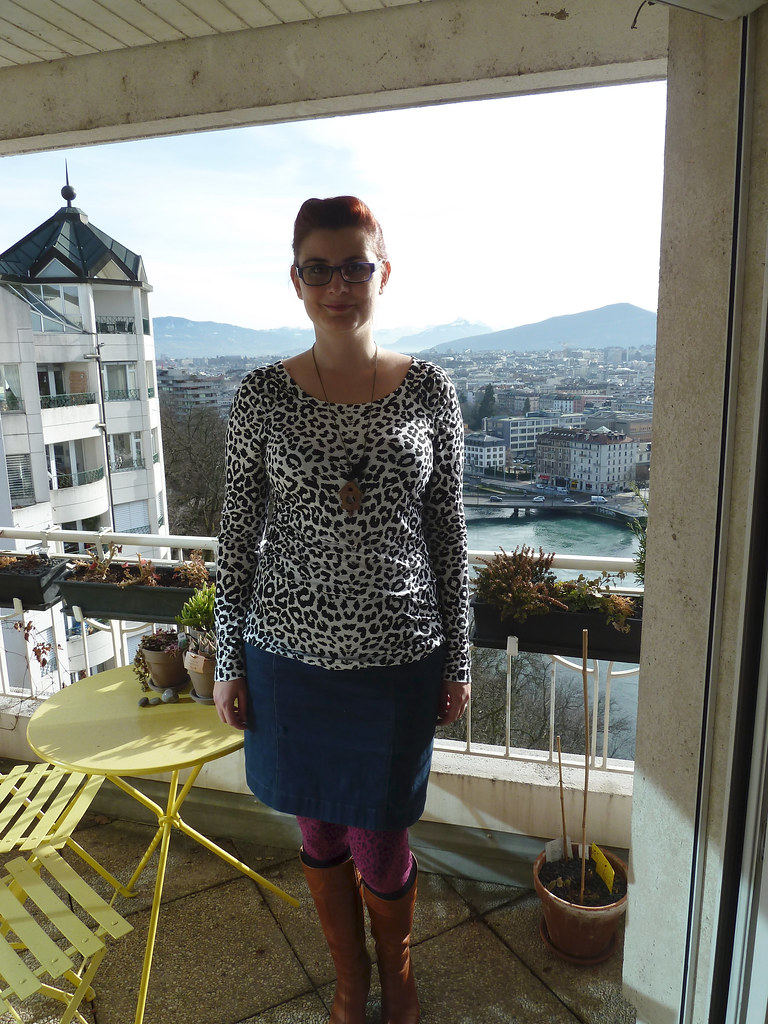
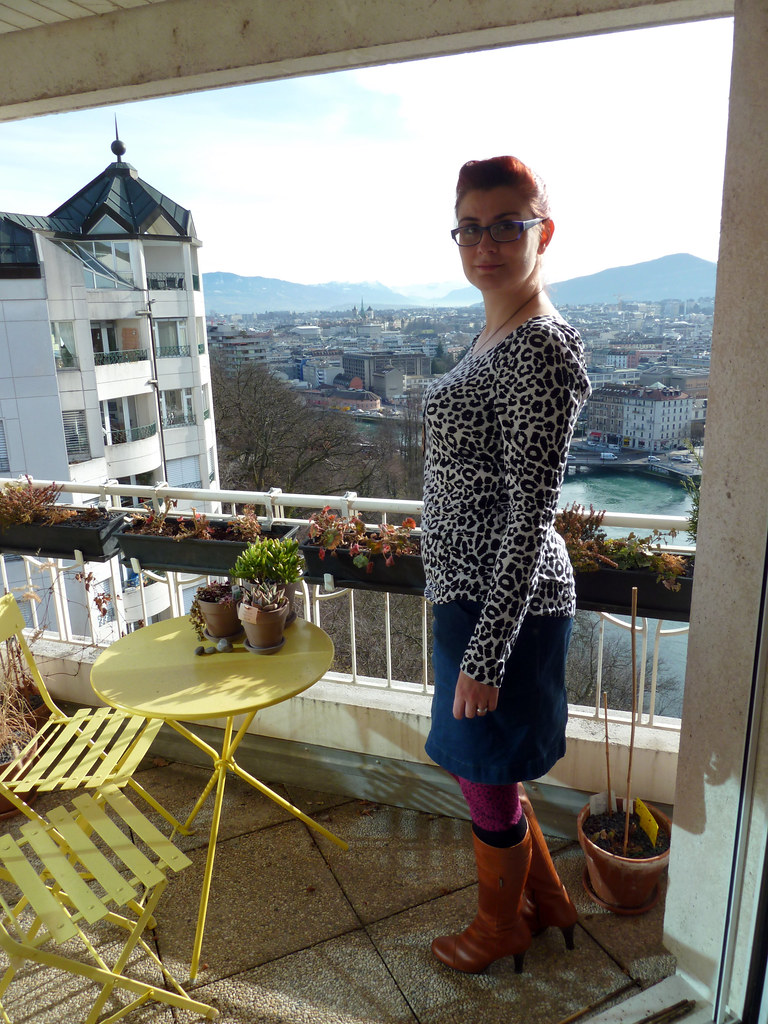
So, I've managed to do my February Burda challenge before the end of January! I found February's BurdaStyle magazine to be so much better than January's, so there was plenty to choose from. For now, I picked this jersey top - interesting separates are something that I'm lacking in my wardrobe at the moment, so this fitted the bill. There are several more pieces from this month's magazine though that I would rather like to make: some more tops, several of the dresses, and I would also like to try one of the trousers for an upcoming trip to Sri Lanka. To me, many of the garments seemed quite summery, so this issue will probably be revisited a few times as the weather warms up.

Pattern description

BurdaStyle 02/2013/127: jersey top with gathered raglan sleeves. Long length with extra-long sleeves.

Pattern sizing

34-42. I cut the 42, but did a dartless FBA, and graded out slightly at the waist and hips.

Fabric used

Lightweight jersey, I think it's possibly a cotton mix, but I can't remember - or where I bought it from either!

Did it look like the photo/drawing on the pattern envelope when you were done?

Yes. But more animal-printy. And with a bra.

Were the instructions easy to follow?

Fairly straightforward, although this is a relatively simple pattern. I have to admit I didn't read them properly before starting, so made a small boo-boo: the sleeve hem is supposed to be 7cm so you get a nice long cuff with the extra long sleeves. I didn't notice this and only added 2.5cm, although it doesn't make much difference on such a busy print.

What did you particularly like or dislike about the pattern?

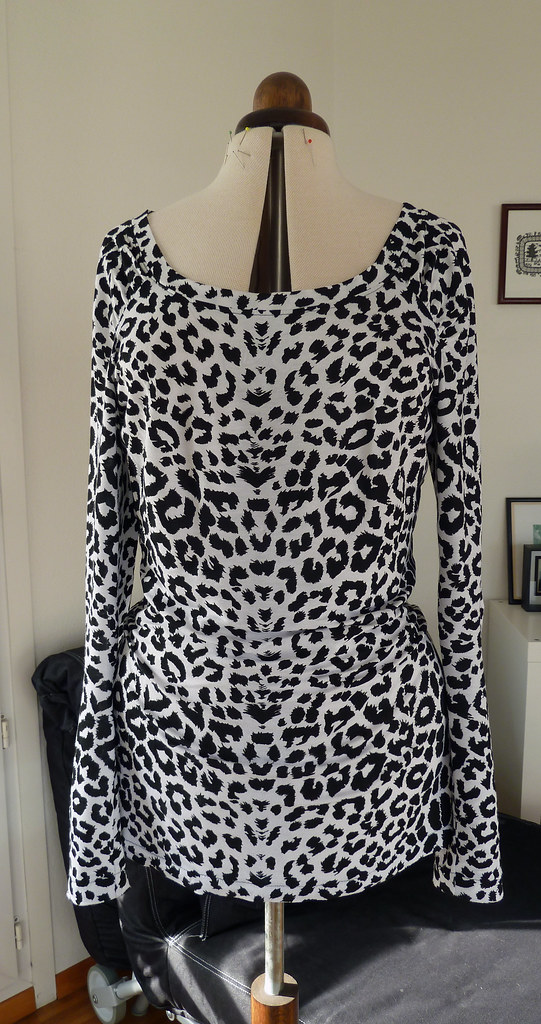
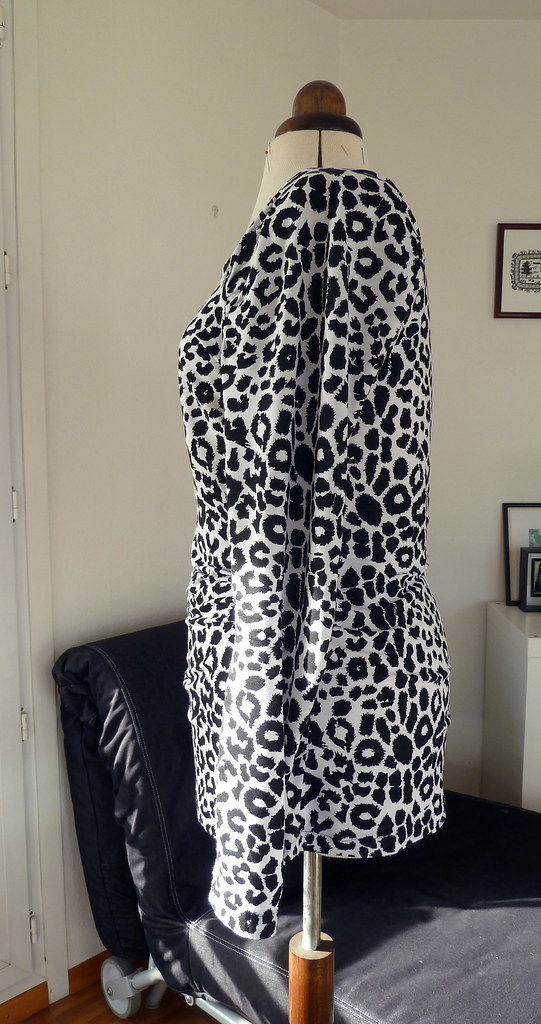
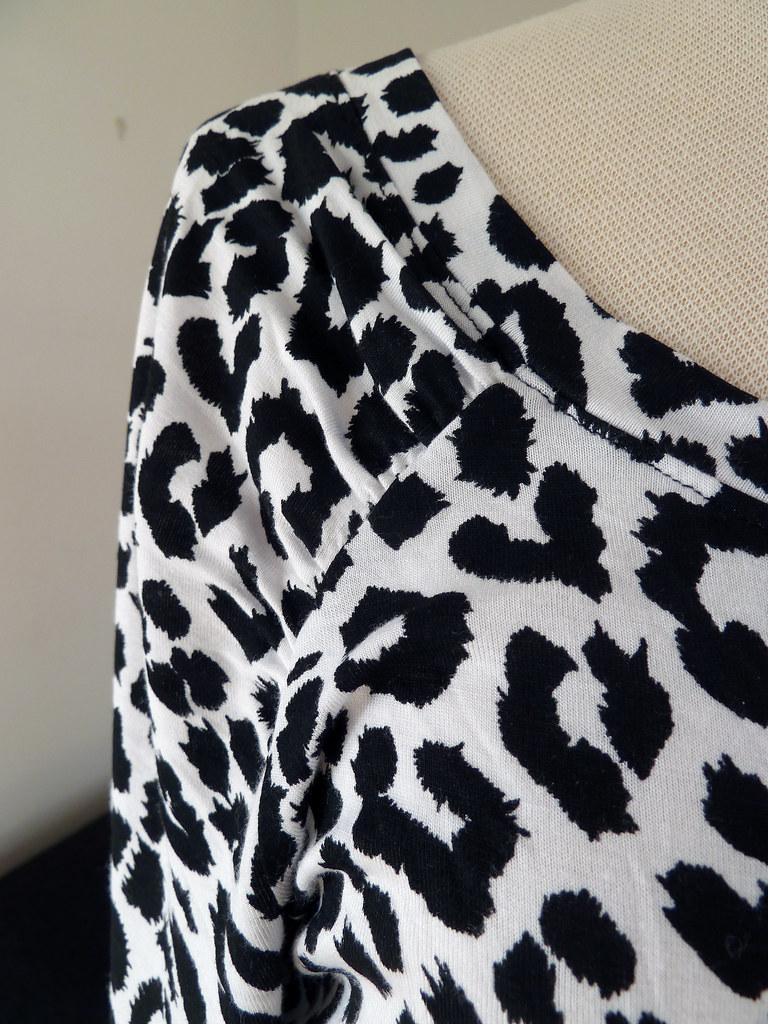
The gathers along the raglan sleeve seam are very pretty and flattering, and I really like the extra long sleeves. The body itself is very very long... It does look quite attractive as it drapes though, so I think I may add some little tabs or elastic to keep the sides gathered at the bottom.

Pattern alterations or any design changes you made

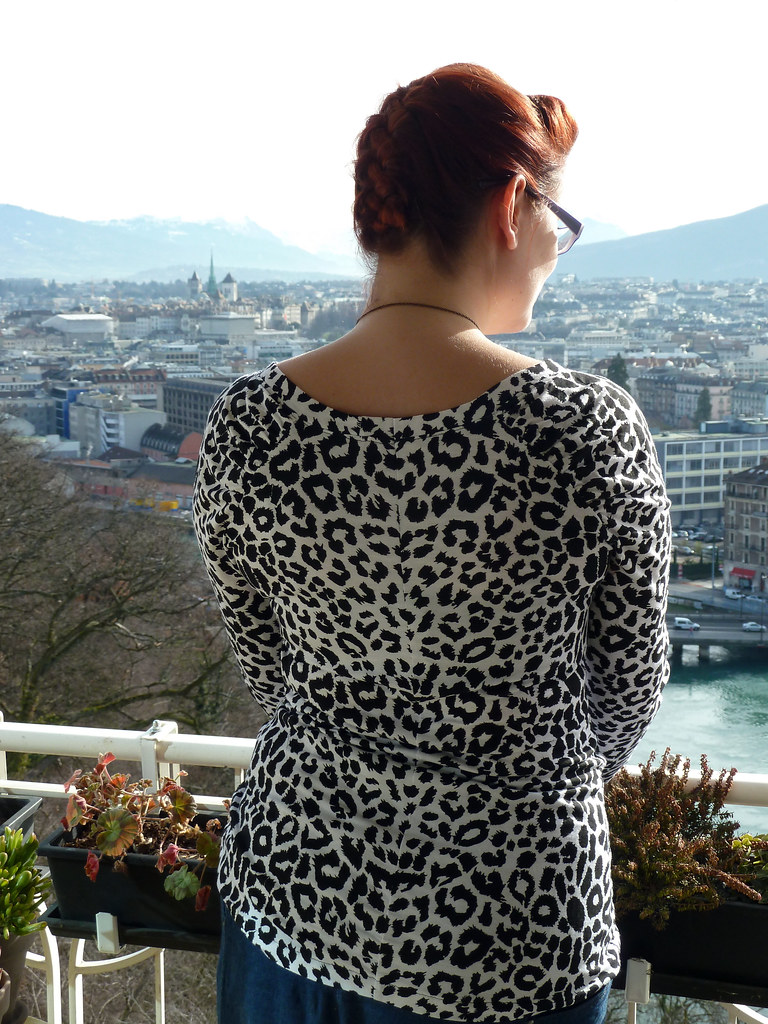
As mentioned, I made a dartless FBA, using the same method as for my knit bodice block. I would give you the exact measurements, but I just sort of eyeballed it... I added about 1.2cm in width, and 2.5cm in length. I added a CB seam as with my "large high hip" (read, "big bum") I need to add fullness towards the middle to avoid the fabric either pooling or pulling. Other than that, I just added a little width at the waist and hip as, even allowing for a little bit of negative ease in a stretch fabric, the measurements for a 42 (the largest size given) would be a little tight.

I didn't like the suggested finishing for the neckline (they have you bind it), I finished it with a T-shirt style band, stitching the CB seam last. Zoe has a tutorial on how to easily do this sort of finish (step four in that link).
Construction details

Everything except the gathering stitches and topstitching was done on the serger. I only did single topstitching rather than a twin needle. Mainly because I was lazy and couldn't be bothered to swap it over. I would normally finish a T-shirt neckband at the side seam, but the gathering at the raglan seams meant I didn't want to add bulk or complication here. When I cut it, I made sure the pattern was symmetrical, but didn't give it any more though than that. I only noticed when I finished it and put it on that there is a slight, err, "headlight" effect... I'm still wearing it though, I just tell myself that it's not too noticeable.

Would you sew it again? Would you recommend it to others?

This is a great T-shirt pattern: basic enough to be used as a wardrobe builder but the gathers on the raglan sleeves add a little extra individuality and femininity. It's pretty straightforward and quick to sew (I made it in an afternoon), and I would definitely recommend it to others. I will probably sew another version (or two or three) as it will make a great quick and easy project between other more complicated ones.

Conclusion

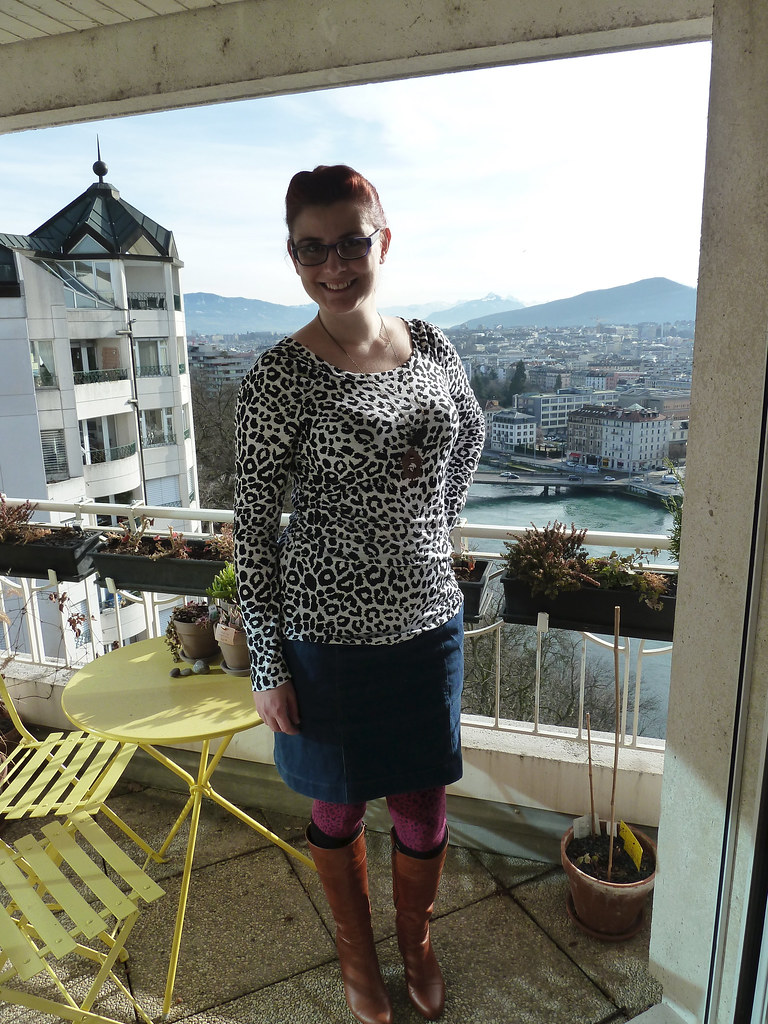
I'm very pleased with this top. I love the fit of it, and it's a really useful addition to my wardrobe (I'm wearing it here with my self-drafted jeans skirt). On to the March Burda challenge!

Tuesday, 29 January 2013

Cottonopolis

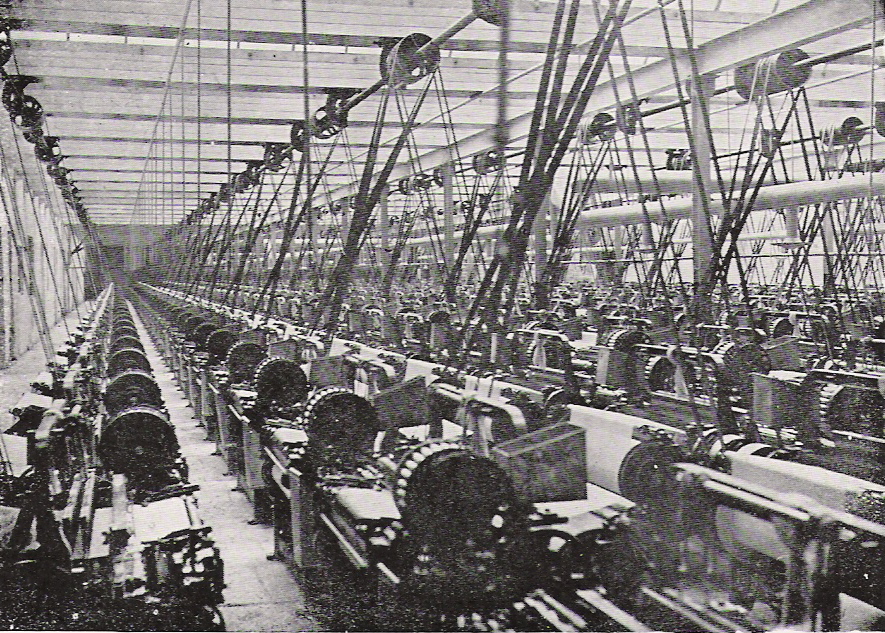
In December I spent a couple of days in Manchester on the way to visit my husband's family in Liverpool. For those who don't know much about the history of the place, it was at the centre of the Industrial Revolution in the UK at the beginning of the 19th century. It was probably the world's first industrialised city, and its growth was driven by the textile industry - at its height, around two thirds of the world's cotton was processed in the city.
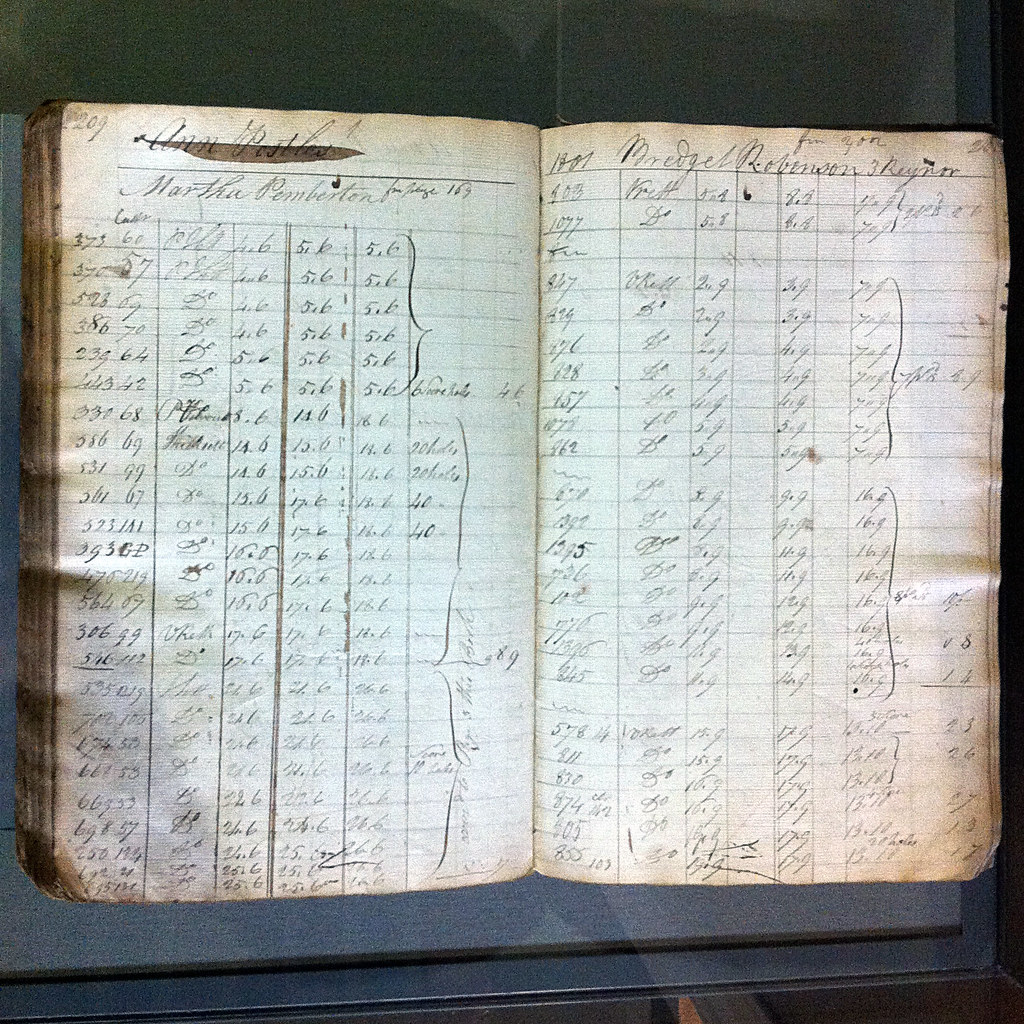
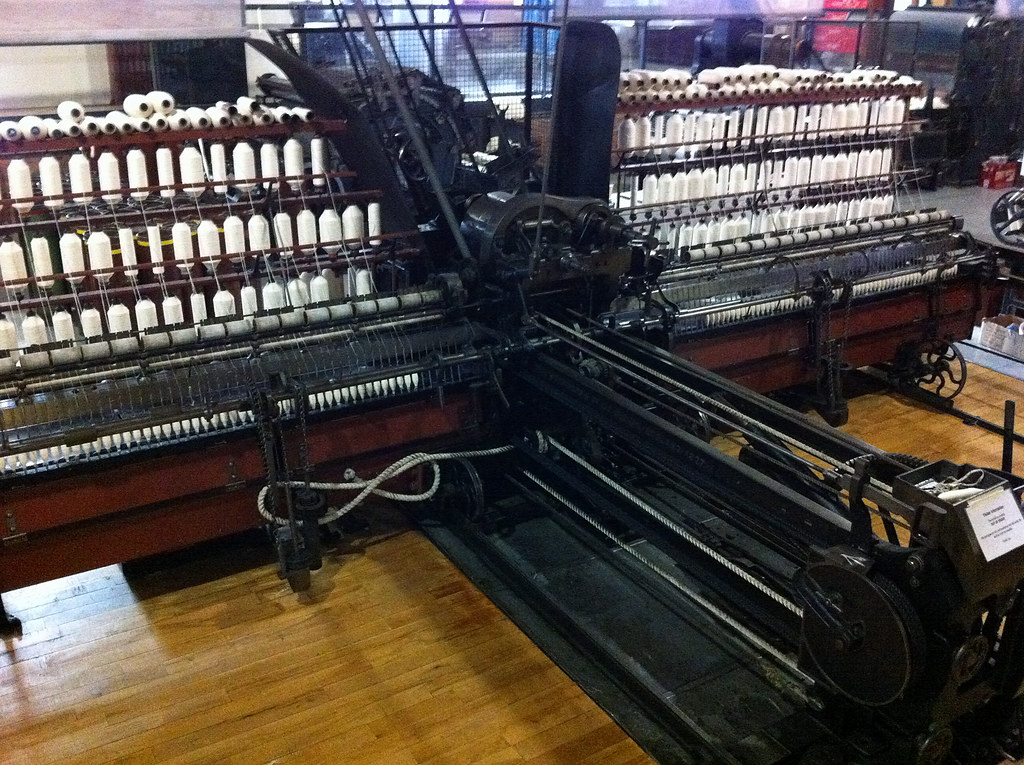
The day we were there it was freezing cold, so instead of looking round the city, we went to the Museum of Science and Industry, and I'm very glad we did as they have a big gallery dedicated to their cotton processing heritage. As well as artefacts relating to the business side of the cotton trade, they also have a huge set up of the machines used for processing from cotton bale to cloth, which they have demonstrations of twice daily (I think around 11am and 3pm).

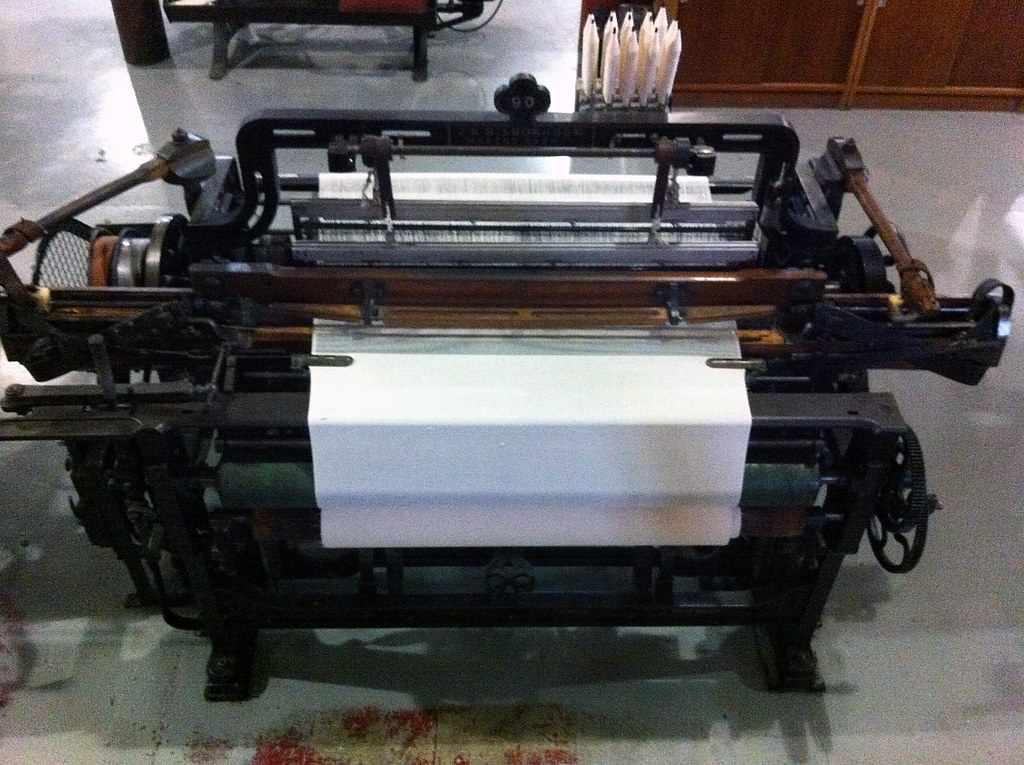
Seeing these machines running is amazing. They are huge and noisy, and then you realise that the machines in the mill were six times as large, with hundreds all together. It was a pretty dangerous and difficult life to work in such a place. Many workers ended up with byssinosis (chronic lung disease from inhalation of the cotton dust), and there was grave risk of injury or death from the drive belts and the machinery itself. It also made me wonder about the conditions in modern mills - whilst I'm sure there is some more mechanisation nowadays, the principle of how the cotton is sorted, spun and woven is the same, so has life improved for those who work doing this?

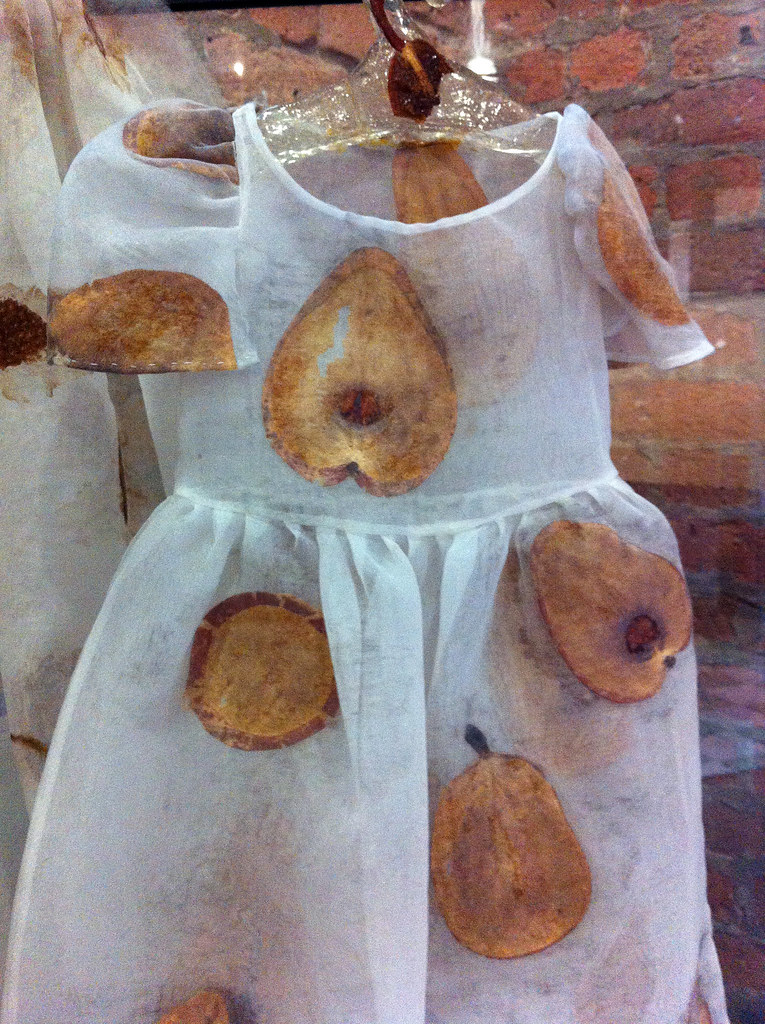
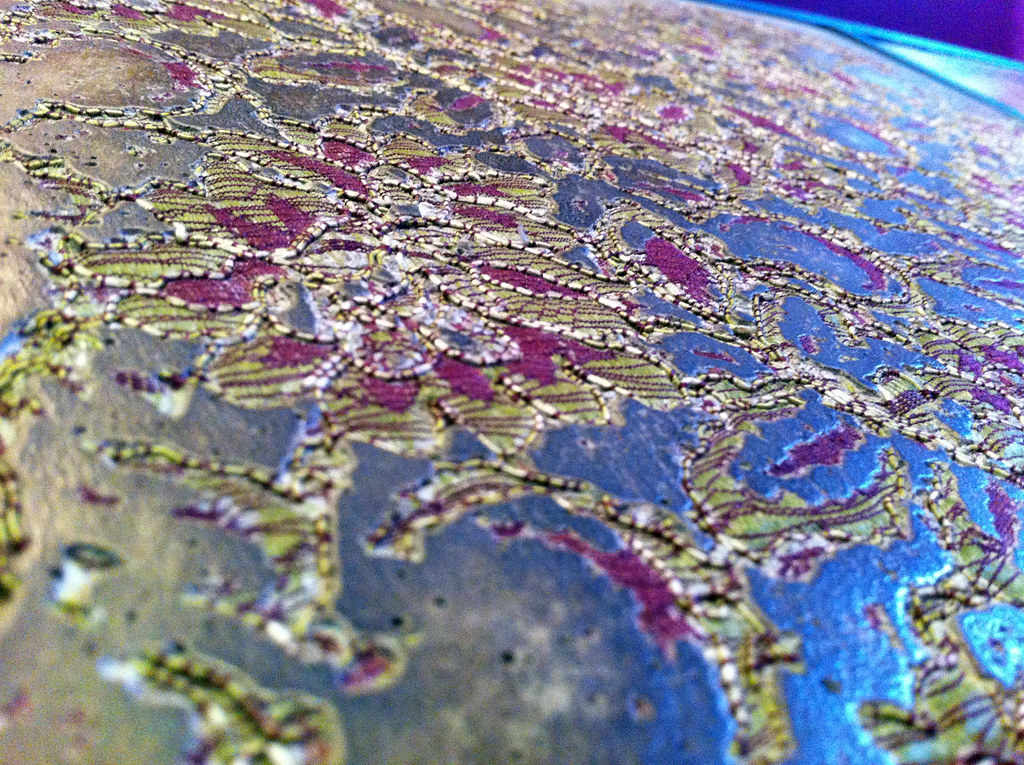
On a slightly lighter note, there were also exhibits of modern Mancunian textile artists, two of which were especially fascinating. Jennifer Collier, who creates art by incorporating found materials into textiles, and Trish Belford, who created printing techniques for designers such as Vivienne Westwood and Zandra Rhodes in the 1980s and 1990s, and since 2005 has worked on amazing composite materials, with fabric embedded in concrete. Seriously, these things are beautiful.

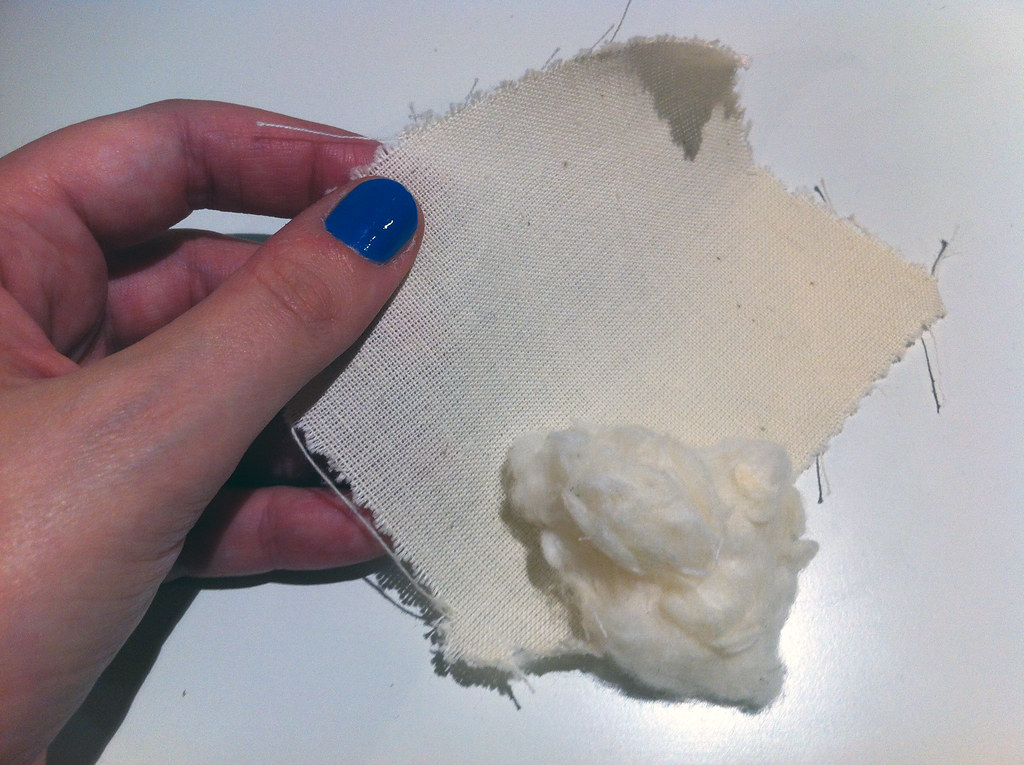
The rest of the museum is also super interesting, but if you are interested in the history of textile manufacture and find yourself in Manchester, I would highly recommend a visit. And look: I have a piece of cotton woven on a loom over 100 years old!

Wednesday, 23 January 2013

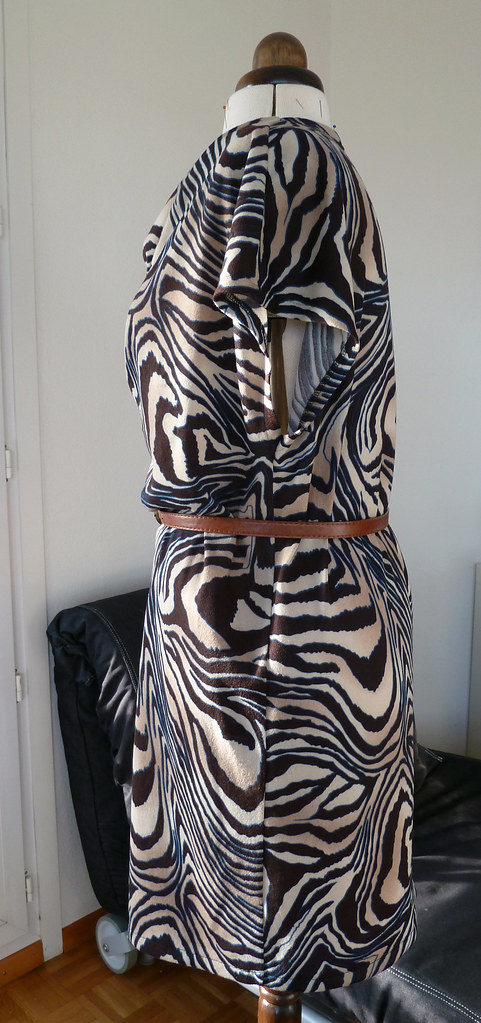
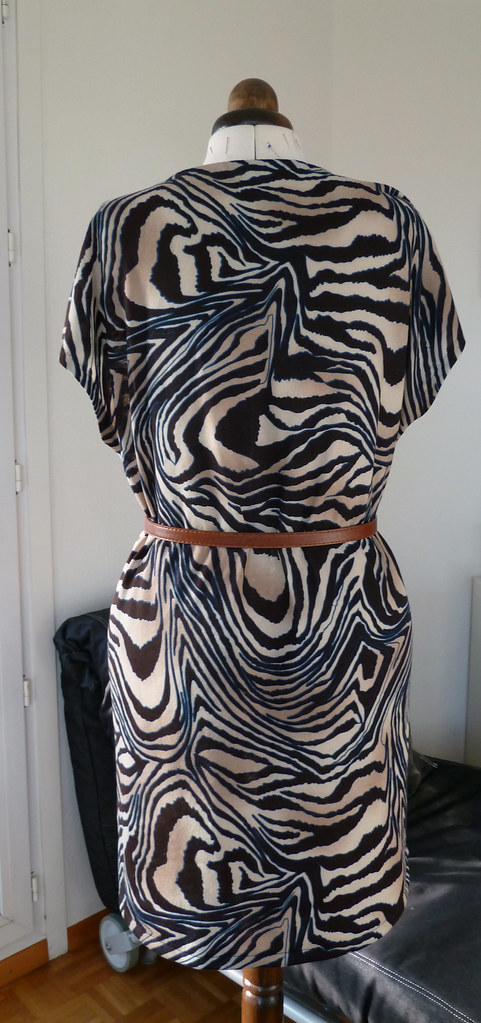
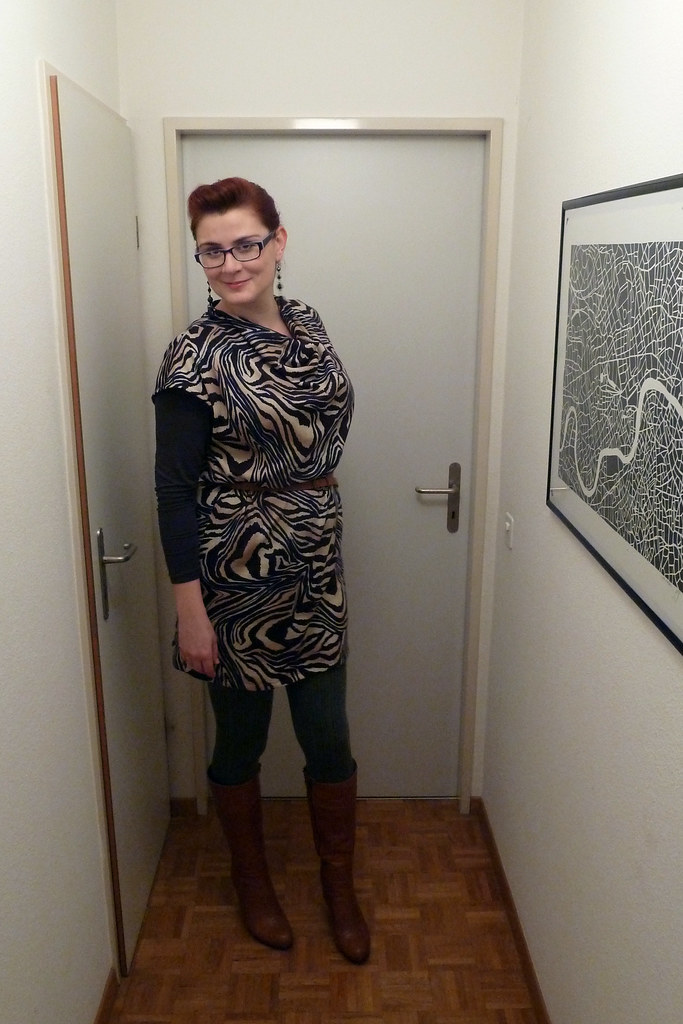
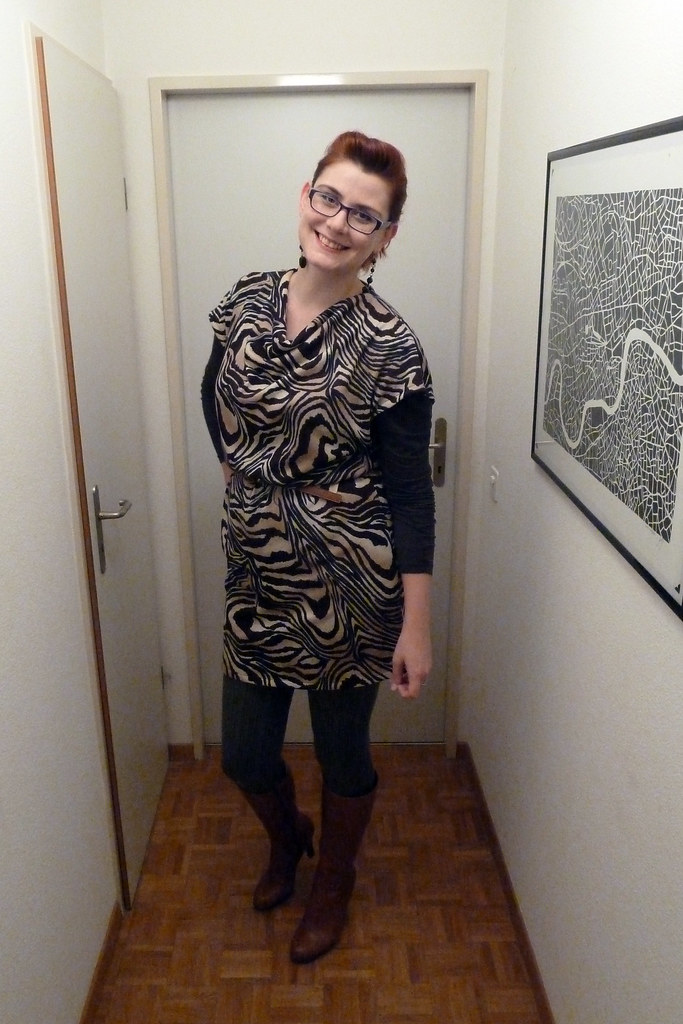
Simple cowl-neck sweater dress

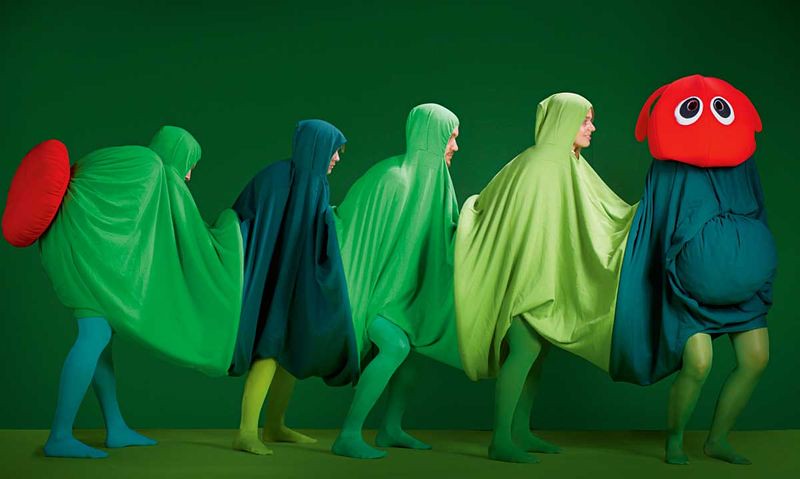
So as part of my aims for 2013 I want to make at least one pattern from each month's BurdaStyle magazine (preferably before that month is out!). Whilst not extortionate, the Burda subscription is not insignificant, and I definitely don't make the most of what I pay for it at the moment. However..... January is probably the most difficult month to start this as they always have the insane carnival costumes filling half the magazine. After much deliberation and reading through of reviews on Pattern Review and BurdaStyle Russia I settled on this quick project. Although I had to talk myself down from making the human centipede very hungry caterpillar costume:

Erm, just no.

Pattern description

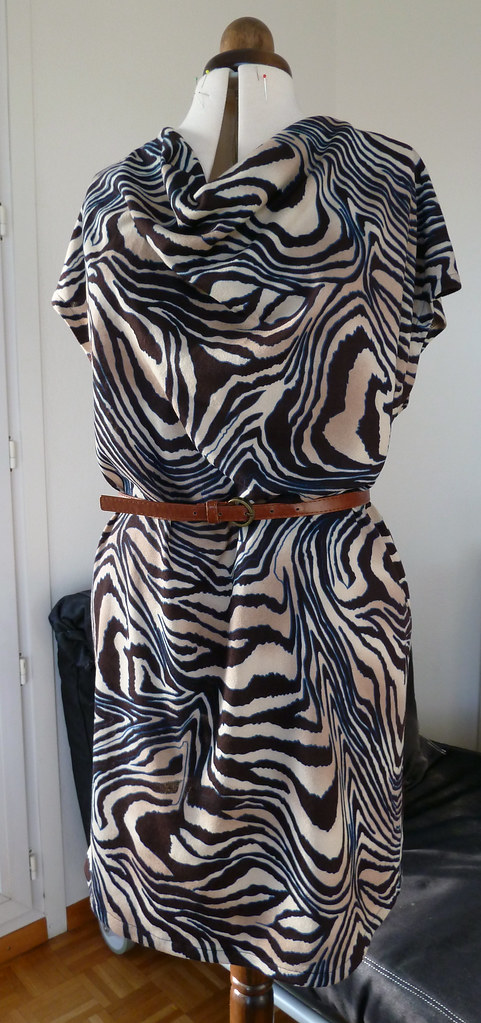
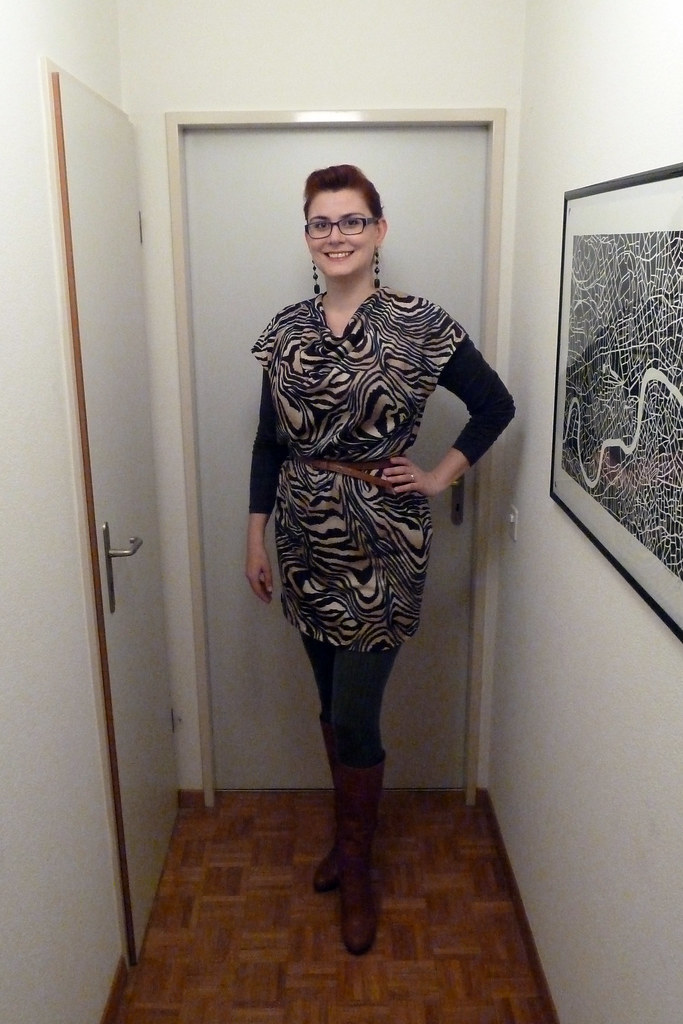
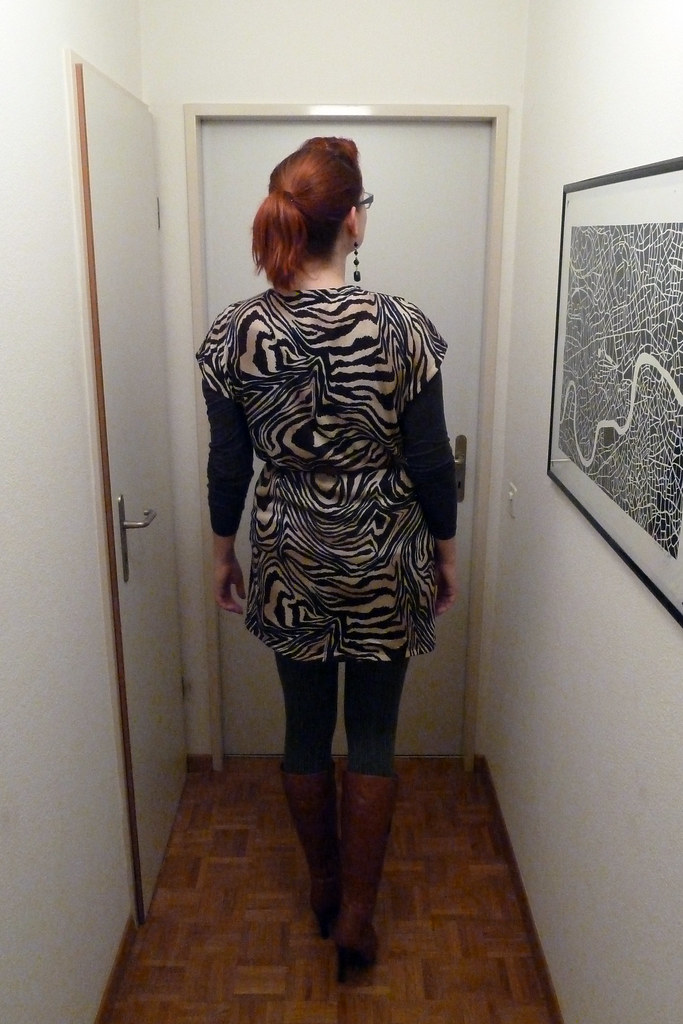
BurdaStyle magazine 01/2013/123B. Simple straight-cut cowl neck tunic with extended shoulders forming cap sleeves.

Pattern sizing

34-42. I cut the 42 after measuring the pattern pieces. This worked out perfectly with the moderate stretch fabric I was using (if I was using a non-stretch fabric it would probably need to be graded up slightly over the hips).

Fabric used

Polyester-rayon-lycra mix animal print sweater-knit from Fabric.com, plus a scrap of black cotton jersey for the back neck facing and cowl weighting pouch.

Did it look like the photo/drawing on the pattern envelope when you were done?

Yep.

Were the instructions easy to follow?

I actually only glanced at the instructions to make sure what I was going to do was what Burda suggested (it was), but they actually seemed pretty clear to me - although it would be impressive if they made them complicated with only 2 pattern pieces and a facing!

What did you particularly like or dislike about the pattern?

This was SUPER fast to sew up (it took about 2.5hrs total, including tracing the pattern pieces) and surprisingly it fit fine with absolutely no pattern changes. Whilst probably not the absolute most flattering shape on me, it's comfy and can be dressed up or down.

Pattern alterations or any design changes you made

For once, absolutely none! I decided against an FBA as cowl necks tend to have a fair amount of room at the front anyway, and this worked fine. Actually, I did make a tiny modification - I cut the back neck facing piece 1cm wider than the measurements given. As they have it, the facing piece ends up only 1cm wide when finished, which would be only just enough to cover the serger seams (especially with the slightly bulkier sweater knit I used).

Construction details

Very straightforward and the same order as the Burda instructions: attach back facing and topstitch down; finish cowl facing edge and sew shoulder seams; hem sleeve openings; sew side seams; hem bottom edge! I did everything on my serger (apart from the topstitching obviously). As my sweater knit is not super super drapey, I added a little pouch with a lead weight to the centre of the cowl facing to keep it draping better.

Would you sew it again? Would you recommend it to others?

It's pretty certain I will sew this again, not immediately as I have other things I want to make, but it will be a good "quickie" project between other more complicated things. One minor issue with this pattern is a familiar one for this shape of sleeve: side bra viewage. It's not too bad, but I might raise the bottom of the arm openings slightly next time so I can wear it comfortably without something underneath - as well as lengthening it an inch or two as it's pretty short on me. If I sew view A of this (the shorter "top" version) I would also probably shape the side seams at the waist a little so it's not too square without a belt.

I would definitely recommend it to others - it's a great project for beginners as it's so simple and quick to sew, without dealing with any fitting issues.

Conclusion

This is a great dress to sew up when you want something quick, simple and comfortable, and I think will be a versatile starting point for a variety of useful tunics and tops - as well as warmer sweater dresses like this, it will also be useful made in a lighter knit for the summer. This dress in particular I think will be worn a fair amount in the next few months - in fact I wore it out the night I made it to go to dinner and the cinema (this is the outfit in the photos here). Not a bad start to my Burda Challenge!

Friday, 4 January 2013

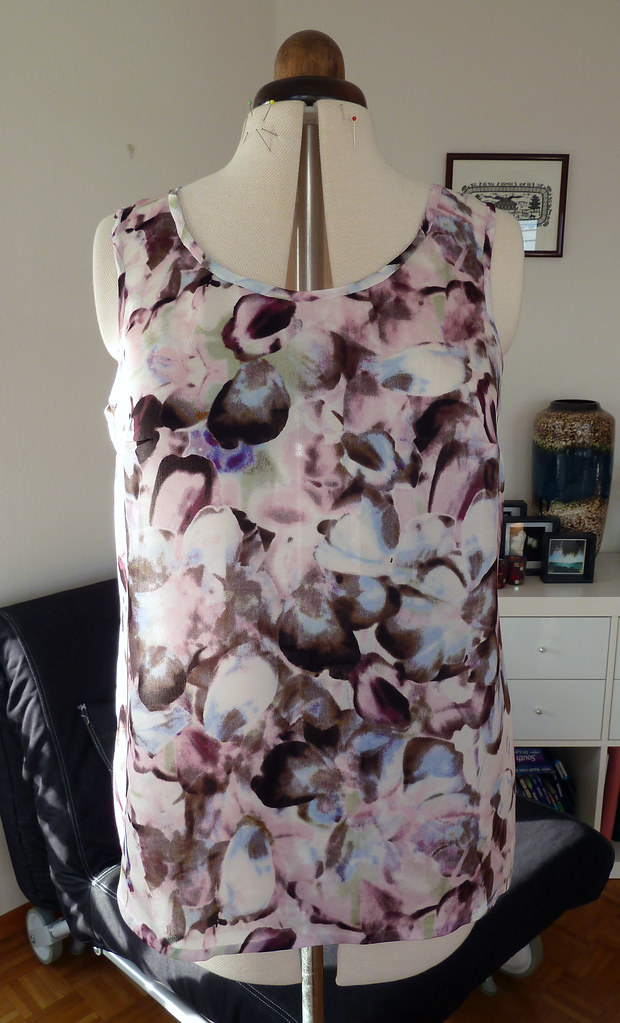
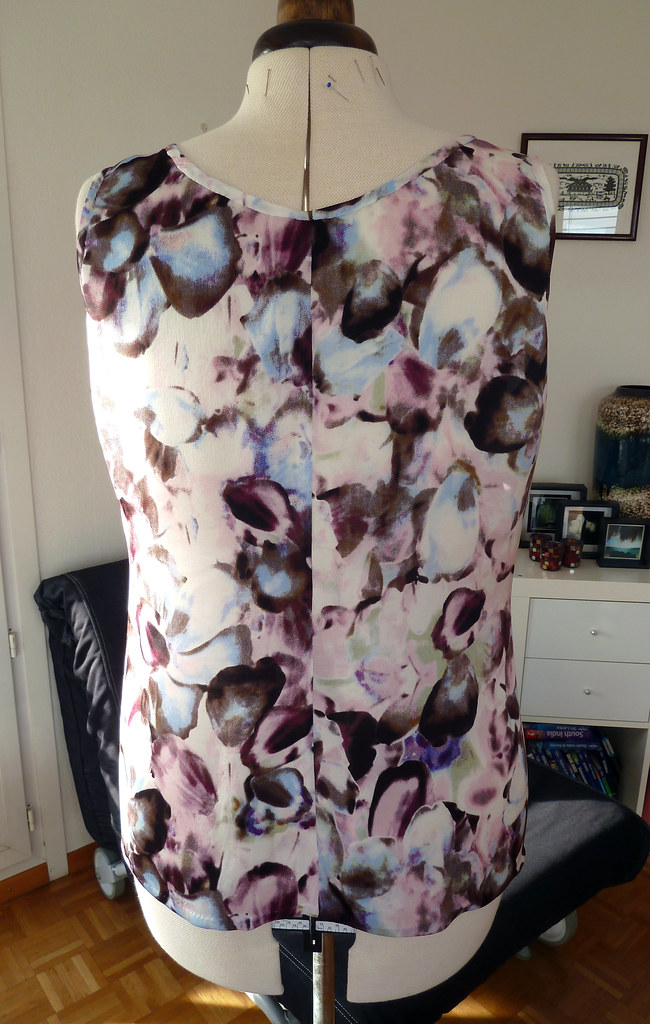
A silk Sorbetto

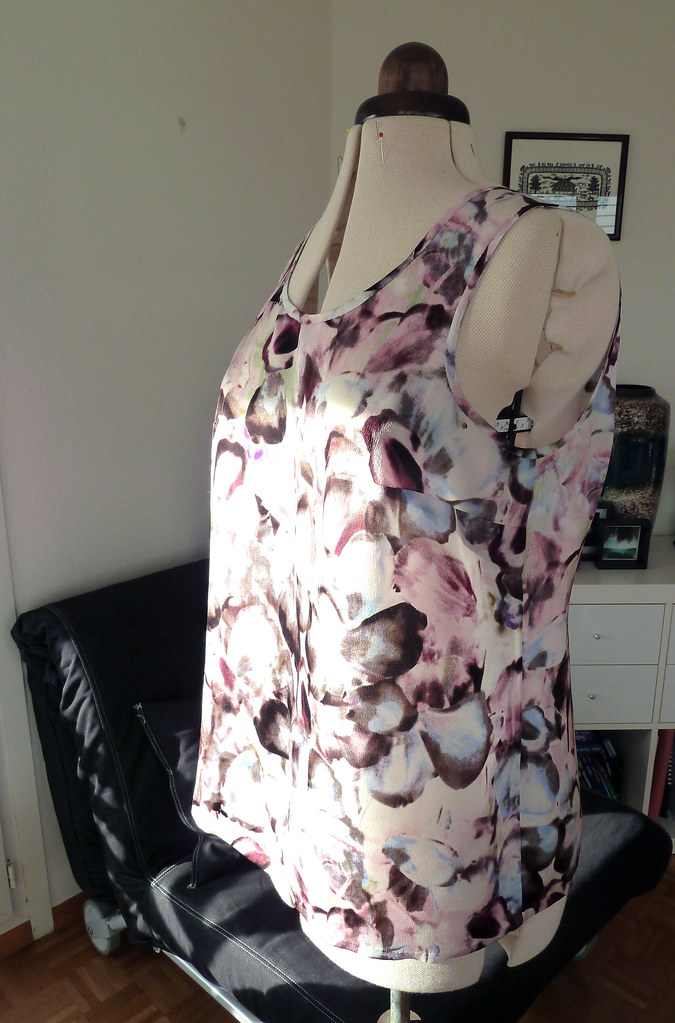
Yet another Sorbetto variation for me (See my previous versions here, here and here), made before the previous peplum top, but I'm very behind with my blogging. This one is back to the original shape, but without the front pleat. I used the fitting refinements at the hip that I made for the V&A Sorbetto, and remembered to finally add the seam allowance on the centre back... I'm not going to do a full on review for this, as I think you must know all my thoughts on the standard Sorbetto by now!

Part of my sewing plan is to make more pretty "going out" tops, so this was made to help fill that hole in my wardrobe. It's turned out to be quite versatile as it's cool enough to wear when it's warm (i.e. when summer returns, or currently in the overheated Swiss winter interiors), but also works for layering when it's cooler.

The fabric is a very lightweight silk crêpe de chine from Fabric.com with a lovely subtle sheen. It's actually slightly sheer, so I tend to wear it with a cami underneath - I didn't want to interline it as I didn't want to lose the fluidity. Although a little fiddly to sew as it's slightly "bouncy", because of the crêpe texture it's not too slippery, and it presses beautifully. (As an aside, I'm really quite hacked off with Fabric.com lately - has anyone else had problems with them? They used to be excellent, but now everything is so slow, and half the order has gone out of stock by the time they send it... Ah, I will save a whole post to rant I think!)

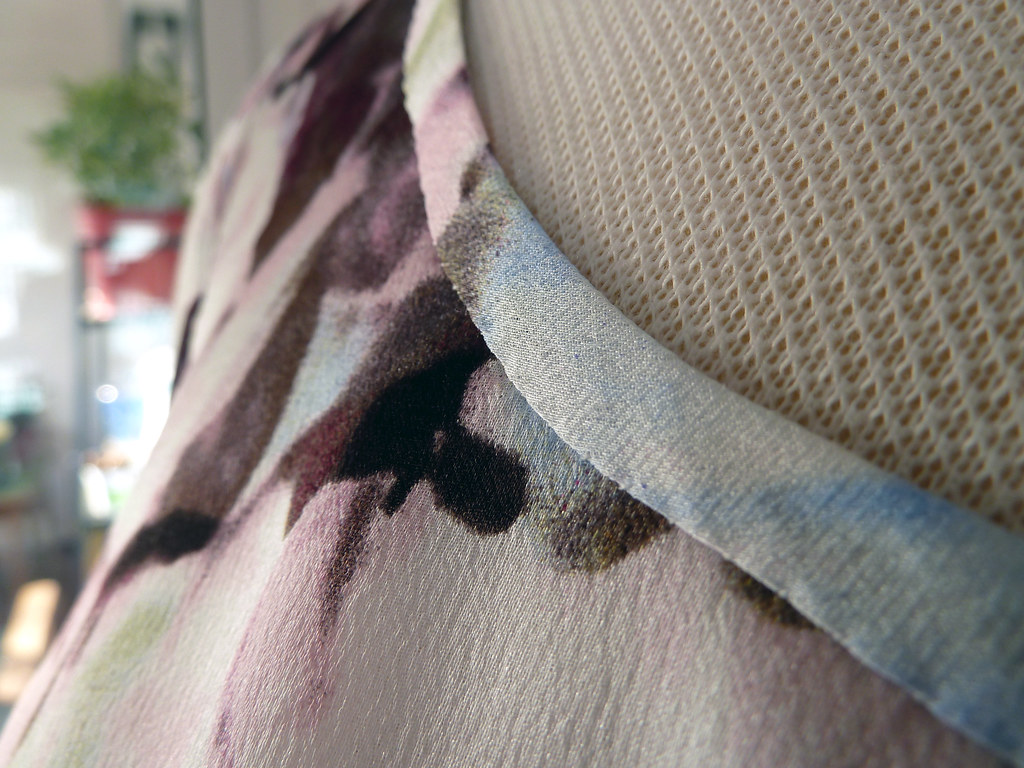
This top is sewn with French seams, and the neckline and arms are finished with bias strips. I missed off the side slits at the hip as I couldn't work out how to do them with French seams, but it would have actually benefited from having them. If you follow me on Twitter, you will already know that the binding was... fiddly. I wanted it fairly narrow, so I cut it 2cm wide: 1cm plus 2 x 5mm seam allowance. However, it didn't occur to me that the crêpe would be very very very stretchy on the bias, meaning it became very narrow as I sewed it. Urgh. This meant it was super hard to control when making the first pass to sew the binding to the bodice, and impossible to turn under and press as usual to sew the second pass by machine.

I ended up doing an awful lot of hand basting: sew the first pass by machine, right side of the binding to wrong side of the bodice, stretching slightly but not too much; press the binding away from the bodice; fold the binding to the outside and baste close to the fold; press; fold the edge under and baste; slipstitch down; remove basting; press. I didn't take any photos of this process. I was too busy swearing. At least the benefit of doing so much handsewing meant I could sit at the dining table and watch Masterchef whilst I did it...

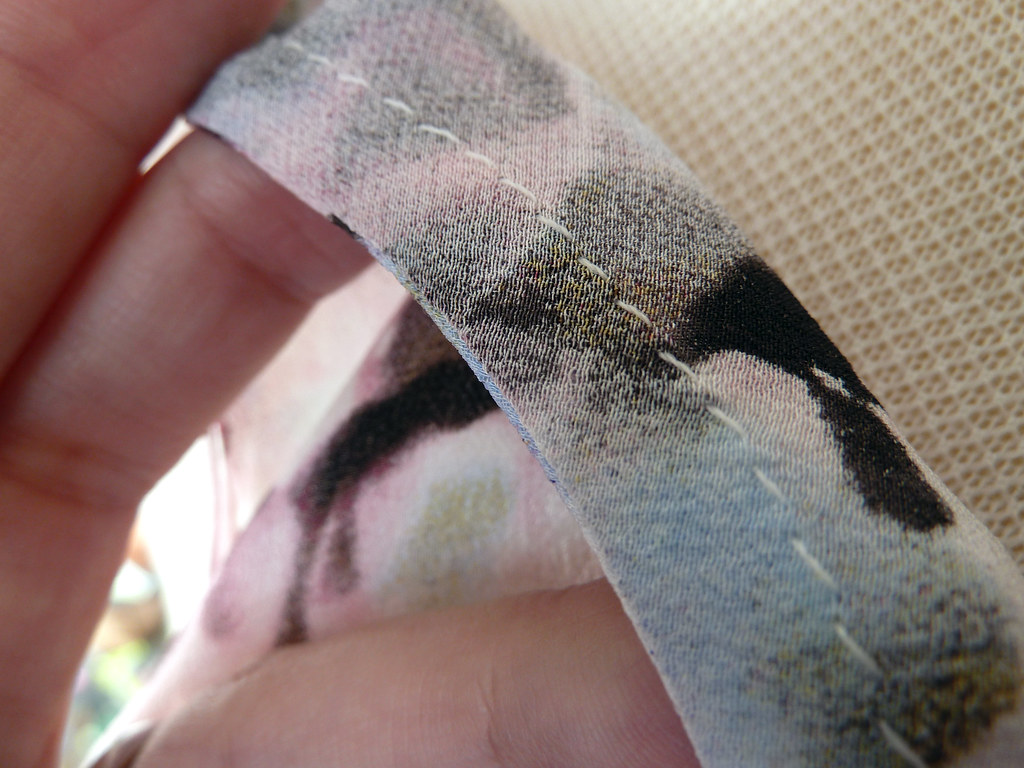
The hem was also sewn by hand: pin up about 7mm; press, removing pins as you go; fold up again to enclose the raw edge and baste; press lightly; slipstich the hem, picking up only a couple of threads on the bodice each time; remove basting; press. I'm actually quite glad I ended up finishing it by hand, as it's pretty invisible so gives a very clean finish.

I used a couple of new techniques with this top. The first was using the walking foot for my machine. For the rest of the sewing I used the teflon foot, but when I was staystitching the neck and arms, I just couldn't get the tension and feed right when sewing a single layer and the fabric was just puckering up. The walking foot stopped this completely, but I think next time I will try using tissue paper to stabilise it whilst sewing, as I found the fabric very difficult to control with the walking foot, especially when sewing curves. Those who use them regularly: is this something inherent to walking feet, or is this just something I will improve at with practice?

The second new thing was a revelation. Normally when basting, I use cotton basting thread as it's super cheap, and breaks easily which is useful when removing it. However, it's also quite thick, so there's a limit to the smallness of the needle you can use before it is impossible to thread. Here, I wanted to use a fine needle with the delicate fabric, so I dug out the silk thread I'd bought ages ago for basting (partly after seeing that it is all Melissa uses), but had never used (mainly as it seemed very expensive to "waste" on basting). My goodness, I don't think I'll go back to cotton! It's so much smoother to use - none of the catchiness when pulling it through or removing it. Now I just need to find a reasonably priced source to buy more.

This top is definitely a success. It's super comfy to wear but also very pretty - it's had several outings already! I just need to remember to take some photos of me wearing it...

Tuesday, 1 January 2013

Happy New Year!

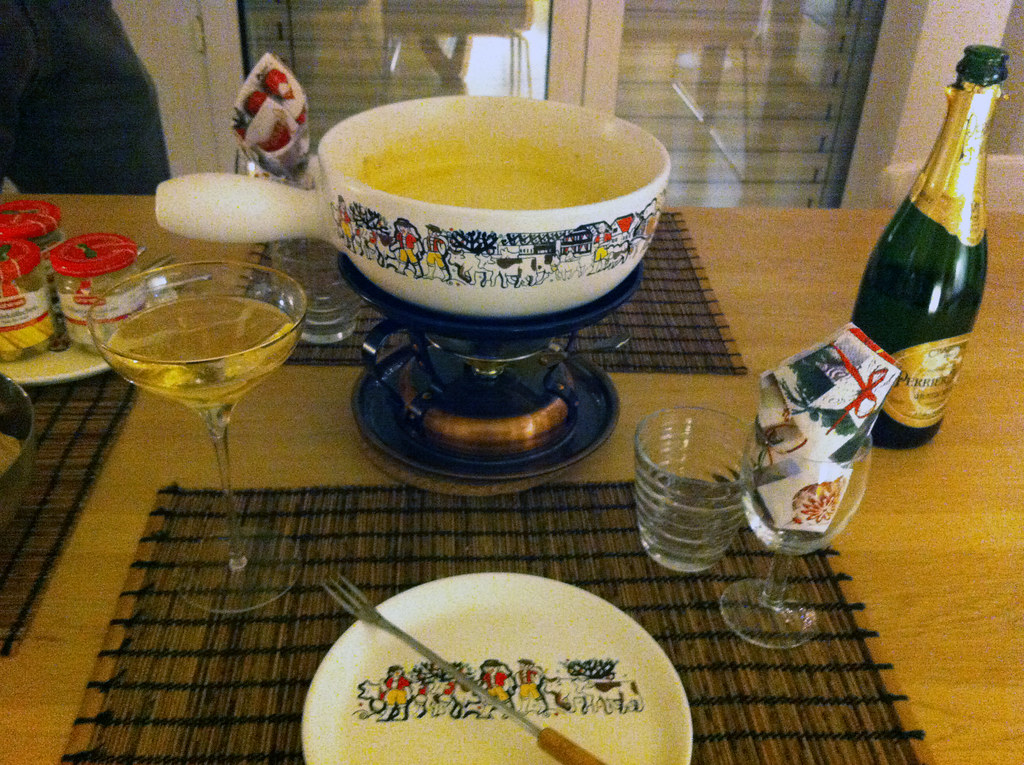
So, I hope everyone had a wonderful holiday period, and you didn't have too much of a headache this morning. What did I do for New Year? I made a fondue and then went out into town for midnight - there was a big funfair at Plainpalais and soundstages and bars set up in the street. It was pretty fun and rather un-Swiss! Fireworks at midnight were provided by crazy Genevois. In the street.

Anyway, here's my obligatory sewing review of the year. Nothing as deep here as you might find on other blogs, but it's helpful for me to see all this in one place.

What I've made this year

What I've learned this year

  • If I'm having "sewist's block" I need to just push through and do something, otherwise I can go months at at time faffing about what I want/need/can do.
  • It is not a waste of time making myself nice clothes, even if I'm not the weight/shape I want to be.
  • Keeping my sewing room tidy is very important.
  • I need a forward shoulder adjustment.
  • Silk basting thread is my new friend.
  • I need to review my New Year sewing "resolutions" more frequently, so I don't forget about them!

How I've done with my plans for this year

  • Tidy and organise my sewing room. I've actually done quite well with this. Nearly all my fabric has been sorted and folded neatly, my notions and other materials are sorted and stored and I have sorted out and catalogued all my patterns. There's a few things left to find a place for or to complete, and I have bought new ceiling lights but these are yet to put up - but overall the room is much more pleasant and easy to work in.
  • Sew more coordinated garments (in a wardrobe sense). Again, I've done pretty well with this. Many of the items I've made are separates and have slotted into my regular wardrobe very well.
  • Blog once a week. Hmm, this one wasn't so great. I managed reasonably well up until July, but then it was unfortunately rather sparse for several months, partly due to a horrible bout of sinusitis, right in the middle of the summer.
  • Sew one item a fortnight. Well, although I've had big gaps in my productivity, there are 32 items in my list above, so this has technically been achieved!
  • Sew at least one item from each new issue of BWOF. Not done so well with this one - I've actually only sewn five Burda items, and two of those were from a pre-2012 magazine. Oh, and four of the items were wadders. Hmm.
  • Finish up each item before starting the next! Not too bad with this again. There were a few UFOs, but all of these were wadders (or on the path to be wadders), so it would have been unproductive to complete them. Generally though, I've been pretty good about finishing up each project and tidying away all the bits and pieces before starting the next one.
  • Do some non-garment sewing. Nope.
  • Sew a garment for someone else. Do aprons and scarves count?! I'm going to say yes so I can tick this one off. (Although I had been intending this to mean a dress for a friend and a shirt for my husband. Shh.)

What I plan to do in 2013

Several of these are continuations from last year.
  • Blog once a week. This is mainly to keep me motivated to keep making things!
  • Make an item once a fortnight. Fairly self-explanatory.
  • Finish each item before starting something else. I was pretty good with doing this in 2012, so I will keep this up. It definitely contributes to more efficient and satisfying sewing.
  • Take pictures of each garment as soon as it's done, and take more pictures of me wearing my clothes. Looking at my list, I realise how many of the things I made haven't been properly blogged, and this is nearly always because I haven't taken pictures of them yet. I will take more pictures of the things I make, including in progress and me wearing them - not least because this helps with my learning process and evaluation of what I'm doing.
  • Continue sewing mostly wardrobe-builders. Really thinking about how the things I'm sewing will fit into my wardrobe has meant I get much more wear out of the things I make.
  • Make at least one pattern from BurdaStyle magazine each month. Although I made a few garments in 2012, I'm still not making the most of my subscription. There are plenty of patterns I love in Burda, and now I'm getting better at fitting and adjusting patterns, I have no excuse to not make more.
  • Declare a moratorium on pattern buying. With the exception of my Burda subscription, I plan to not buy any more patterns for at least six months (preferably the whole year). When I sorted out my patterns, I realised just how many I have (hint: way too many), so there is unlikely to be a reason to buy new ones for a very long time!
  • Declare a moratorium on fabric buying too. I have a feeling this one will be much harder to stick to, as although I nearly always buy fabric with a planned garment in mind, I am very good at coming up with a planned garment for most fabrics... I have a pretty good variety of most fabrics in my stash, so unless there is something that is absolutely vital to a make, I will attempt to talk myself down from fabric purchases.
  • Get back into swimming regularly. Whilst this isn't obviously sewing related, I want to get back into some semblance of "shape", partly for my own health, and (more relevant here) partly so that I can make even nicer clothes even more flattering for me.
  • Non-garment sewing. There are too many things on this list that have been on the back burner for months, if not years. 2013 will be when I tick some of them off.
  • Sew for others. I would like to make my husband a shirt, and would also like to try my hand at sewing a dress on commission for someone else (someone patient).
  • Complete the finishing touches in the sewing room. There's just a few niggling things that need to be done, after which the room will be pretty much complete: move a filing cabinet and replace it with more drawers, put pictures and a hanging bar on the wall, replace the lights and sort out a couple of remaining boxes that I moved in with (yeah, that was 2 1/2 years ago). I aim to get this done asap (at least by the end of January).
  • Check back on these plans throughout the year. Because I have a terrible memory.

Finally

Look what I got for Christmas from my husband - just what I wanted and needed! (almost as if he had some sort of list of handy hints......)