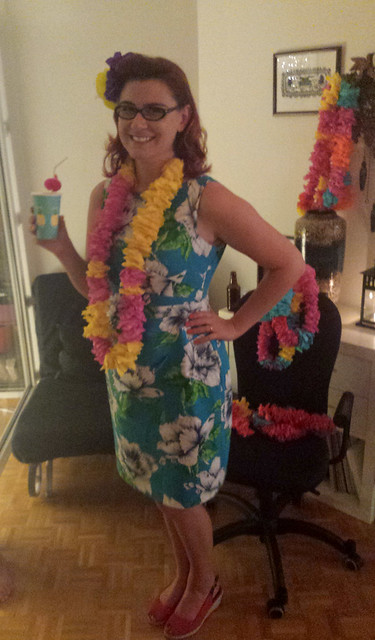
We needed an excuse to tidy our flat, so decided to throw a party! And of course that then gave me an excuse to make a party frock... Given the terrible summer we've had, we went for a tropical theme - so even more excuse for a party frock.
Pattern description
Simplicity 2053 - dress with pleated front bodice and skirt, choice of sleeves and length.Pattern sizing
6-22 (Bust 30.5-44"). After looking at the finished measurements, I cut the 16 at the shoulders, 18 at the waist and 20 at the hips.Fabric used
A linen blend (I think with cotton), underlined with rayon challis.Did it look like the photo/drawing on the pattern envelope when you were done?
Sort of. I made some design changes to the neckline at front and back, but the main difference was the front skirt - I found it super difficult to get the pleats here to lie as nicely as they appeared on Simplicity's sample dresses.Were the instructions easy to follow?
To be honest, I only looked at the instructions for the pleats on the front section (the waist seam on the front is sewn before the pleats are formed, then the side seams are sewn.What did you particularly like or dislike about the pattern?
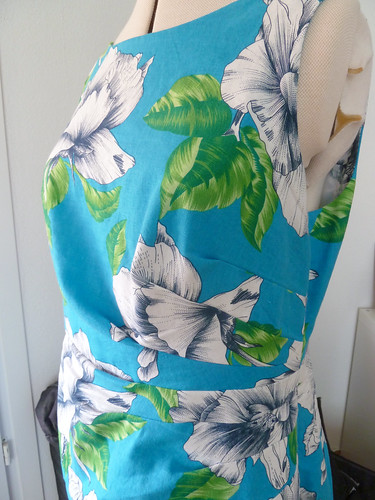
Like: the pleats on the bodice. The drafting of the pleats is generally nice (even if I did have to alter quite a bit to fit them to me).Dislike: the pleats on the skirt. Also the huge amount of ease. The measurements give a whopping 3"/7cm of ease on the bust. Whilst that might be fine on a loose fitting and gently shaped garment, it's totally inappropriate here as a tighter fit is needed to keep the pleats in place. I think that's one reason the skirt pleats don't sit well since I kept the ease in the skirt to give myself some sitting space, but that allows the excess fabric to sag, rather than form nice neat pleats. Heh, neat pleats. The skirt pleats might also sit better in a slightly crisper fabric.
I also think it's madness putting the side zip in the side with all the pleats, as directed - it would be insanely difficult to get a neat insertion. I know the left side is the "proper" side for a dress zip, but if Simplicity desperately wanted to keep that, wouldn't it make sense to draft the pattern with the pleats on the right?
Pattern alterations or any design changes you made
I wanted a sleeveless dress, but with two straps (so I didn't have to wear a strapless bra), so I traced the bodice for the version with sleeves, but traced the armscye from the asymmetric sleeveless version onto both sides (mirrored obviously!). I also lowered the back neckline significantly to provide interest on the back and moved the zip to the centre back as I find these easier to get in and out of.I pegged the skirt 6cm total, and increased the length of the back slit about an inch, as I felt it looked a bit stubby as drafted.
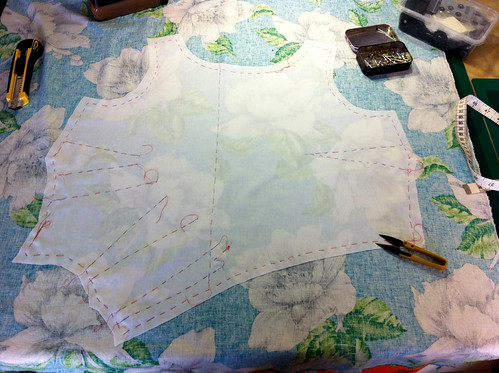
Hmm, the fitting was a little bit involved... Given the darts are all rotated into the pleats, I couldn't just do a standard FBA on the bodice - and I also didn't know how much the pleats would affect the fit. So... I made a muslin version of the unaltered pattern piece (unaltered for fit, it had my design changes), then figured out how much I needed to add in length and width by snipping into it and pinning extra fabric as required. Not the easiest thing to be doing to yourself, but I somehow managed not to chop up my bra or give myself any impromptu surgery...
Once I had my bodice fitting approximately how I wanted it, I unpicked the seams, laid it on my sewing table, and...

Yeah, it wasn't so easy to transfer the changes to the flat pattern - as I'd been doing the fitting on myself, it hadn't been possible to always cut and pin in a way that could be unfolded so I couldn't lay it out completely flat. After a little while staring blankly at the pattern piece, I went and had a cup of tea to contemplate what to do.
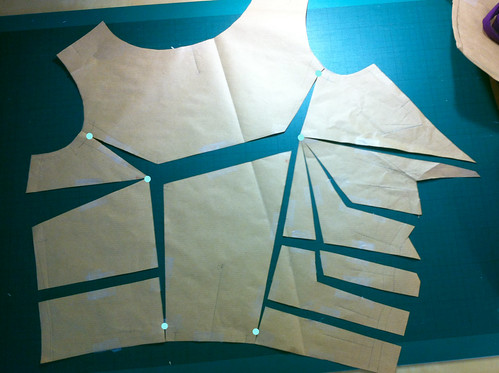
I decided to use the modified muslin piece as a guide for doing an FBA on the paper pattern piece. I could see how much length I'd needed to add at the bust point, and also how much width I'd needed to add on the plain (right-hand) side so did this as normal, adding a dart from the side seam (I wanted this as it would reduce the amount needed to add to the pleats and keep the dress closer fitting). For the left-hand side, I drew in approximate equivalent FBA lines (I'd marked bust points on the muslin), splitting the vertical length added between the pleats, and spreading the width the same as for the normal side.
Here is the unaltered pattern piece with the slash lines marked. There is extra width at the waist on the pleat side as the paper was difficult to fold and true so I did this on the muslin. The pale blue lines are the pleat fold lines and the other colours mark the equivalent cuts in each side.
After spreading it, I got this. The blobs are the hinge points - note that I made this alteration on a pattern piece with seam allowances, so the hinge points are on the seam lines, not the edge of the pattern piece.
After cutting this new pattern from muslin, I arranged the pleats approximately on Wilma, then adjusted the fit on me. My bodged FBA actually worked quite well, although I needed to take out a little width on the pleat side.
Other than this, I shortened the back piece, and took a small wedge out of each side of the back neckline after lowering it to stop it gaping. The skirt only needed minor changes, and a slight rearrangement of the pleats. I also took out about 1.5cm of length in the bodice - this put the waistline seam at the perfect place in the muslin, but I must have done something weird as this turned out to be a problem in the final version.
Construction details
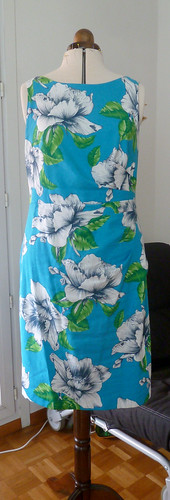
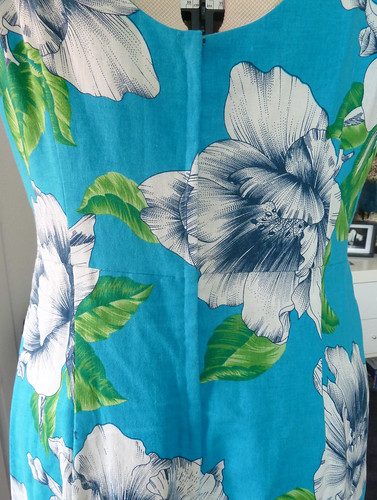
The linen blend fabric is fairly loosely woven and lightweight, so I chose to underline with rayon challis to provide some structure and opacity whilst keeping the softness and drape of the linen. A cotton batiste or lawn might have been a better choice as the rayon has the same tendency as the linen to "grow" slightly when worn (although that made for a super comfortable dress). I cut the underlining first and put the markings on this, then used these pieces to cut the linen, which meant I could be careful with the pattern placement. I started off hand basting the markings and the edge, but after spending ages doing this on the first piece I realised I'd moved the underlining slightly whilst straightening it so had moved from where I wanted the pattern placement to be. ARGH. After that I hand basted the markings but machine basted the edges (having learnt from the yellow dress to make sure to keep these within the seam allowances so I didn't have to pick everything out...)As for pattern placement, I managed to avoid bullseye flowers on boobs or butt! There's a bit of a crotch flower happening on the front skirt, but it's not so bad with all the pleats there. I also managed to match across the zip, and mostly match across the waistline seam.
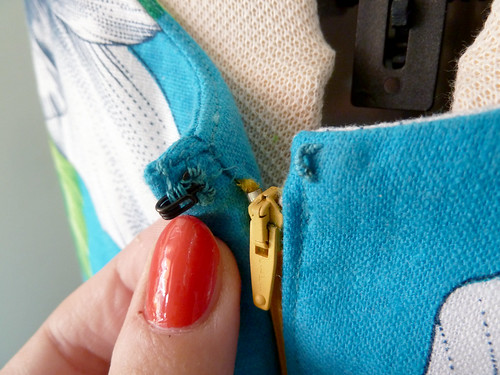
All the seams were sewn on the regular machine and then pinked to reduce bulk. These pinked seam allowances could do with being slip/catch stitched to the underlining, but I only did that along the CB zip and vent seams, and will come back to that for the rest of them. The zip was machine sewn on the underlap side and hand picked on the overlap side as I couldn't find a perfect thread colour match. I couldn't find a good colour match for the zip either so I went with a contrast zip (plus I'll go for the opportunity to use yellow wherever I can!). I finished it with a hook and thread loop at the top.
I went for a combined facing to finish the armscyes and neckline. Because the straps are quite narrow I didn't use the burrito machine method as I wouldn't be able to pull the dress through the straps. So I sewed the shoulders last and finished the facing shoulder seams by hand. The facing is under-stitched, and catch-stitched to the underlining.
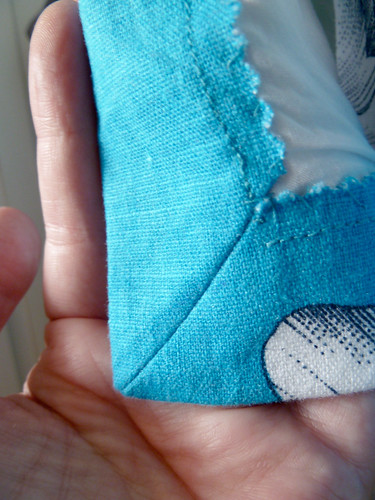
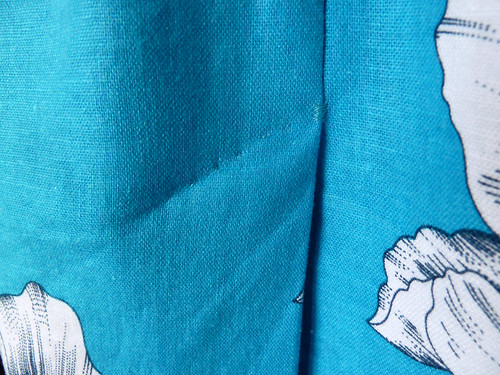
I mitred the corner of the vent overlap and hem, and did the stitching along the top of the event by hand pick-stitches to avoid visible stitching again.
Unfortunately, I didn't try on the final dress until after basically finishing the whole thing and trimming the seam allowances, assuming the fit would be mostly similar to the muslin. Oops. The shoulder straps were too short, the waistline was waaaaay too high, meaning the fit of the skirt (especially at the back) was completely off), and the bodice was too tight on the upper half. ARGH AGAIN. I had a little cry, had another cup of tea, then took a deep breath and channelled Tim Gunn. I didn't want to waste the fabric, and the basic idea of the dress was fine, so I figured I'd try to make alterations.
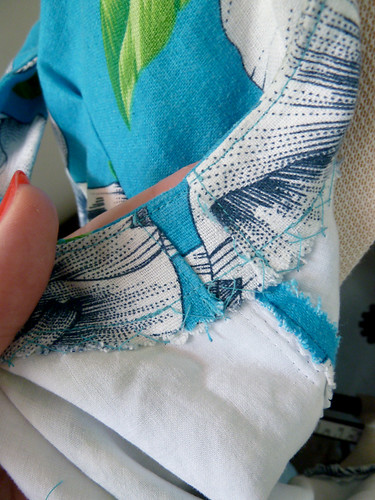
To add some breathing space in the bodice I let it out at the side seams from underarm to about halfway to the waist, slightly more in the back than the front. This left me with teeny tiny seam allowances, hopefully they won't entirely disintegrate over time. I'd trimmed the seam allowances of the facing narrower than the bodice pieces, so I patched in a spare bit of fabric. Not super pretty, but it's on the inside.
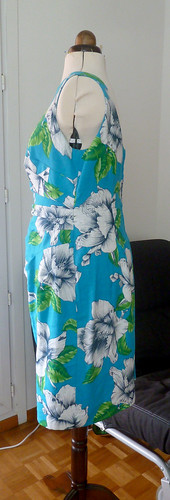
Because of the way I'd finished and trimmed the shoulder seams, I couldn't let these out, so I lowered the front neckline about 1cm at the front. This meant trimming through some of my stay-stitching, fingers crossed the seam stitching and under-stitching here will prevent it from stretching too much. I also couldn't lengthen the bodice as the pleats go over the waist seam, plus the zip was already in, so I just pretended it was always meant to be slightly high-waisted/empire line, and adjusted the darts in the back skirt to shape it properly at the natural back waist. It's really annoying that these alterations meant the dress isn't as perfect as I wanted, but at least it was wearable!
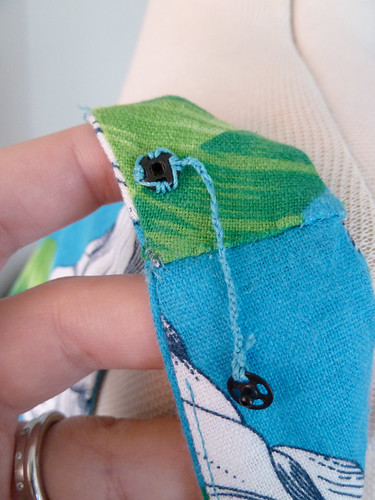
The slight tightness in the upper bodice meant that my bra straps showed a bit, so I also added thread chain lingerie holders, which worked well.
Would you sew it again? Would you recommend it to others?
I might use the bodice again (after adding back in the length...), but will either take out most of the pleats in the skirt or draft a new front piece. I would recommend it to others, but just pay attention to the printed final garment measurements when picking your size, and make a muslin to check the fit.Conclusion
Despite the mess up with fitting, I wore this dress for the party and it was actually really comfortable - the fabric relaxed slightly during wearing, and is also super soft (the photos here were taken after wearing, hence a few wrinkles - I did iron it before taking the photos, but apparently not terribly well). I think I will take apart the front of the skirt and redo the pleats - either stitching them down more, or rotating some of them out, as it's pretty poochy across my belly as it is. The party, however, was super fun, there was lots of food and drink, and colourful decorations. Oh, and piña colada cupcakes...Cheers! (Yes, that is a straw with a flamingo on it).






What a great dress (and a great party theme!). I love the print and the fit is really nice. I am highly impressed by your dedication to the FBA. All that hinging and spreading looks painful.
ReplyDeleteThanks Trena! The party was really fun, and worth all the time and effort that I put into the prep (I made twenty crepe paper leis, amongst other things....). The FBA was a necessity if I was going to use this pattern, but wasn't actually too bad once I figured out what on earth I was doing!
DeleteLooks like a fantastic party! Your dress looks fab, you have far more patience than me - I would have chucked it in the corner and given up!!
ReplyDelete