Tuesday, 30 April 2013

Me-Made-May '13 sign-up

Hooray! Once again it's that time of year! Zoe has launched the Me-Made-Month - and this year it is May.

I actually only spotted it last week after returning from holiday, so I haven't had a lot of time to plan or consider my pledge, or to inventory my me-mades in order to make it a bit easier during the month. (Yes, I know there's no planning or panic sewing required, but I like to be organised!) There's a few things I want to achieve with this month, but I'm going away again on Thursday for a week and a bit, so I need to factor that in as I won't be able to wash and repeat so easily! I think this will actually be quite useful though, as it will be handy as a measure of how versatile my me-made wardrobe actually is.

So, without further ado, here is my pledge and corollaries:

I, Dilly of Dibulous, sign up as a participant of Me-Made-May '13. I endeavour to wear at least one me-made item (clothing or accessory) each day for the duration of May and June 2013, starting from 12 May.

  • I will be away from 2 May and only return home on 11 May. During this period I will endeavour to wear a me-made item as often as possible. This is unlikely to be every day...
  • Because I'm starting later, I've decided to extend this into June.
  • The challenge always highlights any holes in my wardrobe, but this time I want to actively note these and work on filling them. During my me-made-month-and-a-half, I will make at least two items from the following list: a pair of casual trousers, a pair of shorts, a new denim skirt, a cardigan or sweater, a pretty/interesting jersey top, a casual summer jacket.

Hopefully see some of you there!

Tuesday, 23 April 2013

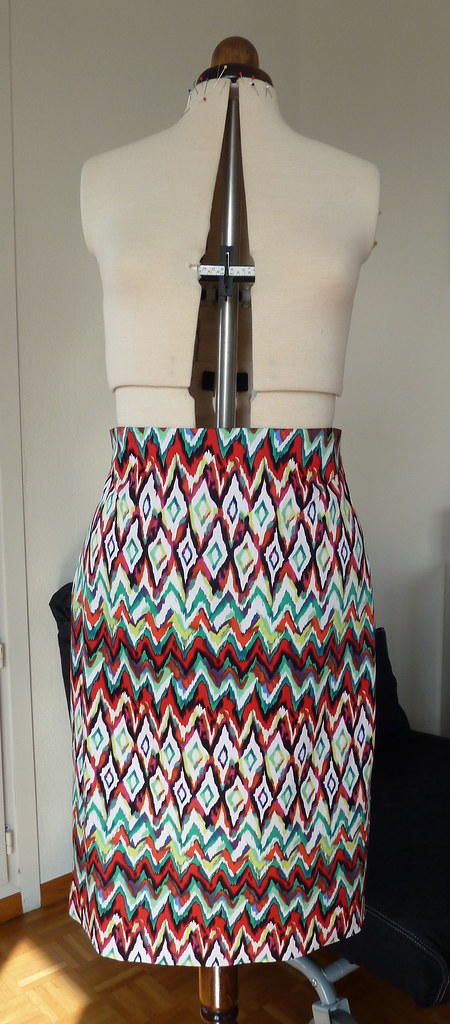
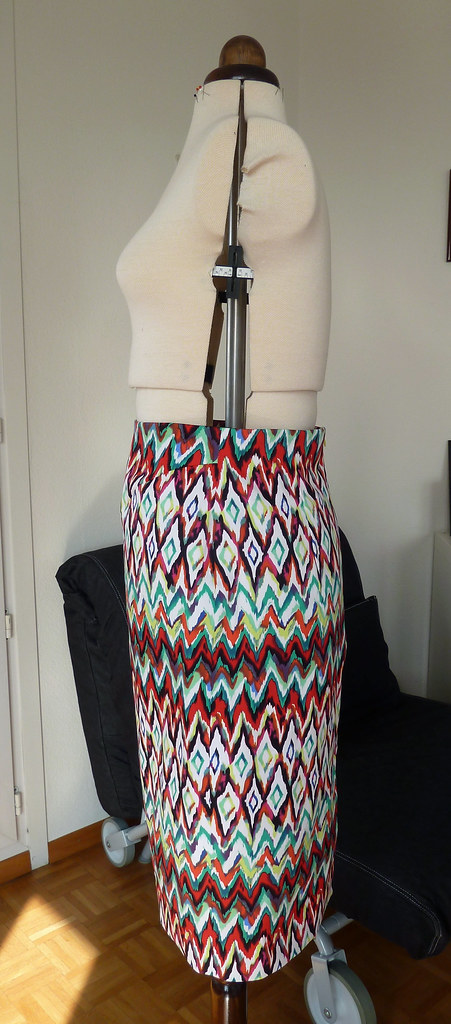
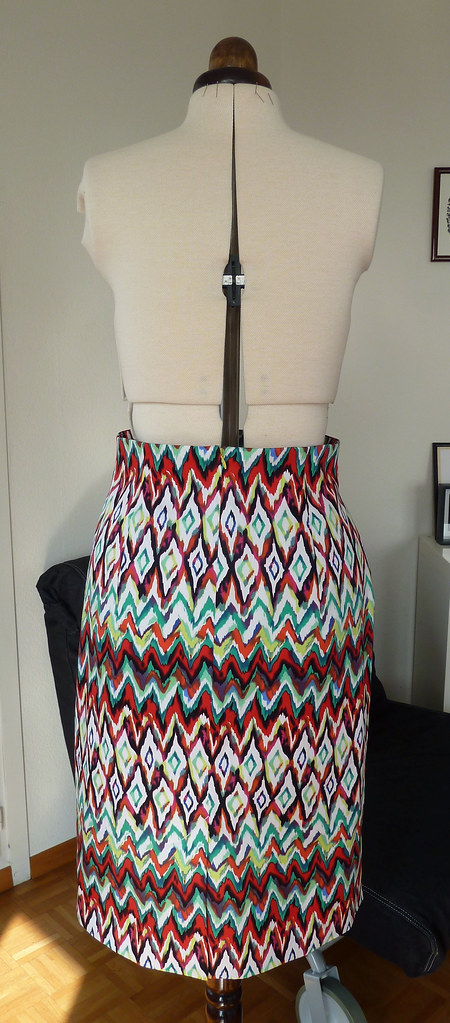
A slightly crazy skirt

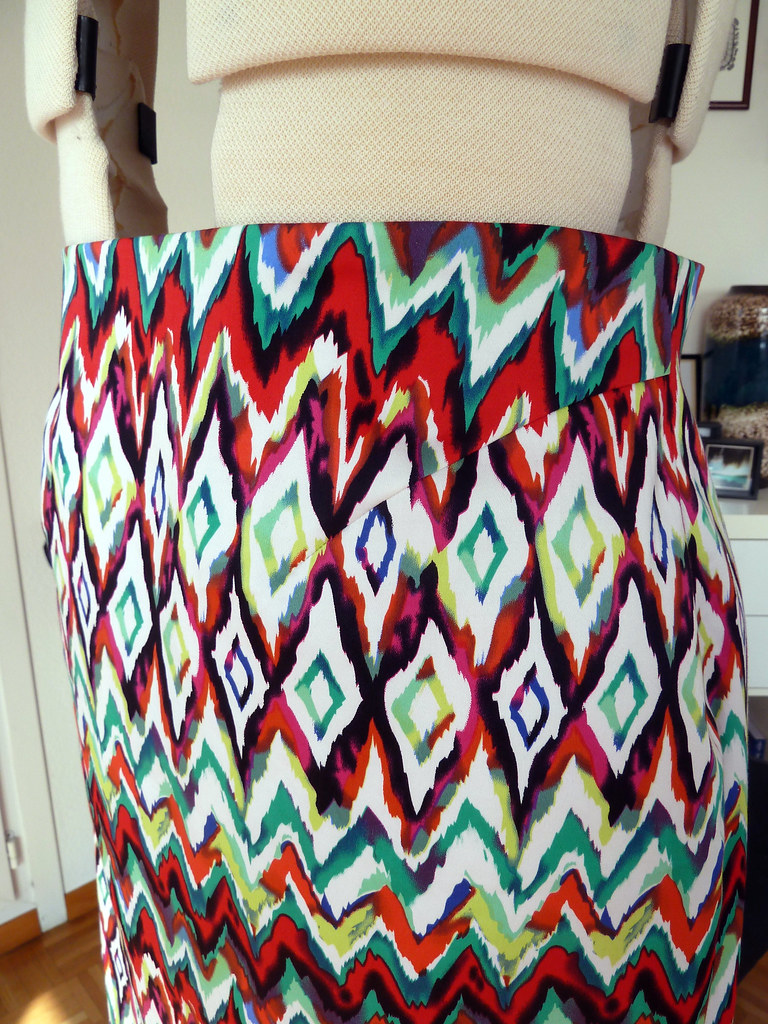
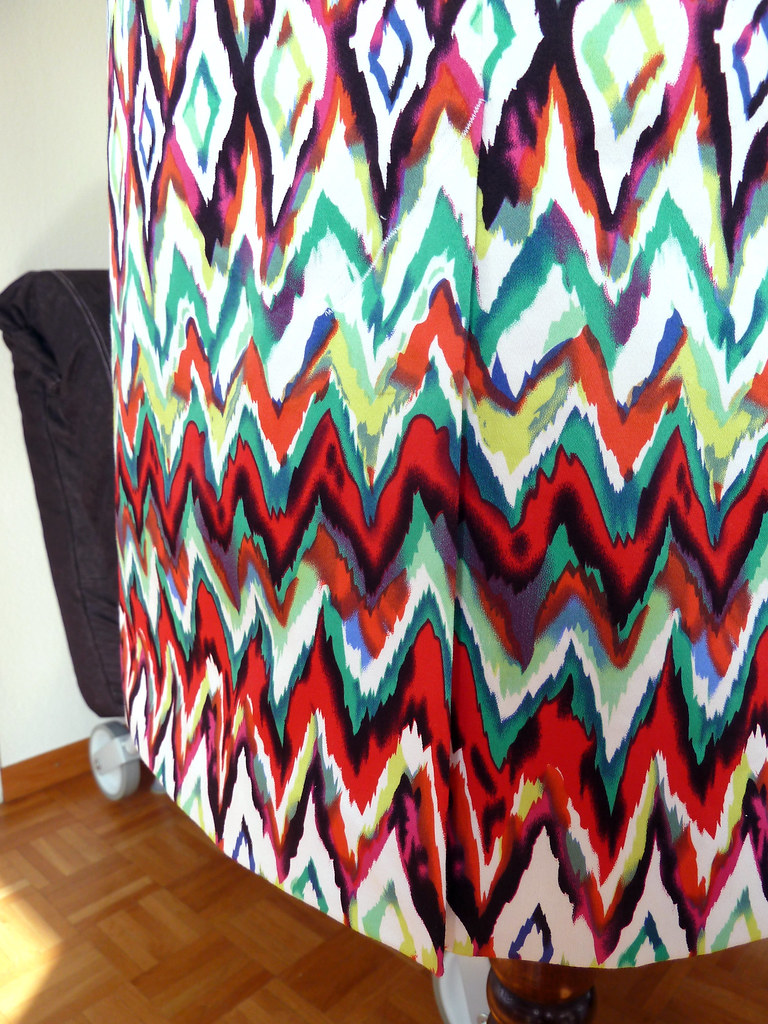
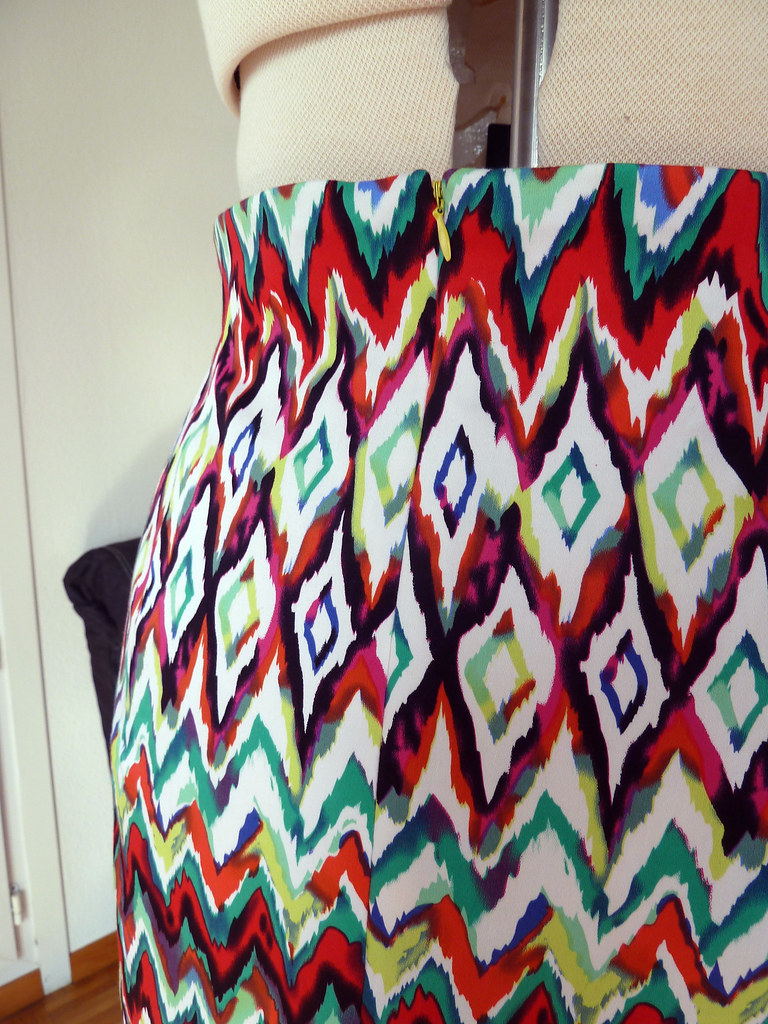
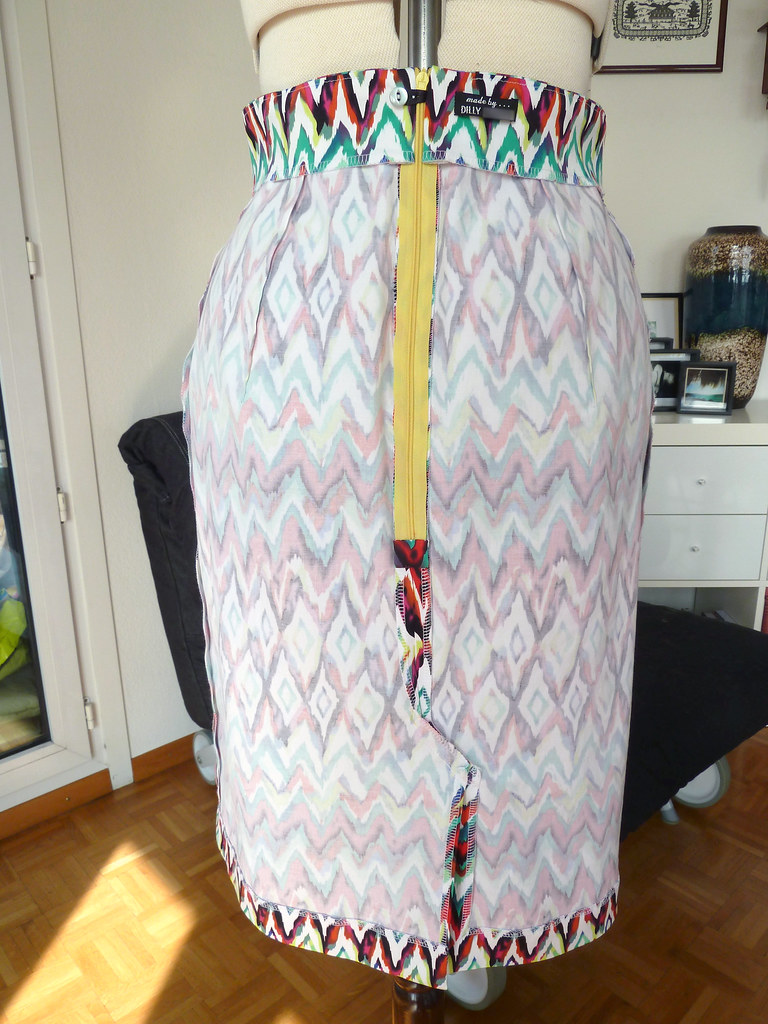
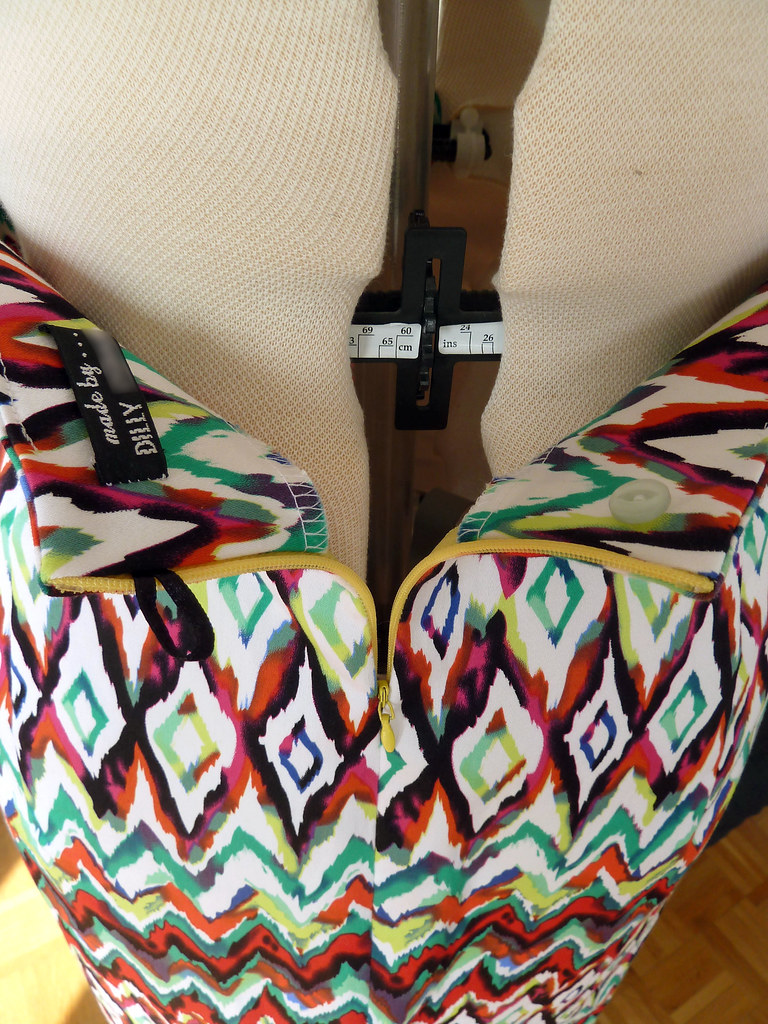
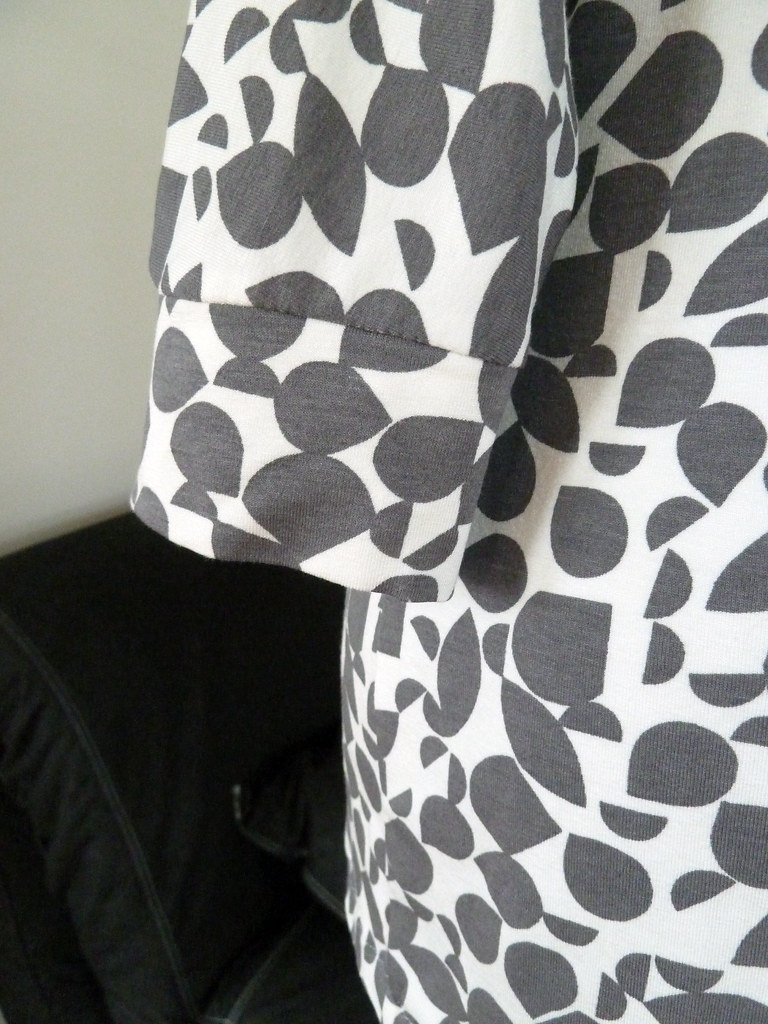
I had a half day of spare time before I left to go on holiday, and decided to make something fun to wear when I got back. Separates are always handy, and I've been wanting to try this pattern for ages. It was super quick to make - I did the whole thing (tracing, cutting and sewing) in an afternoon and evening, and if you didn't need to do pattern matching across the seams, it would be even quicker. This is one of my makes for the PR pattern stash contest, but I've realised it could almost be part of the Pantone contest too, as the print contains no less than four of the Pantone spring 2013 colours! (Emerald, Tender Shoots, Monaco Blue and Poppy Red for those interested). I obviously have an eye for forecasting these things... ;)

Pattern description

BurdaStyle magazine 07-2012-120. Pencil skirt with high waist, shaped diagonal front darts and back slit.

Pattern sizing

34-44. I cut the 44.

Fabric used

Stretch cotton sateen from Fabric.com.

Did it look like the photo/drawing on the pattern envelope when you were done?

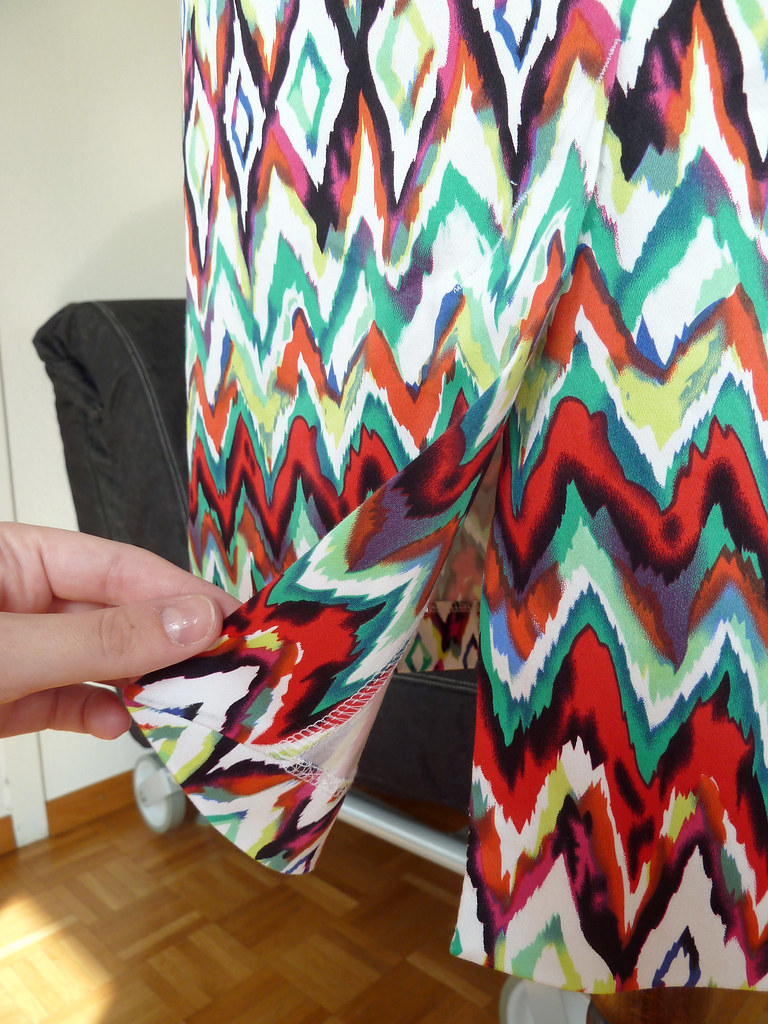
Fairly similar - I converted the back slit into a vent.

Were the instructions easy to follow?

The instructions seemed pretty straightforward, although for most of it I just glanced through as apart from the curved darts it's a fairly basic skirt. One thing to note though: it says at the beginning of the instructions that the skirt sits 5cm below the waist; it does of course mean 5cm above the waist.

What did you particularly like or dislike about the pattern?

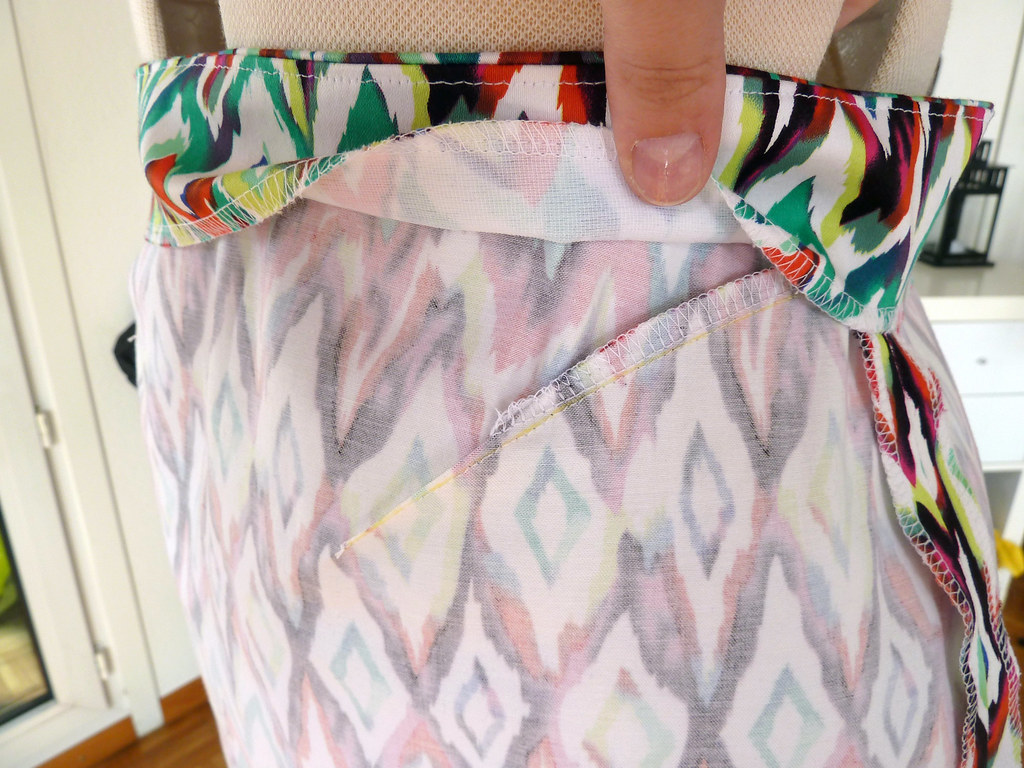
I really like that this skirt is drafted to be pegged at the bottom - it's by a decent amount too, which seems to be pretty rare. I also like the shaping of the waistline. I don't normally go for skirts without a waistband, but this may have converted me!

I'm not entirely convinced about the front shaped darts. I like the feature, but I think I need to adjust the width a bit as they're not completely flattering over my stomach as they are.

Pattern alterations or any design changes you made

Apart from converting the back slit into a vent, I made no other adjustments or changes. This was even the same length as given.

Construction details

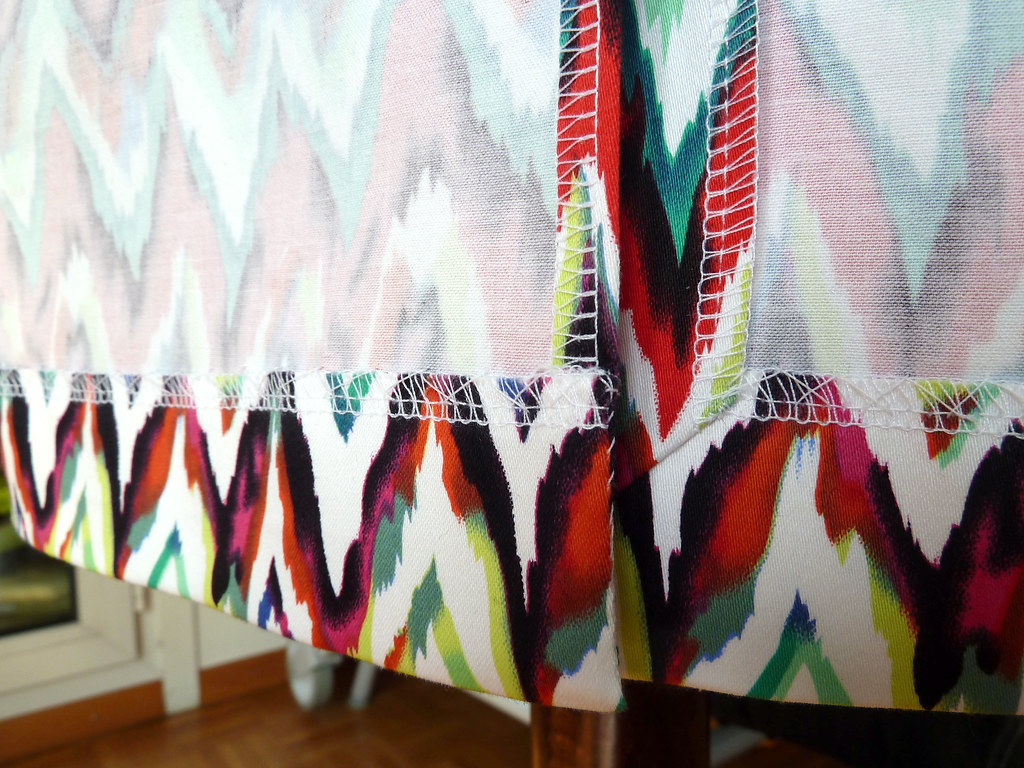
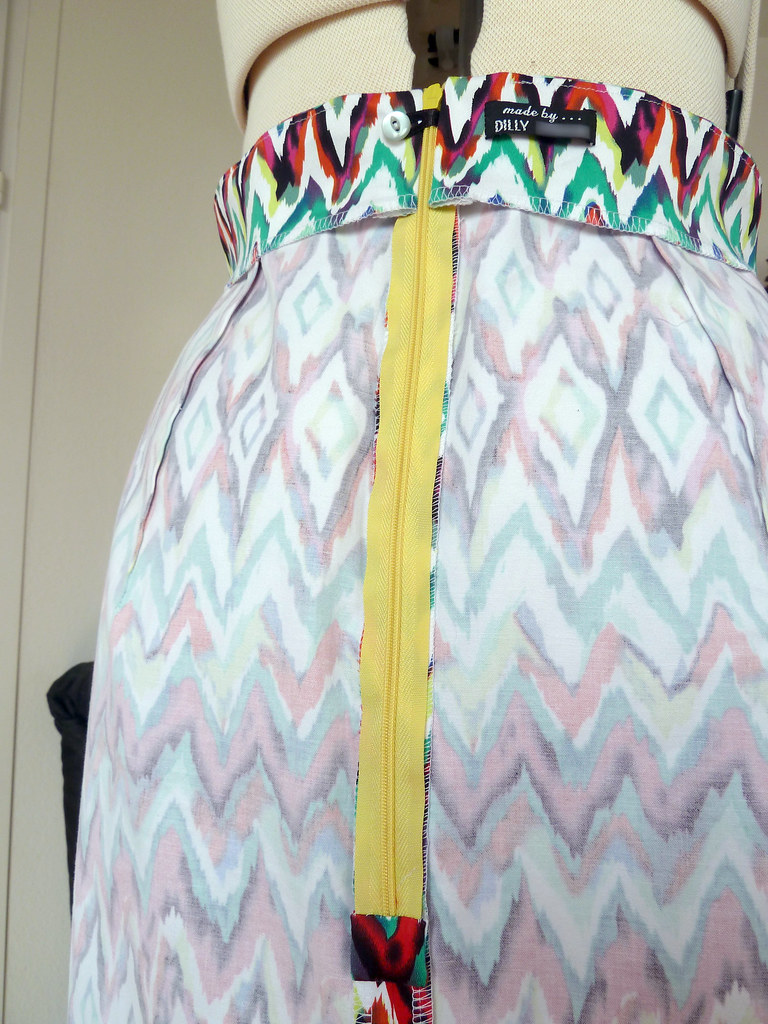
The waistline facing pieces were interfaced with fusible tricot to provide stability but maintain the stretch, and the zip opening reinforced with straight grain tape to ensure it didn't stretch out. I serged the edges of the pieces (apart from the enclosed seams under the facings) and sewed the seams themselves with a very narrow zig-zag stitch on my regular machine.

I always sew my invisible zips after sewing the seam as I've found this pretty much eliminates the bump at the end of the zipper. I use Els's tutorial - her English isn't perfect so the descriptions aren't completely clear, but if you follow along with the photos too it's pretty straightforward.

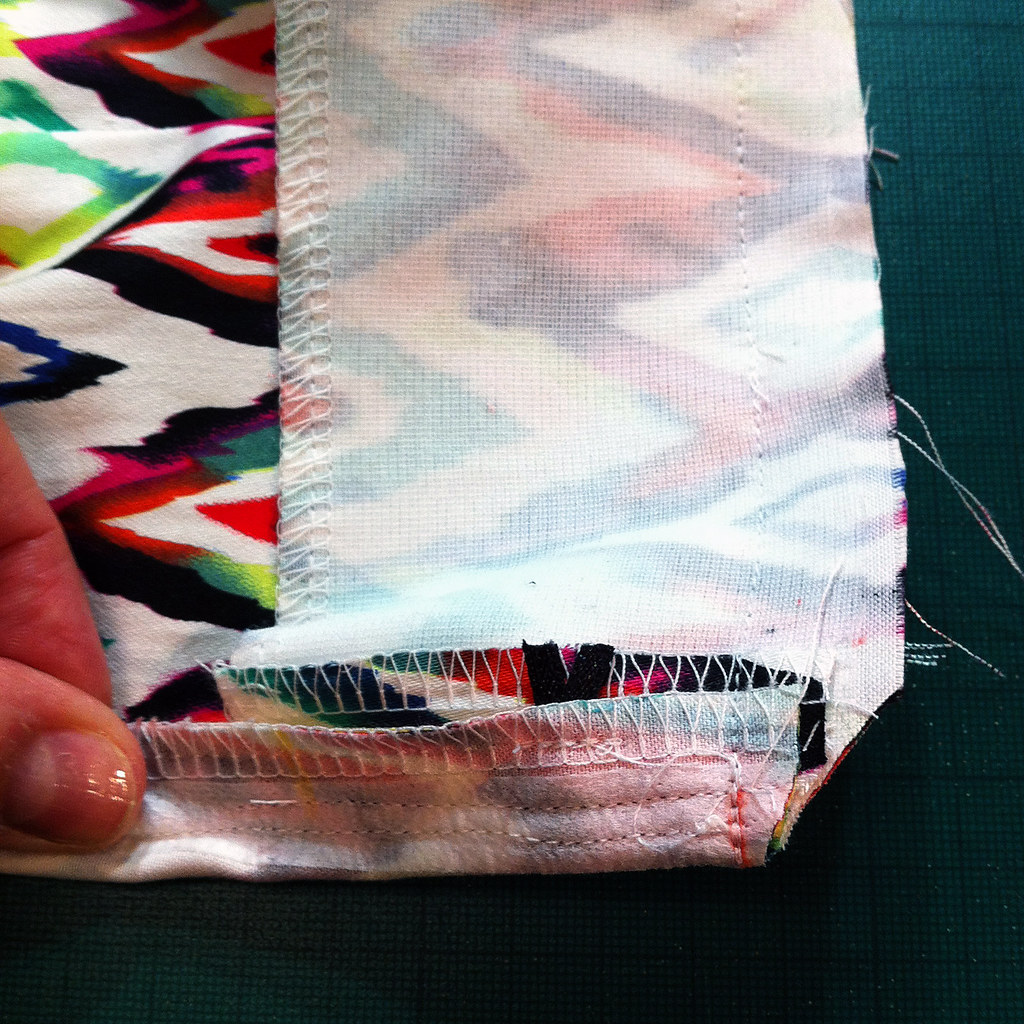
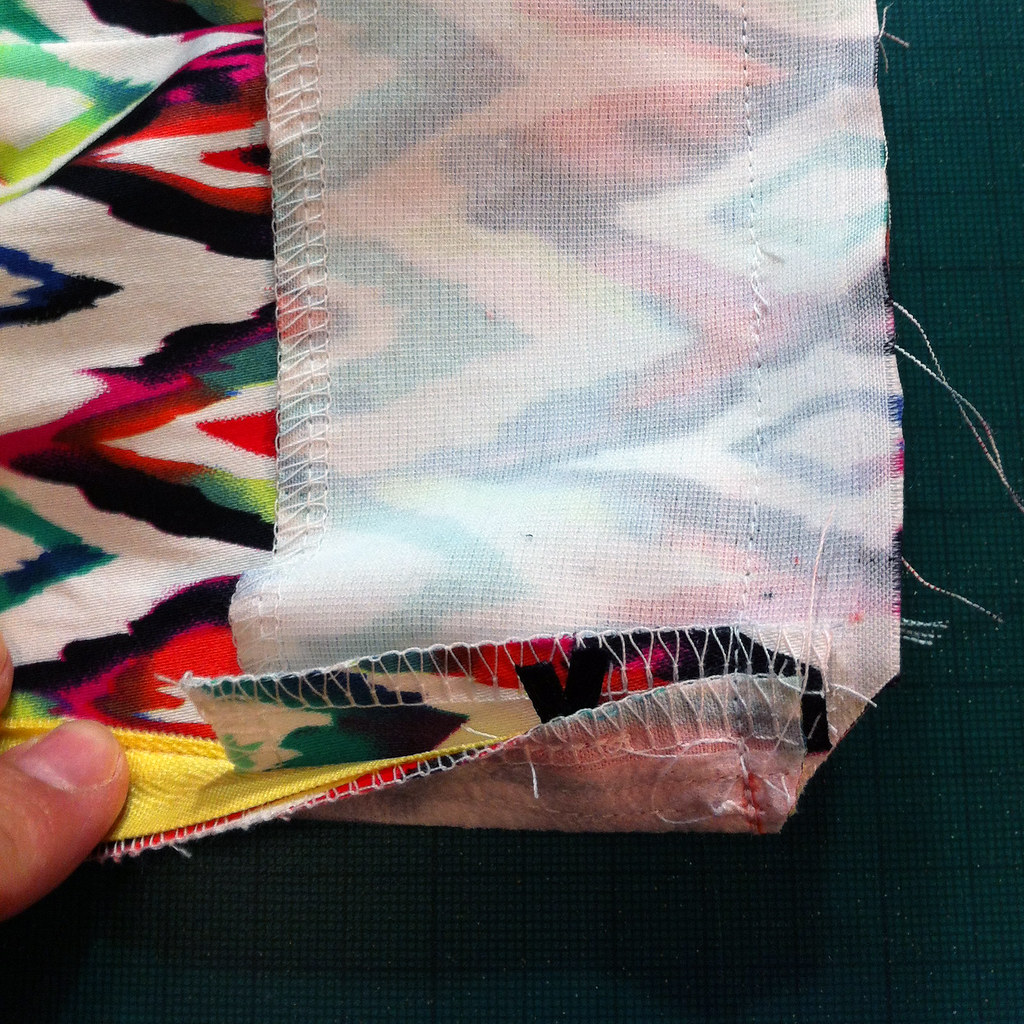
I also used her tutorial for sewing the facing so that it was finished cleanly. Again, this requires a couple of reads through, but is fairly straightforward once you've worked it out, and also provides a neat way to attach a loop for a button, by sandwiching it in the seam with the facing. The only step I needed to fiddle a bit was the step to sew the final few cm of the facing and waistband. It took me a couple of goes to work out the correct way to fold everything so that it turned neatly, but I took the picture below so that I would remember.

You can see the facing on top, with the zipper tape and skirt seam allowance folded back on top of it. Clipping the corner and doing a bit of enthusiastic seam grading meant that the finished result from this configuration was fairly neat. As this skirt is unlined, I covered the end of the zipper with a piece of matching fabric.

Would you sew it again? Would you recommend it to others?

I have plenty of skirt patterns to try out, so I don't know whether I'll sew this again, but it is a very easy but effective pencil skirt, so I would definitely recommend it. If you wanted to make a feature of the curved darts, it would be better in a plain fabric.

Conclusion

Despite its craziness, I really like this print - it was originally purchased for a dress. I still have plenty left over for a dress too, but that really will be quite loud! This was a very quick and satisfying make. I've lost a little weight over the holiday, so trying this on today I realised I need to take it in a little at the side seams, but that shouldn't take too long. It's very comfortable to wear, I just need to work out what to wear it with!

Saturday, 13 April 2013

Seersucker shirt-dress

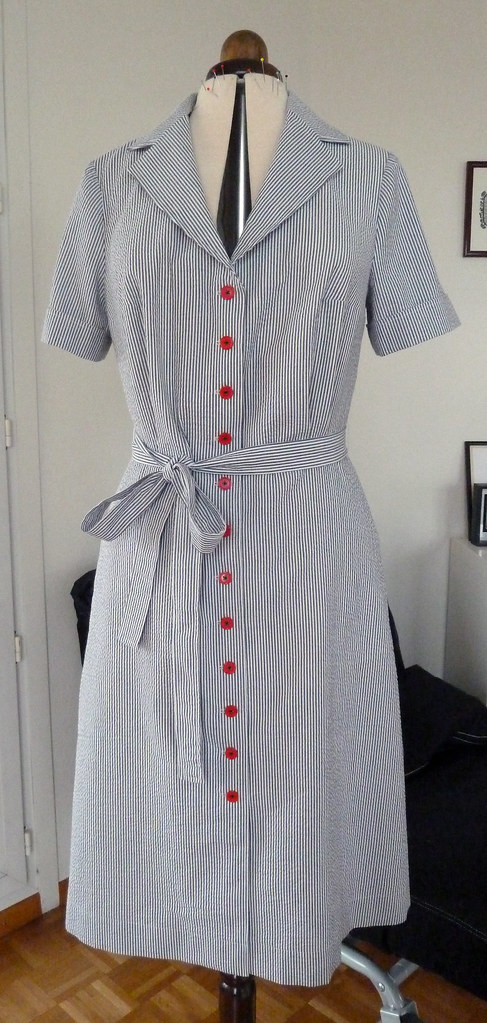
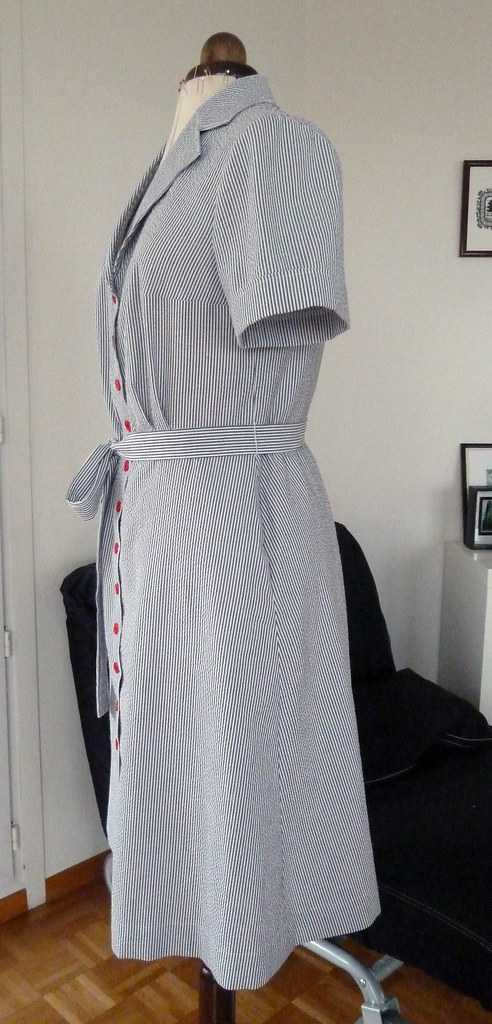
I've been on a kick of summer clothes lately with all the holiday sewing, and something I've been wanting to make for a while is a seersucker shirt-dress - I had a lovely sleeveless one from Monsoon a few years ago, but it never really fit that well (anything RTW button-up is unlikely to fit that well for me, unfortunately), so it went to charity. I have a ton of vintage shirt-dress patterns, but most of these need grading up in size, and I wanted something a bit quicker, so I had a look through my commercial patterns. I settled on BWOF 05/2010/137, as it had pretty much all the features I wanted: wide neckline, A-line skirt with pockets, and short sleeves.

Pattern description

Shirt-waist dress with notched collar and in-seam side pockets.

Pattern sizing

44-52. I cut the 44.

Fabric used

Black and white striped cotton seersucker, with plain white polycotton for the pockets.

Did it look like the photo/drawing on the pattern envelope when you were done?

It looked like the line drawing. Although this dress looks gorgeous in the photo (as do nearly all the plus size dresses in this issue - possibly helped by the gorgeous model!), it's actually quite hard to see details of the fit, especially around the neckline - she has the top few buttons undone. Be warned that in addition to the usual Burda low-ness, the neckline is also very wide.

Were the instructions easy to follow?

I had a couple of issues with the instructions for this dress: the collar and the pockets.

As the instructions have it, the edges of the facings are not properly finished, and there is just a vague mention of "neatening the edges" after the collar is sewn. I finished the edges of the facings before attaching them, and then sewed the collar on with the serger to finish it at the same time. However it's done, the finishing needs to be done before turning the facings and lapels the right way out.

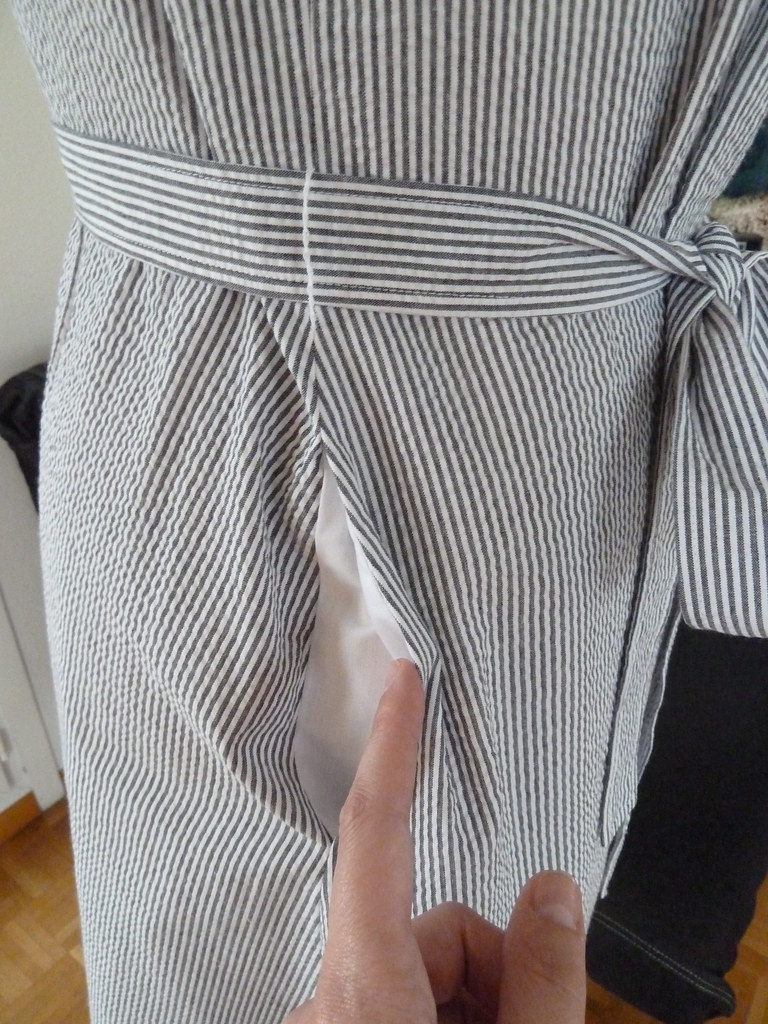
I have to say, I've never come across instructions for attaching the pockets like those given here. Burda instruct you to sew the side seams first, leaving a gap, then sewing the pockets together and somehow fiddling them into place. I ignored Burda, and sewed on the pockets in a more sensible fashion (Sewaholic has a decent tutorial if you haven't come across in-seam pockets before). I also reshaped the pockets so that they were caught in the waist seam to help keep them in place.

What did you particularly like or dislike about the pattern?

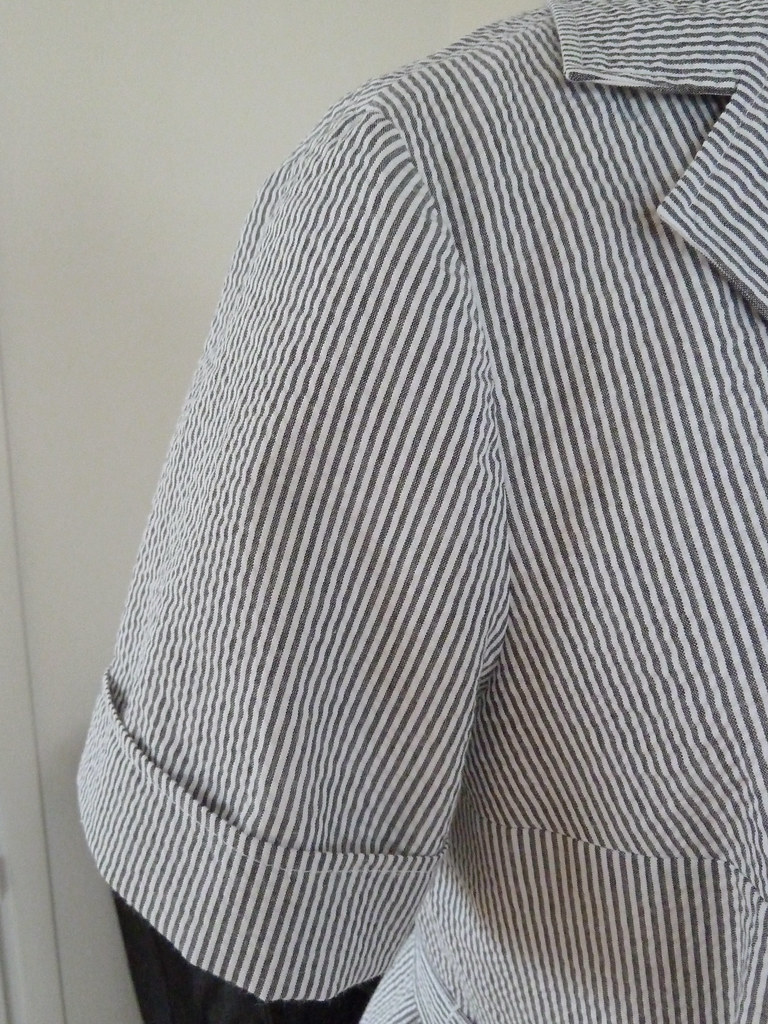
I really like the sleeves on this pattern (after my changes, detailed below), they are probably the best fitting sleeves on anything I've made so far.

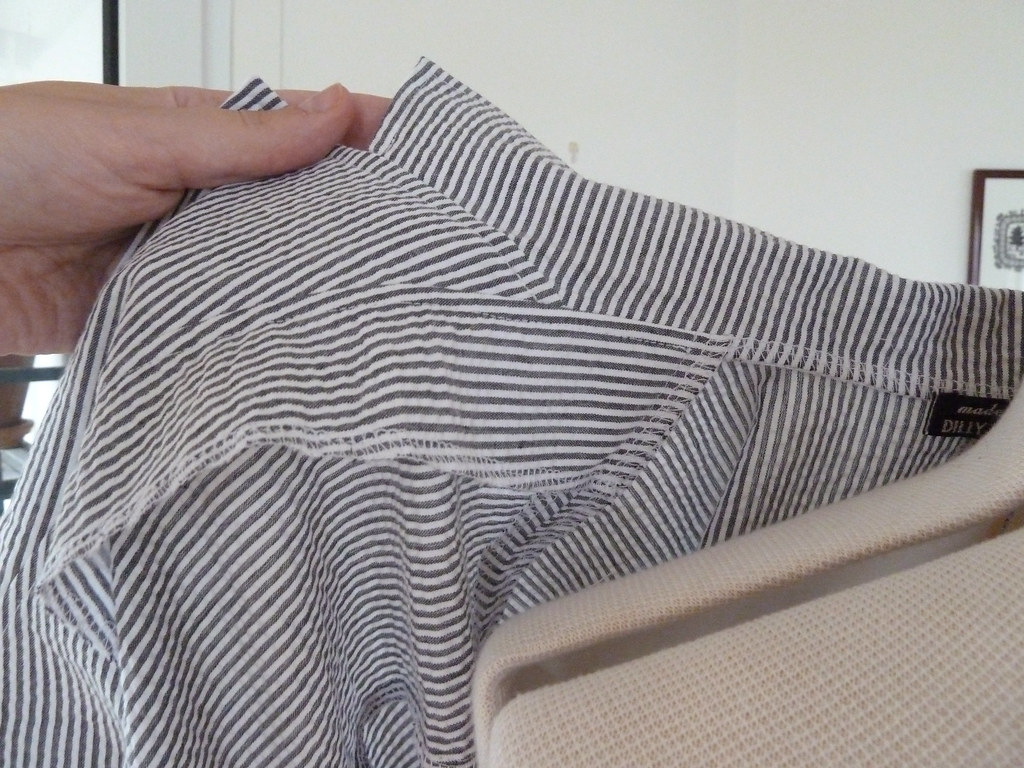
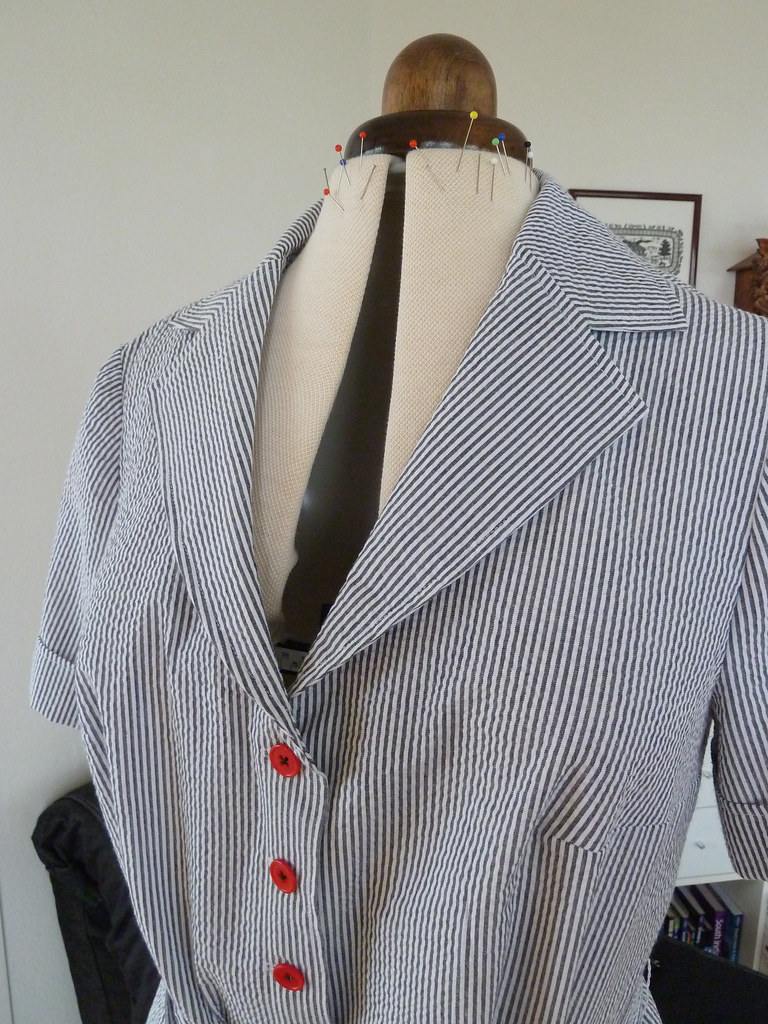
My only real dislike is the very wide neckline combined with a fairly low neckline. Combined with the overly stiff interfacing I used (doh), this means it gapes a bit around the collar. If I made this again, I would raise the neckline slightly, and shorten the lapel section of the collar so these don't push the collar open so much.

Pattern alterations or any design changes you made

I made a 3cm FBA, but somehow ended up needing none of the length added. This was the first time I've made a BWOF plus size pattern, so I don't know if these patterns are drafted slightly differently. Of course, this was also the time I decided to skip the toile... In making the FBA, I added a bust dart as well as the waist dart. However, when I sewed these both up, the waist dart looked absolutely terrible, not least because of the weird interaction with the stripes on the fabric. I decided to convert each waist dart into two unpressed pleats, and I'm actually really happy with how this looks.

I made a forward shoulder adjustment on shoulder seam and sleeve cap, and also removed half the sleeve cap ease (a huge 4cm originally). I didn't reshape the armscye at all when I made this adjustment, and it's worked the best of my forward shoulder adjustments so far.

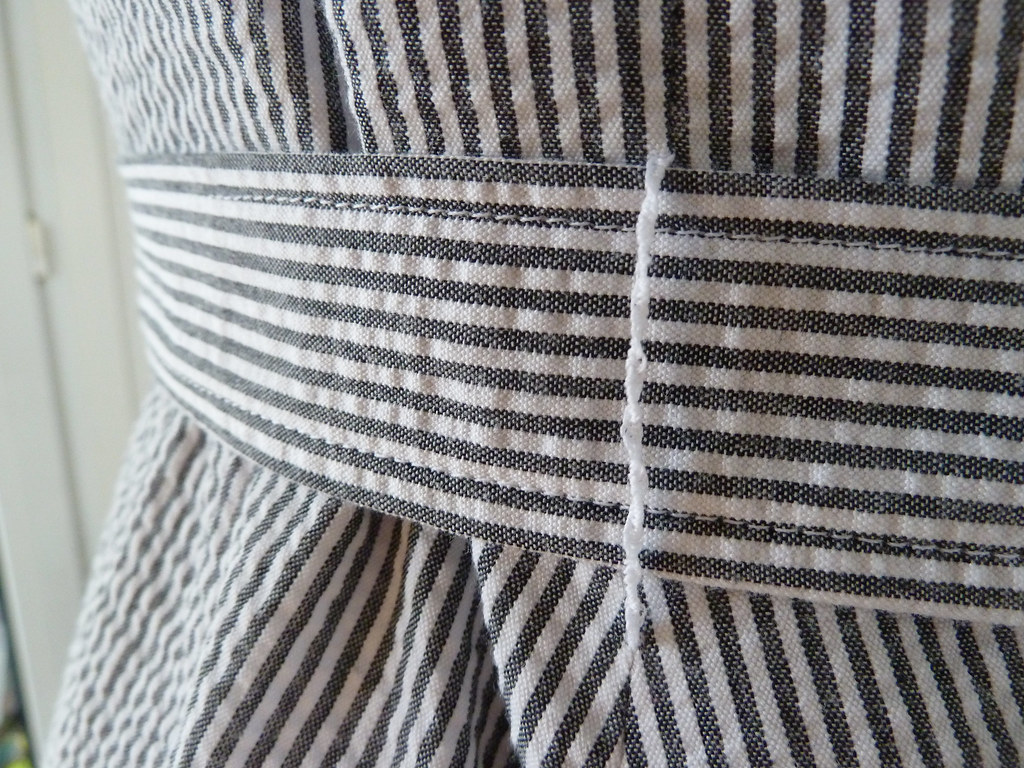
When I finished up this dress, the combination of the shirt-dress style and the fabric meant it looked a leeeetle like a nurse's outfit. To help counteract this, along with switching from white to red buttons, I added a tie belt, held in place with thread loops at the sides.

Construction details

I sewed this with my regular machine, with the seams finished with my serger. As mentioned above, I finished the edges of the facings before the pieces were assembled, finished the collar/lapel joining seam with my serger, and made the pockets in a more sensible fashion. To keep the facings in place, I stitched along the shoulder and waistline seams, meaning the stitches were hidden from the outside.

I used fusible interfacing for the collar and facings, but these ended up a bit too stiff. This is the lightest weight white fusible interfacing I have. It's bog standard Vilene from John Lewis; I think I need to source some better interfacing...

Would you sew it again? Would you recommend it to others?

I'm not sure I will sew this again immediately - I definitely want more shirt-dresses, but I have a ton of patterns I want to try, including many vintage ones. I would still recommend this pattern, although I would also recommend making a toile to check whether you need any adjustments to the neckline.

Conclusion

Although not perfect, I'm still pretty pleased with this dress. The fit around the neckline is a little off, and it's a little tight around the hips, but these are not major issues. I'm pleased with the quality of finishing on this dress, and I think it will be a handy summer dress.

Saturday, 6 April 2013

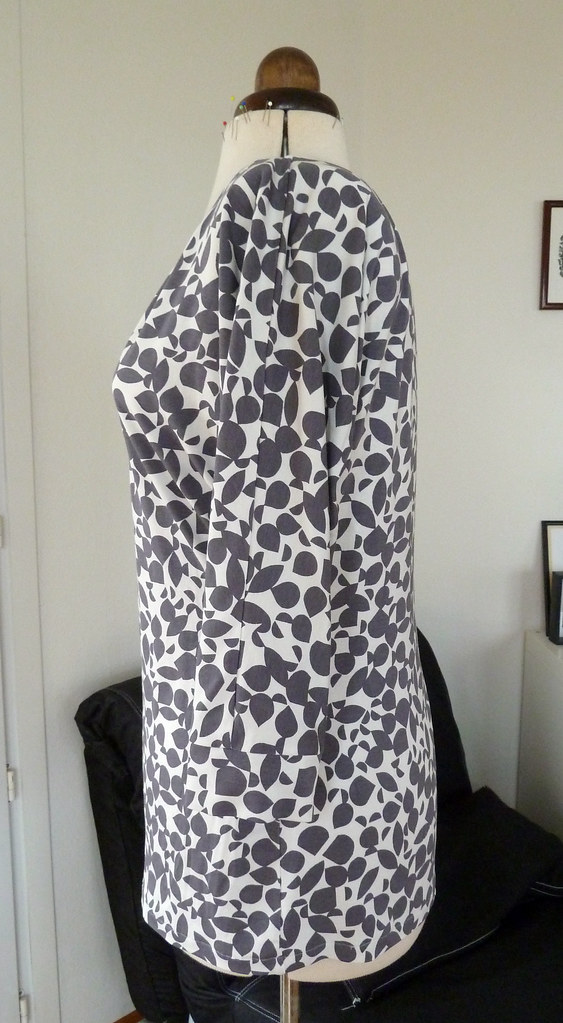
Two jersey tops

I'm not doing a full review for these tops, as they are super simple. They are both self drafted and I made both in one afternoon - each is just three pieces, plus binding strips for the neckline, sleeves and (for the stripy one) the hem.

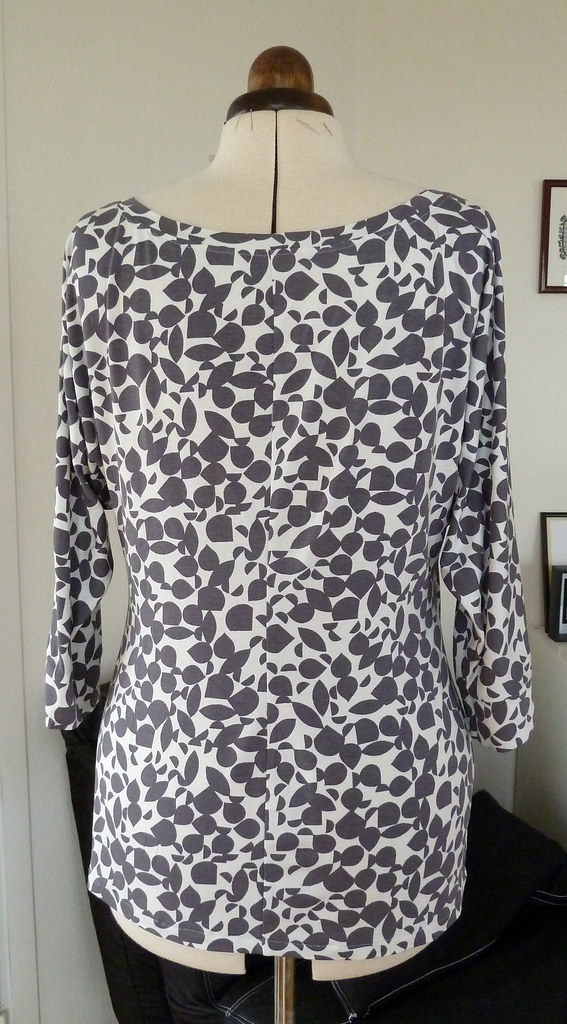
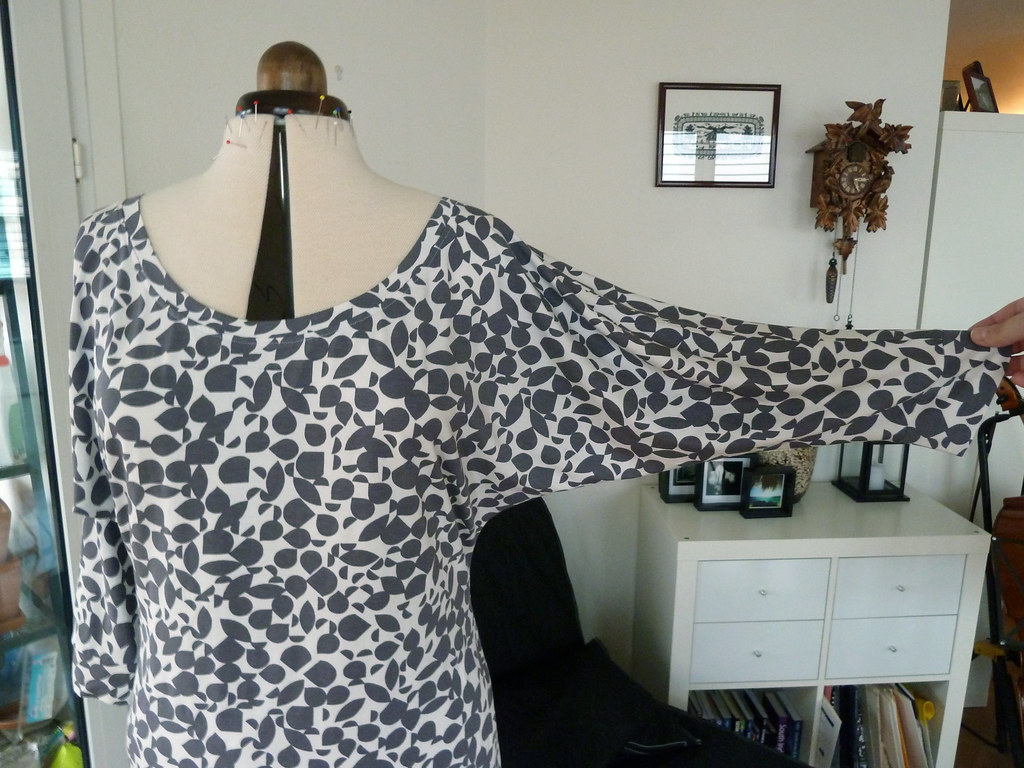
Batwing top

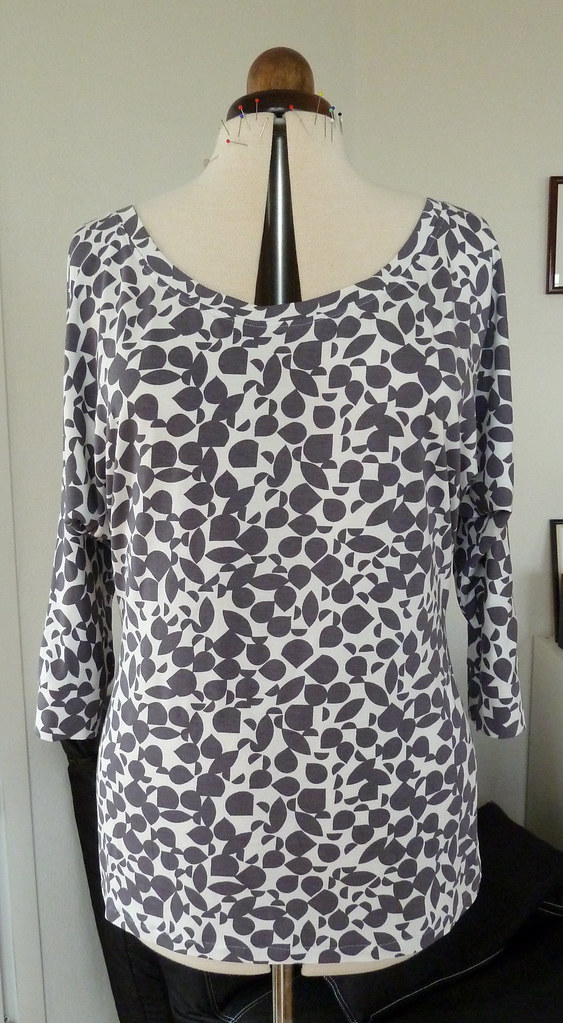
This is the third version of this top that I have made (I never blogged about the first two, but you can see one of them here). It's a very comfortable and flattering style, and nice and cool too because it is loose under the arms.

It was super simple to draft from my knit block, and just needed a little refinement in the width of the body and depth of the curve under the arm after the first version. The fabric is a cotton/viscose jersey from Tia Knight.

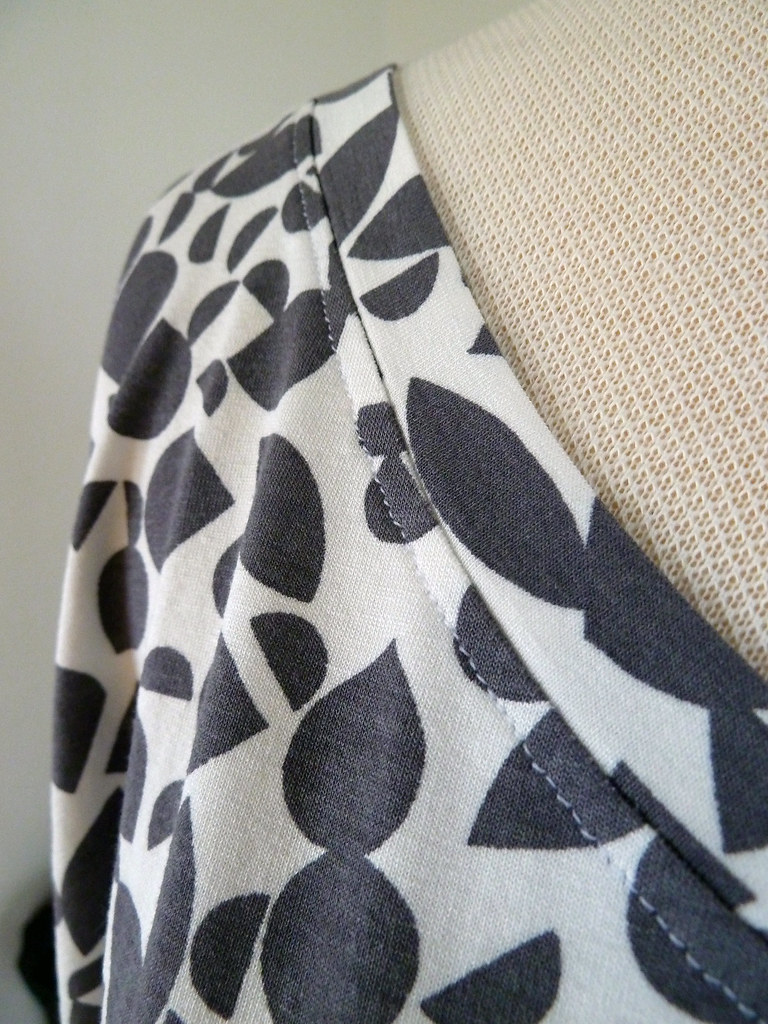
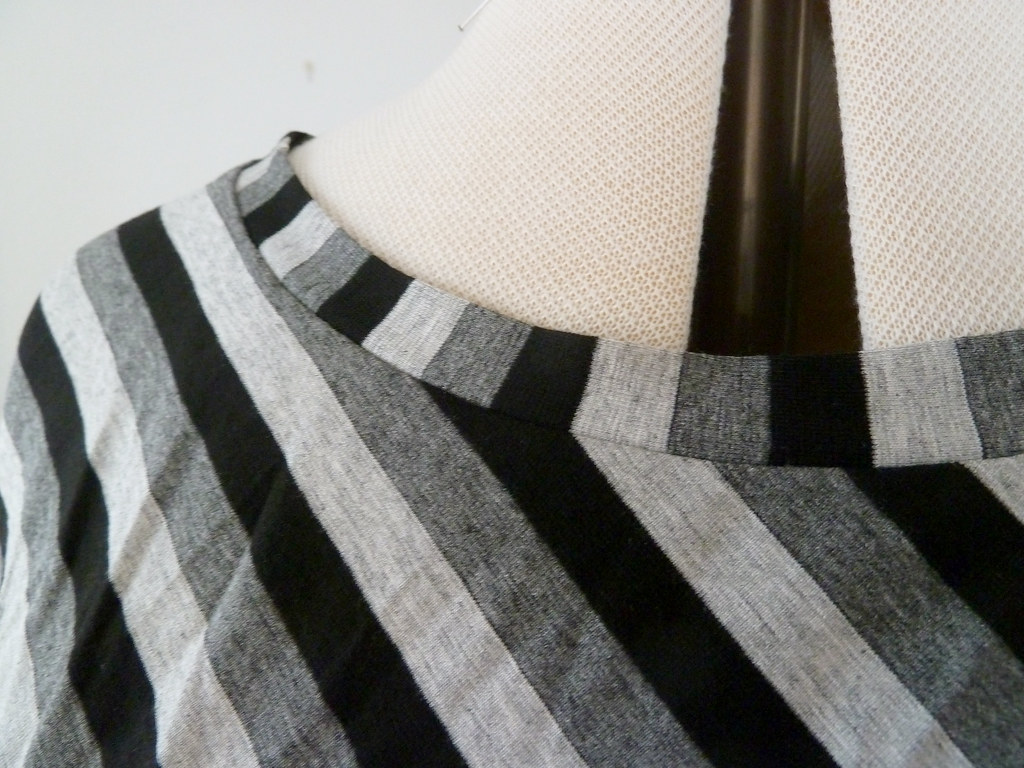
The neckline and arms are finished in my usual way. Cut a strip a little longer than the length of the edge that is being finished (normally on the horizontal grain so it is stretchy), fold it in half with the right side facing out and press. Serge the raw edge of the folded strip onto the right side of the edge, applying a little tension to the strip but not the garment. Flip the strip up and press in place. I also topstitched the neckline binding here to keep it in place, and used a wide strip at the wrists to give a wide cuff effect.

I normally leave one seam open on each edge I'm binding, then sew the binding in one with the last seam to finish it all together, as it is much easier to cut a strip the approximate length you need rather than guessing how much shorter the binding should be and trying to apply it in the round. This meant the order of construction here was:

  • Sew CB seam and one shoulder seam.
  • Bind and topstitch neckline.
  • Sew second shoulder seam.
  • Bind arms.
  • Sew side seams.
  • Finish hem.

Underarm drape top

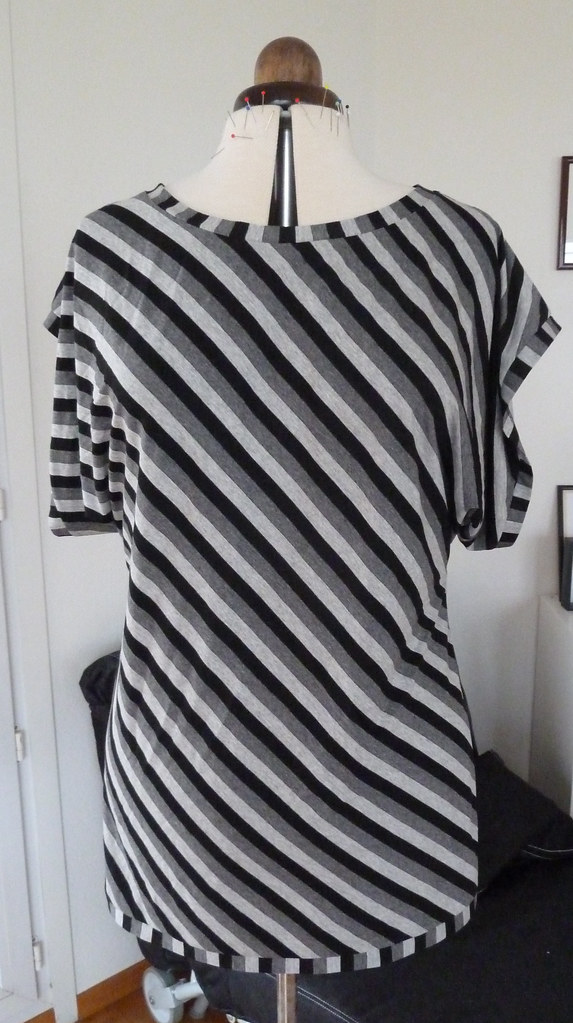
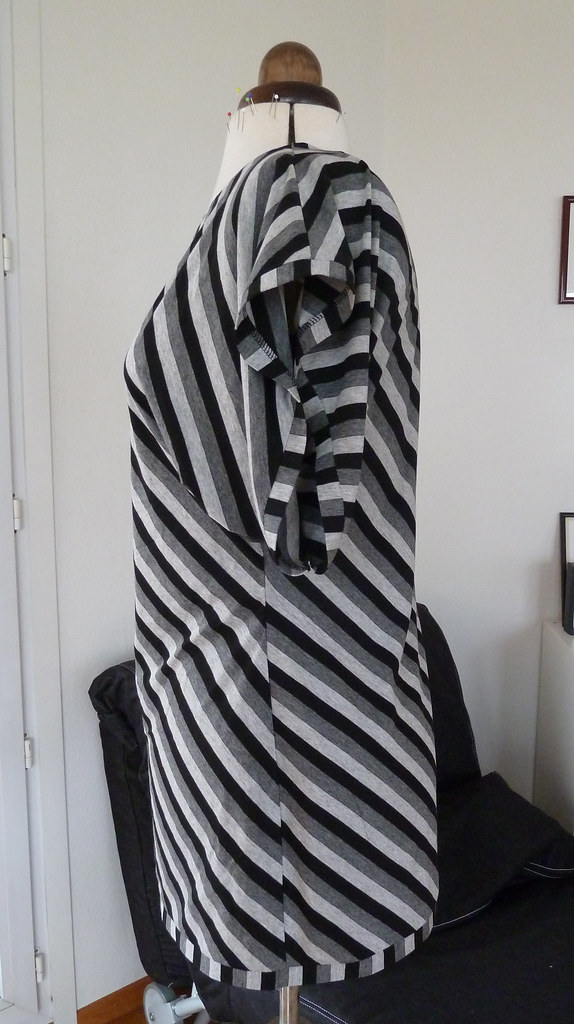
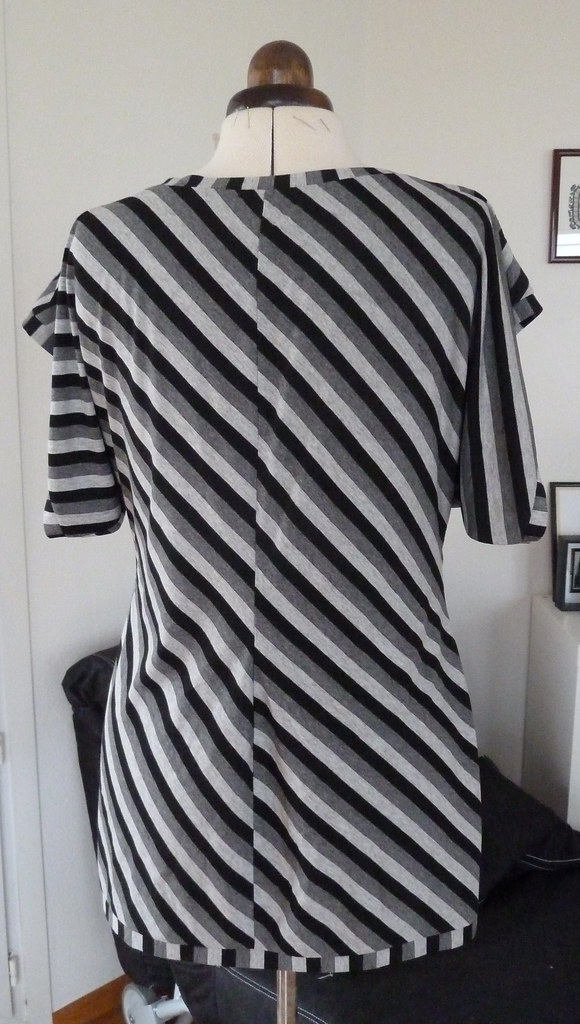
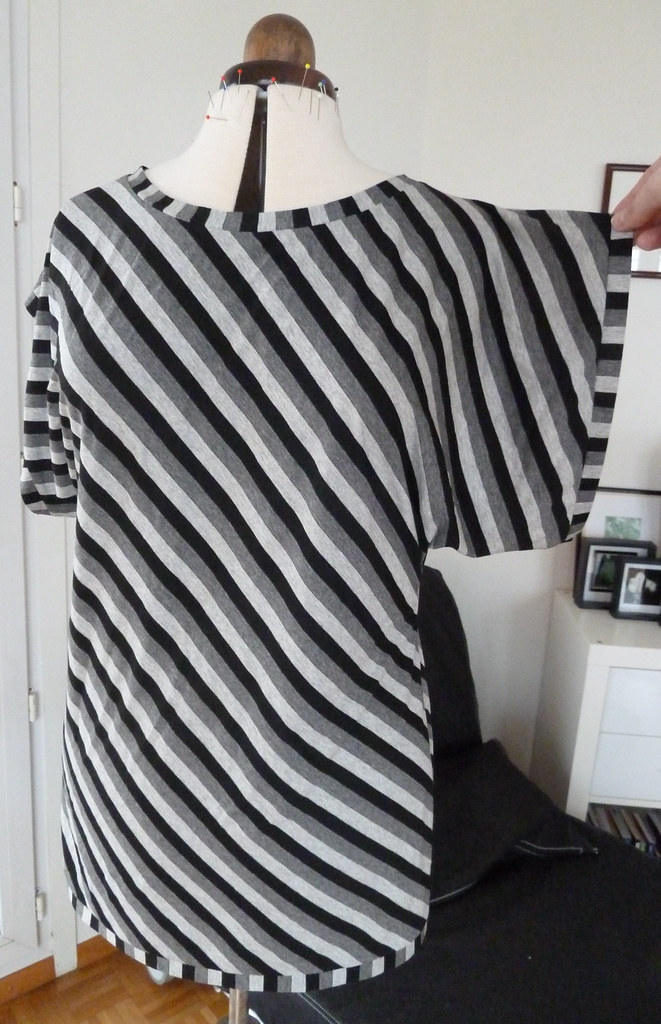
This was drafted from my basic knit block, using this tutorial for the sleeves. I cut the top on the bias for some interest with the stripes, but it didn't work out quite as intended - the CB seam and the drape on the sleeves make the diagonal stripes look a bit odd. I had also intended for the stripes on the back to be going in the other direction (i.e. so that they made chevrons at the sides where front and back met), but I cut it wrong. Neither of these issues particularly bother me much though.

I do like these sleeves, but they don't seem to drape as much as Rhonda's. I have a feeling some of this might be because the fabric is on the bias, and I think next time I will also spread the slashed sections a little more.

This fabric (a jersey of unknown fibre and forgotten origin!) has some stretch lengthwise as well as crosswise, so I cut the bindings lengthwise to add some extra interest. The hem was also bound for the top, so the order of construction was:

  • Sew CB seam and one shoulder seam.
  • Bind and topstitch neckline.
  • Sew second shoulder seam.
  • Bind arms.
  • Sew one side seam.
  • Bind hem.
  • Sew second side seam.

The sleeve openings on this top are quite deep, and it does show a little bra at the side. However, it's only really occasional glimpses as the draping falls in such a way to hide it most of the time, so it's not at all uncomfortable to wear.

Sunday, 31 March 2013

Summer shirt dress

More sewing for the holiday! And for summer in general... I've been trying to use some more of my patterns - this is one I bought fairly recently. Apologies that I am not modelling any of the clothes in the next few posts, I didn't have time for a photoshoot in the last couple of weeks, and now they are all folded up and packed for holiday... I will post photos of them "in use" when I'm back!

Pattern description

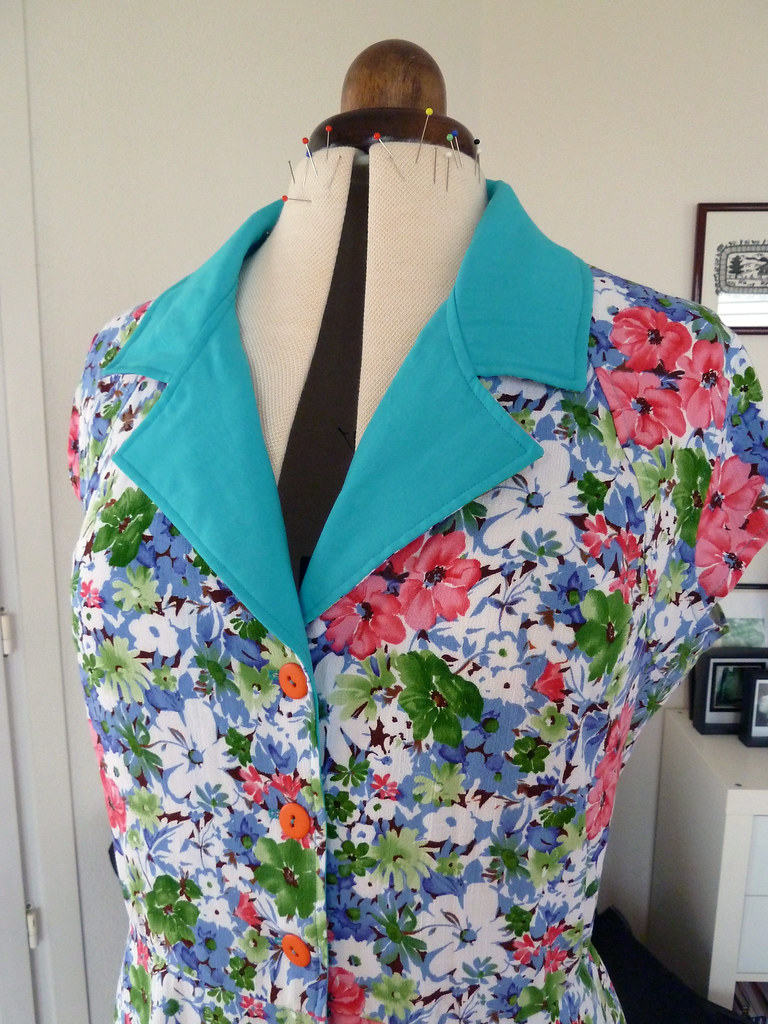
Vogue 8613: close fitting dress with front yoke, three bust darts, collar, cap sleeves and slightly flared skirt.

Pattern sizing

Available in sizes 8-24. I cut the 16.

Fabric used

Stretch rayon challis, with non-stretch rayon challis for the collar and facings.

Did it look like the photo/drawing on the pattern envelope/sketch/idea when you were done?

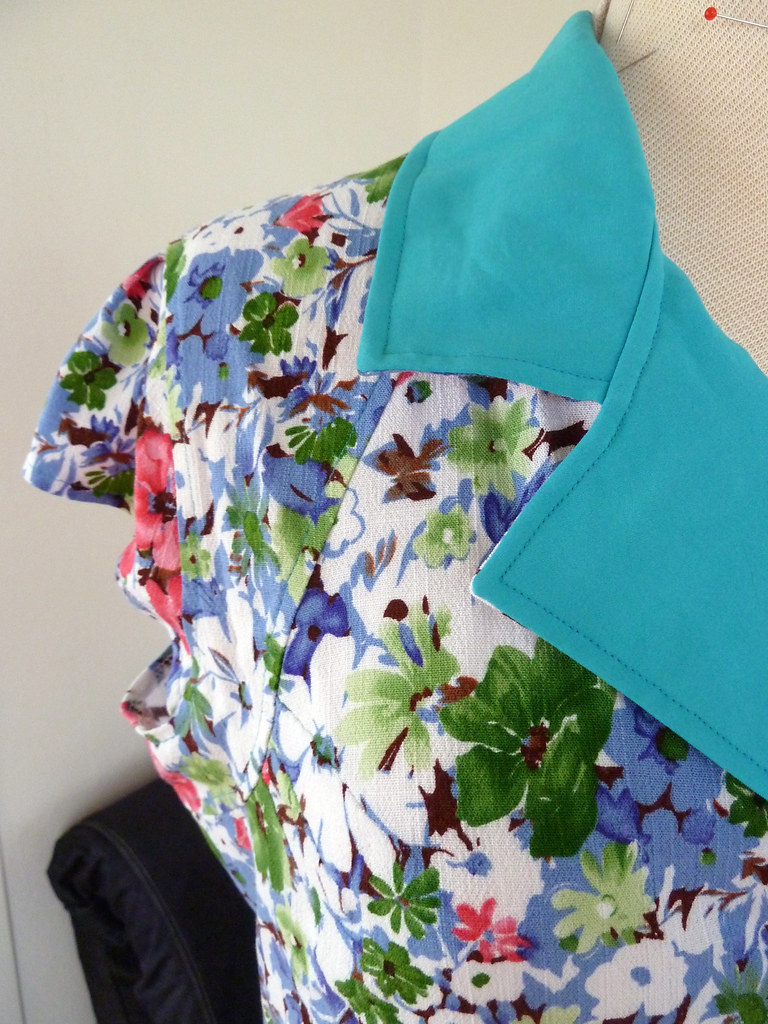
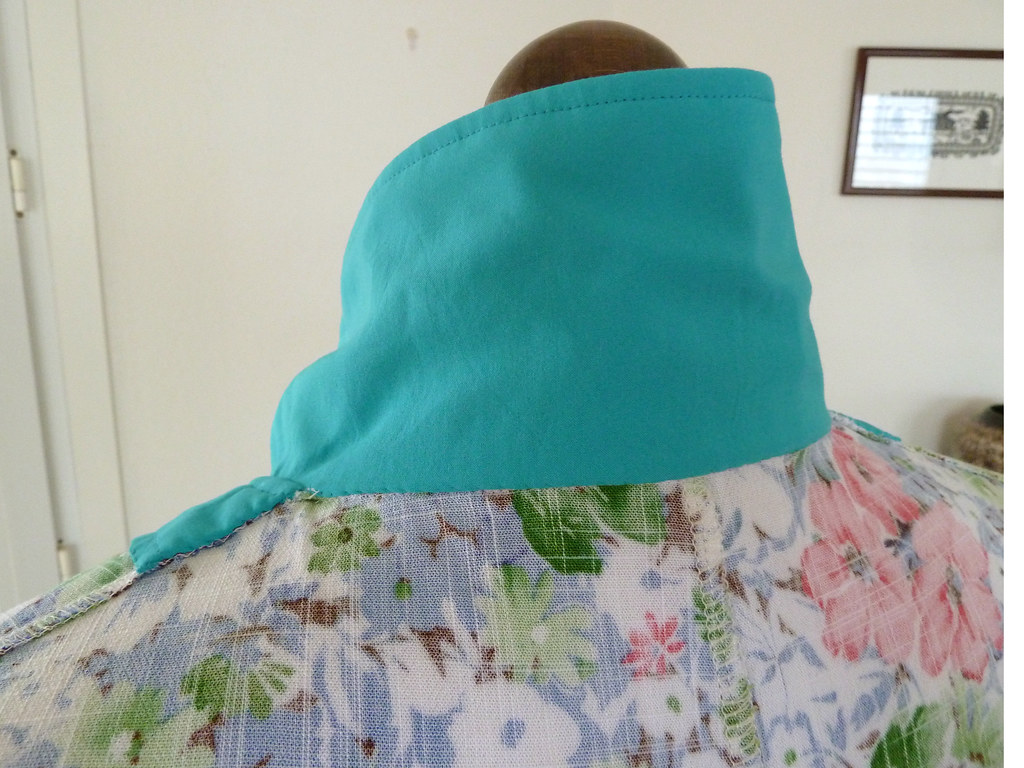
Not entirely. As many have noted on Pattern Review, this is actually much closer fitting than the picture on the front would lead you to believe. I was concerned that I'd misread or mismeasured something, but checking the garment measurements printed on the pattern confirmed that it really is very close fitting. It is very low cut at the front (even for me - and I like fairly low cut tops!), so I raised the top button about 2cm (and re-spaced the buttons accordingly). If I made this again, I would alter the shape of the front piece slightly so that the lapel curves out only above the top button.

I also really don't like zips in stretchy garments if they can be avoided (and I knew that with this particular fabric it would be a nightmare to put in neatly), so I extended the centre front so that the buttons continue into the skirt. I would imagine that if this was made in a jersey, the zip could easily be eliminated without extending the buttons to the skirt.

Were the instructions easy to follow?

They were mostly pretty good. The only part I got a bit confused about was the collar, I had to read it through a few times to work it out. Other than that it's pretty straightforward.

What did you particularly like or dislike about the pattern?

I like the front yoke and interesting bust dart placement, and jersey dresses are always useful in anyone's wardrobe! I really didn't like how much ease there is in the sleeve caps: 4cm!!! In a dress drafted for knits!!! I couldn't get the sleeves in as intended without some puckering, so decided to fold out the excess to create a small pleat at the top of the sleeve. I actually quite like how this looks.

Pattern alterations or any design changes you made

As already mentioned, I extended the buttons all the way down the front, extending the centre front of the skirt by the same amount as the bodice, and adding a facing. If I'd thought about it earlier (and had had enough fabric) I would have cut the facings as one (i.e. without a seam at the waistline). I added a fair amount at the waist seams, but it fitted well enough elsewhere, even without my usual FBA. (It would fit better with an FBA, but I couldn't be bothered working it out here. I will probably do so if I make another one.)

Construction details

I serged all exposed seams. Enclosed seams were sewn on my regular machine and pinked (i.e. where the facings were joined to the front edges, and where the collar was attached). I did much more topstitching than the pattern indicates, as I liked the look of it.

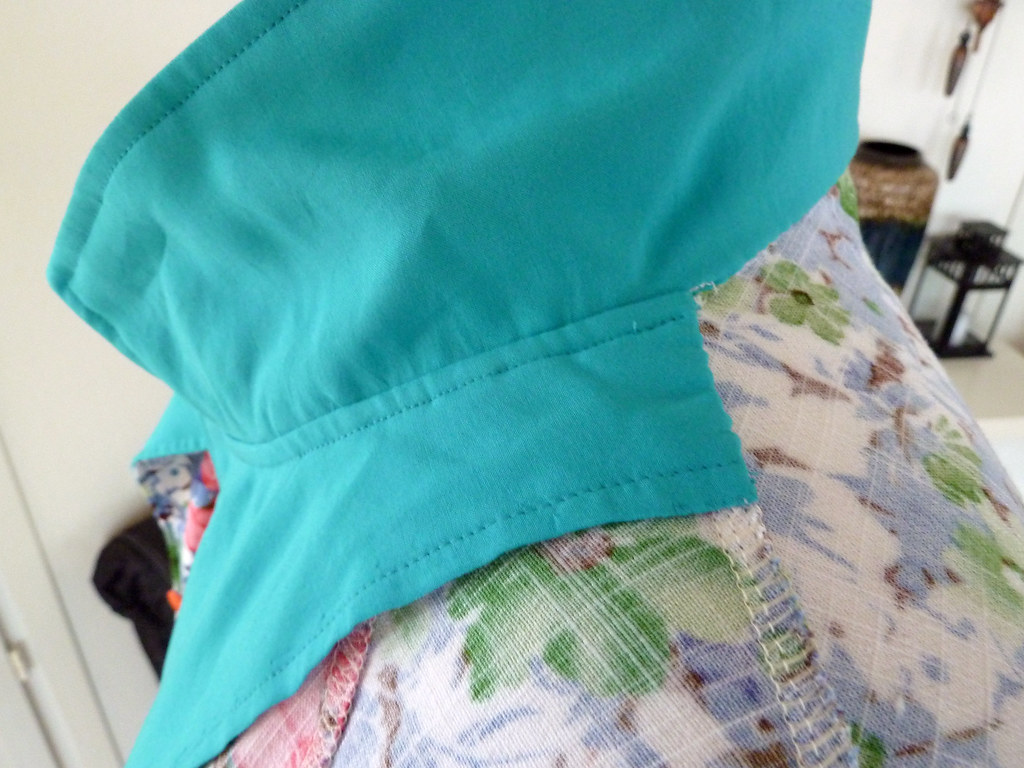
I used cotton batiste to interface the collar and the facings. The collar has actually ended up a little bulky, but I don't know how I would avoid that. I also added elastic at the waistline, serging it on as I sewed the seam. My fabric is pretty heavy, so this provides some support for the weight of the skirt.

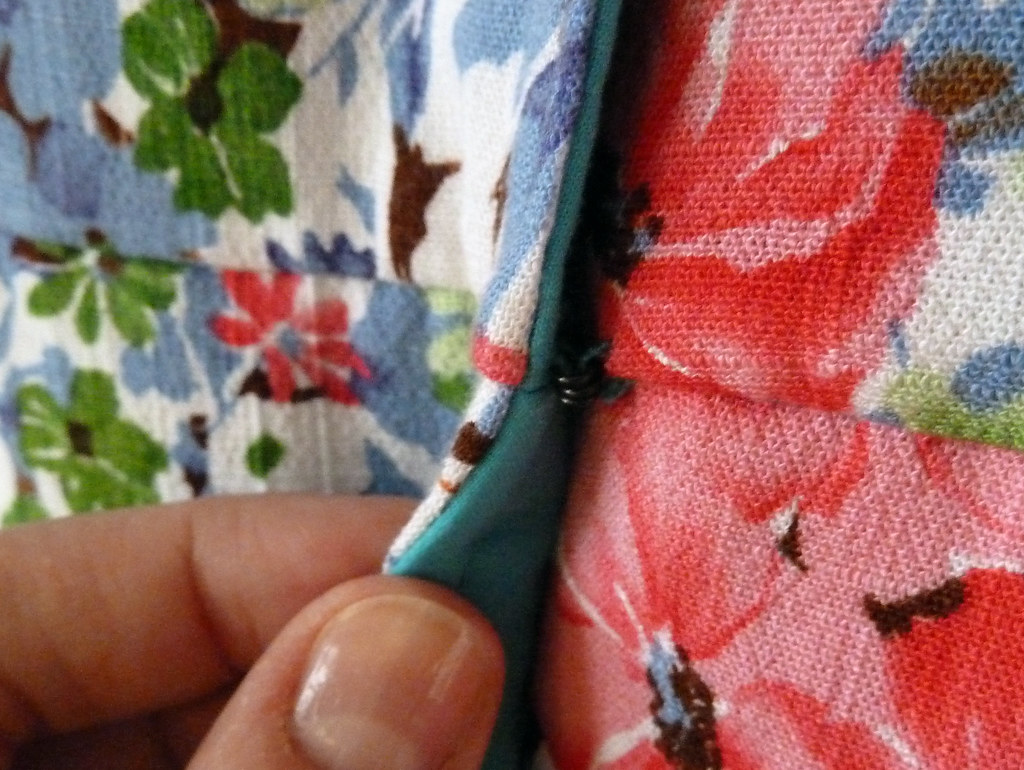
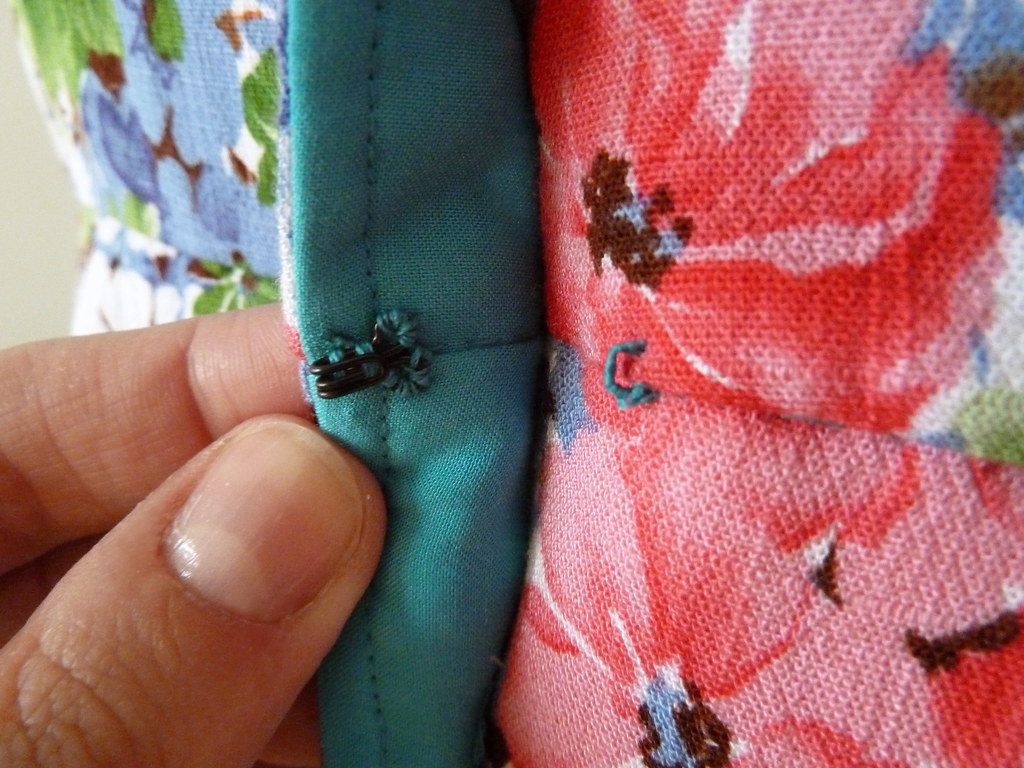
I added a hook and thread bar at the waistline.

Would you sew it again? Would you recommend it to others?

I might sew this again - I quite like the idea of it in a plain fabric. However, repeats of most things generally take a low priority for me, so I think I will give it a few wears to see how much I like it before deciding.

I would recommend this to others, but be aware that it is actually very close fitting.

Conclusion

When I finished this dress, I was rather down on it, as it wasn't particularly fun to sew - the fabrics I chose were slippery and stretchy and blah. I'm not super happy with the finishing on this dress, but after leaving it a few days I don't think it looks quite as sloppy and "home-made" as I first did. I'm not convinced the hem is totally ok, but I'm really not feeling like redoing it right at the moment. I am slightly in two minds whether it looks retro and funky, or just a bit frumpy, but I'm coming down on the side of funky and retro I think, as long as the styling is right. It is certainly very comfortable to wear, and is a lovely cool fabric for the summer.

Saturday, 9 March 2013

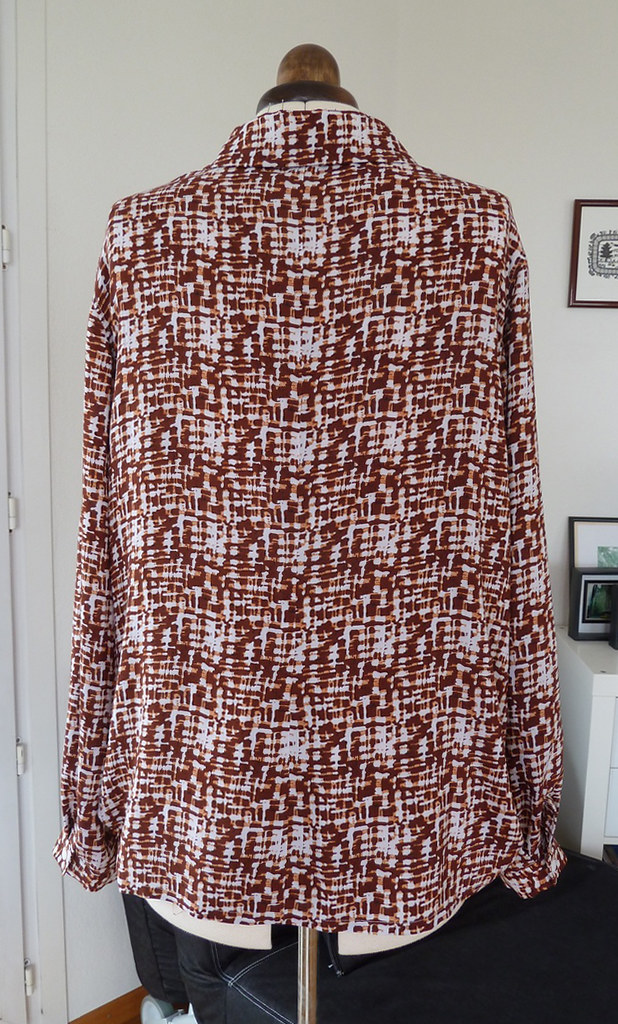
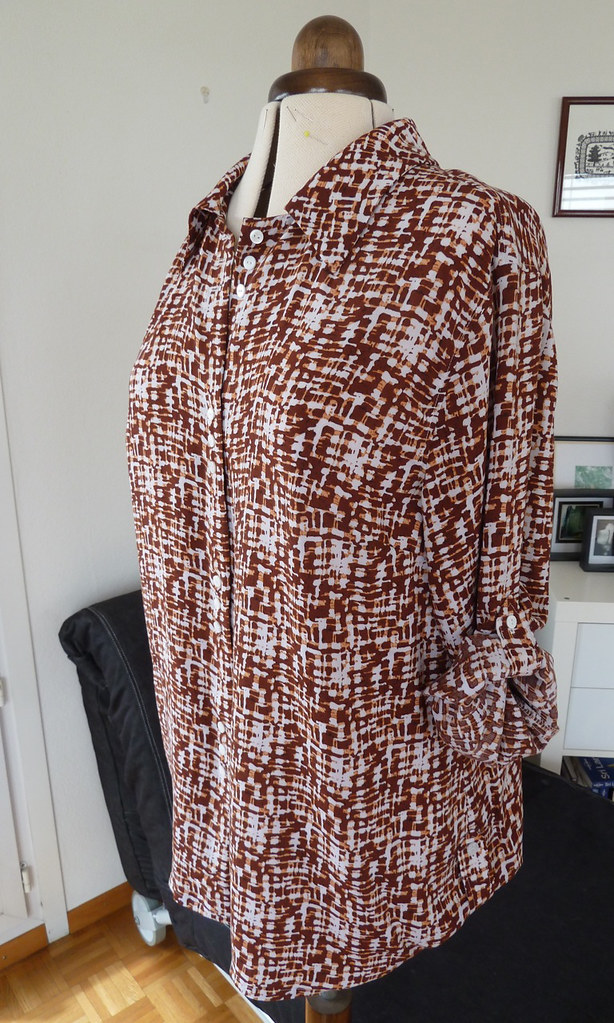
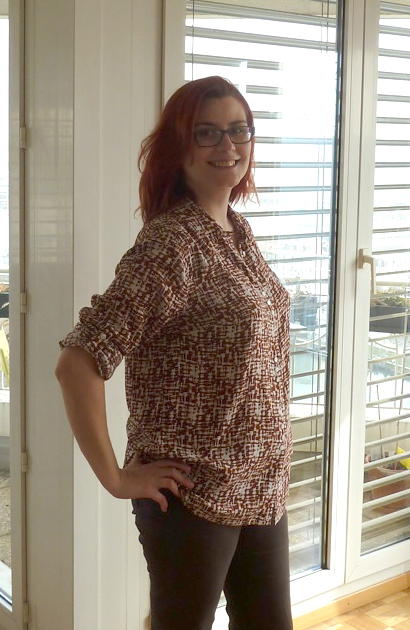
A summer blouse

My husband and I are going to Sri Lanka to visit family in a month's time, via Qatar to visit a friend. Both places are hot hot hot, but are also places where strappy dresses and shorts are not really acceptable to wear, so I need to procure some suitable clothing (plus I need some long-sleeved tops to avoid mozzie bites). Most of my summer tops and dresses are sleeveless, so I'm focussing my sewing in the next month on making things I can take with me, but will also be suitable to wear afterwards. Natural fibres are a must so I don't boil, and when I was choosing March's Burda Challenge, I spotted this shirt and thought it would be lovely and airy. Well-fitting shirts are also something I find very difficult to find in RTW, so this is a win-win.

Pattern description

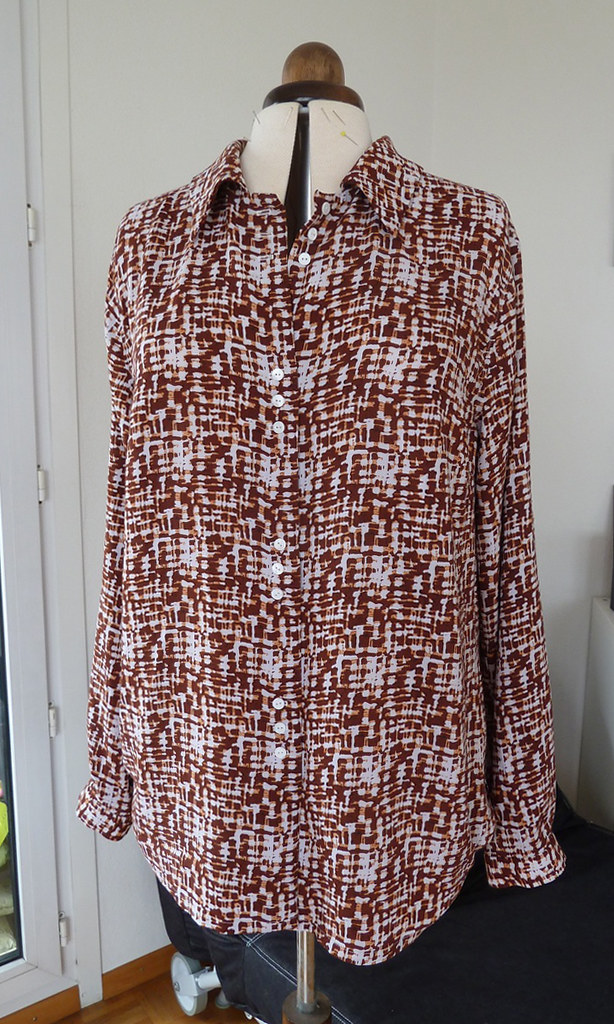
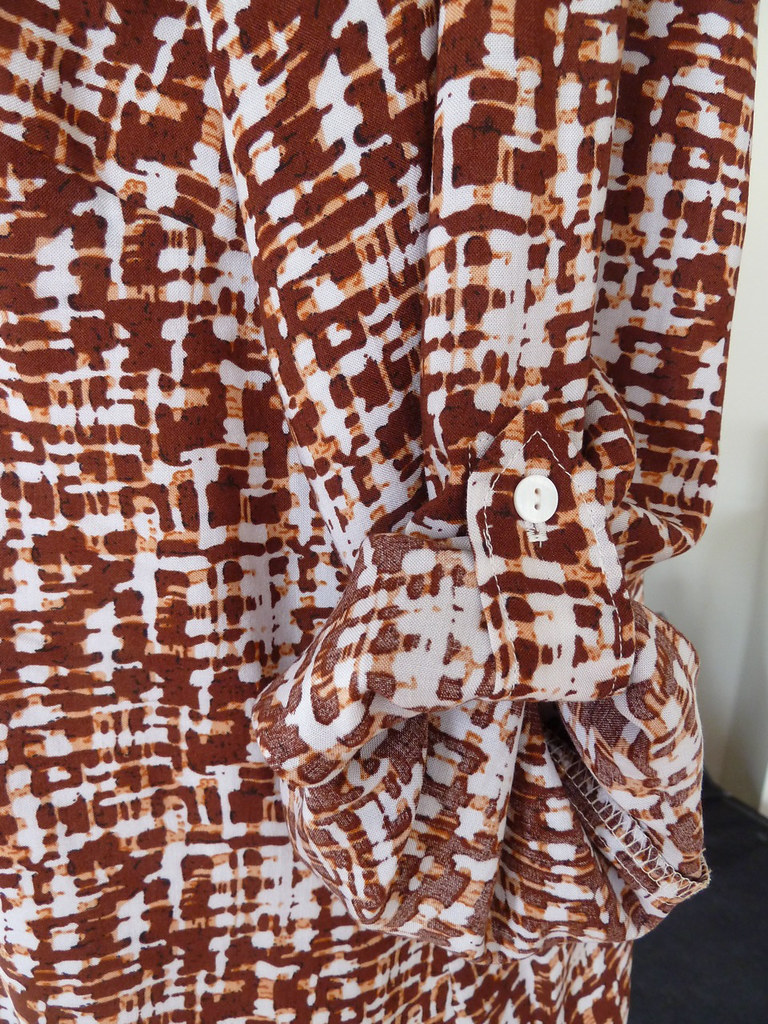
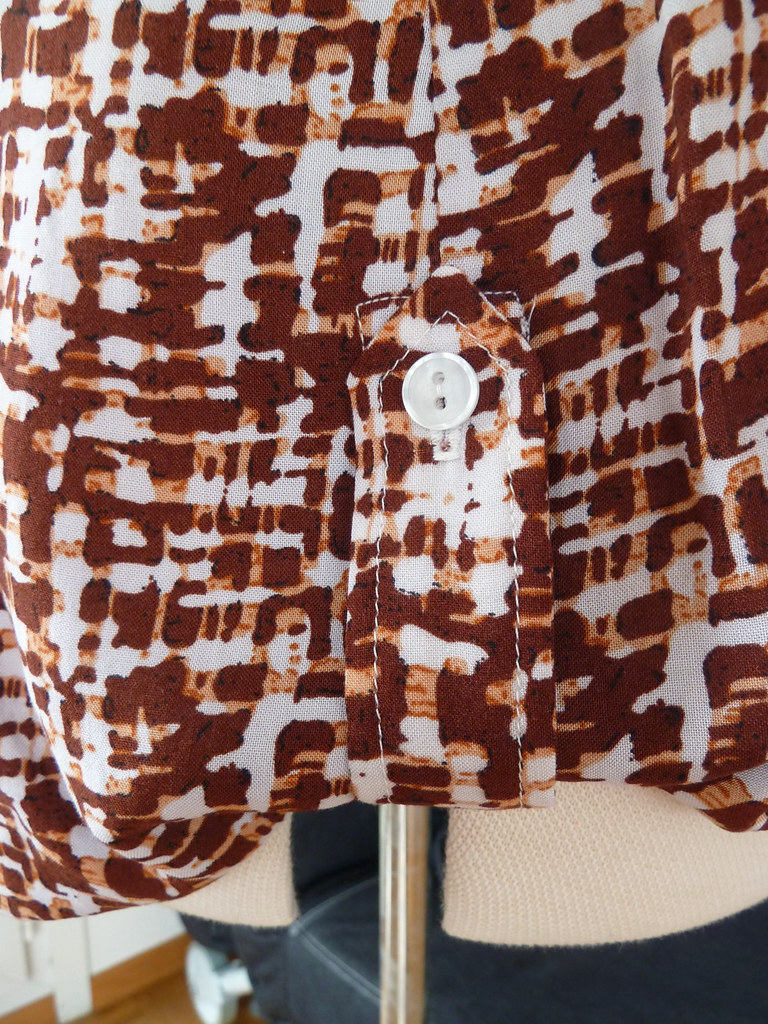
Easy fitting shirt-styled blouse with sleeve and side hem tabs, roll collar and cut-on front placket.
Pattern sizing

36-44. I cut the 44.

Fabric used

Rayon challis from Fabric.com. Instead of fusible interfacing I used a layer of cotton lawn together with a layer of cotton batiste to keep the drape-y qualities of the challis.

Did it look like the photo/drawing on the pattern envelope when you were done?

Pretty much - except with proper cuffed long sleeves. And a lot more 70s.

Were the instructions easy to follow?

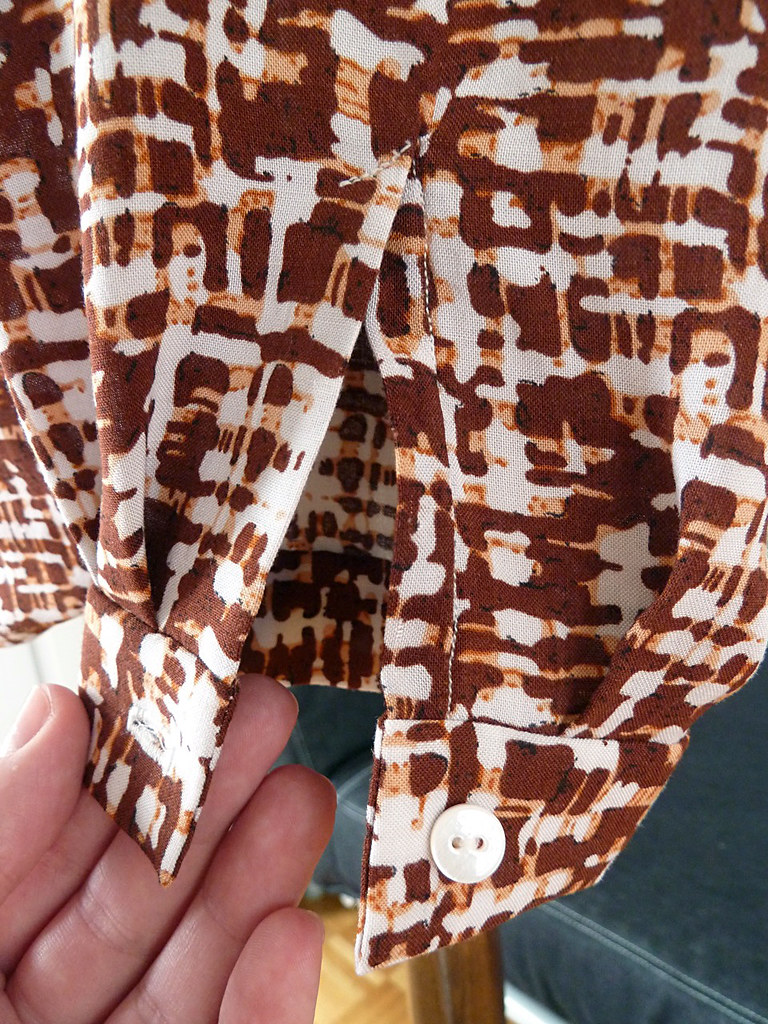
Mostly the instructions were fine for anyone who has sewn a little before. I was a bit confused by the instructions for the sleeve vent lapped placket, but I consulted my sewing books, and it became clear what I was meant to do once I had a go with the muslin, and realised that one half was folded under whilst the other half extended out from the slash underneath.
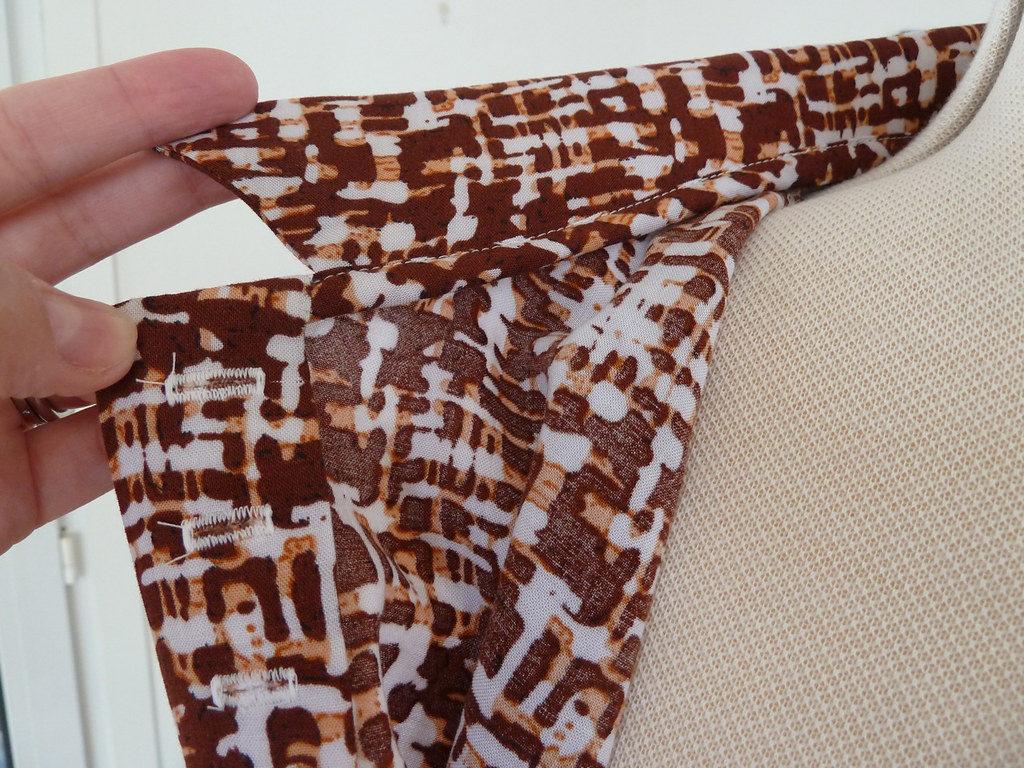
The only bit I found completely opaque was for applying the bias strip neck facing. It says to lay the bias strip on the collar, but then that it is resting on the body of the shirt, which was rather confusing. As it went to to tell us to fold it upwards, I went with putting it on the underside of the collar seam. As the pattern has it, the facing seems to come out super narrow, just 5mm wide when folded and sewn over the raw seam allowances. This means that even with trimming and grading the seam allowances that it encloses, it comes out rather bulky. To be honest, I'm not entirely sure what I ended up with is correct and if I made it again I would probably try and work out something a bit different.
What did you particularly like or dislike about the pattern?

I like: the button tabs on the sleeves and the side hems, the interesting button placement, and the overall fit. I dislike: the bias neckline facing.
Pattern alterations or any design changes you made

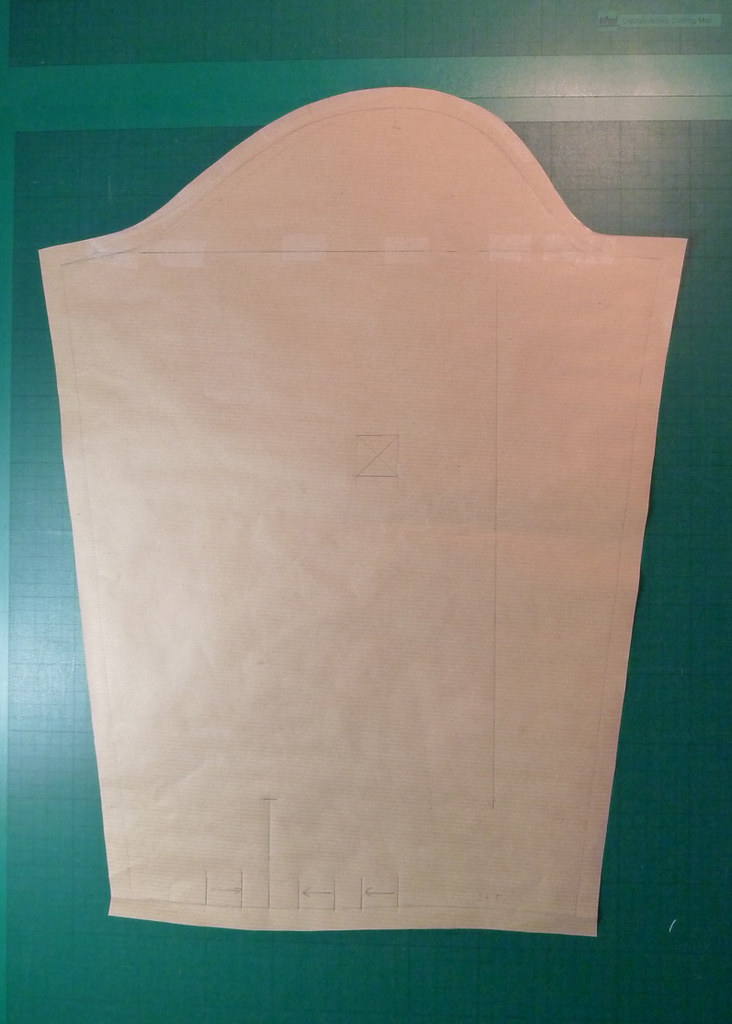
I decided to muslin this unaltered as it is easy fitting, and found only minimal alterations were needed: forward shoulder adjustment, raising the back neckline, adding a shaped CB seam, and a small FBA. I moved the shoulder seam forward 1cm at the neckline and 1.5cm at the shoulder point. The sleeve cap was slashed horizontally at the level of the balance point and slid forward 1.5cm so the shoulder point matched, then reshaped, ensuring that the length of front and back matched the armscyes (this style of shirt sleeve has zero sleeve cap ease, which makes this simpler).
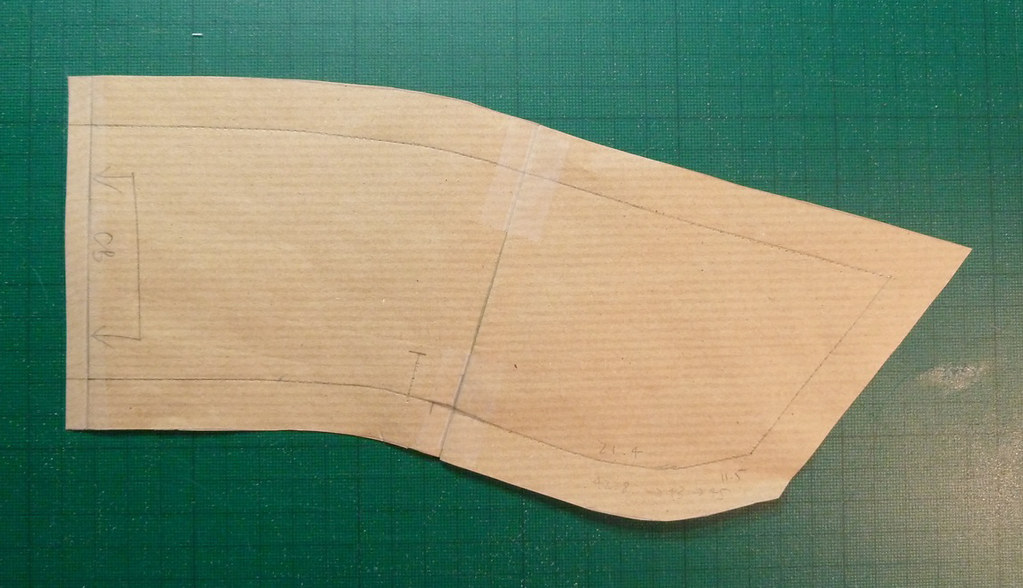
The back neckline was raised 1cm, and the collar piece reshaped to take account of the new shoulder seam placement and back neckline shape. I wanted to make sure the shape was not distorted, so rather than just simply adjusting the length at the CB, I folded out the excess length in the front section, and added a little to the CB to match the length in the back section.
The CB was shaped inwards at the waist by about 1.5cm (for a total of 3cm) and a seam allowance added. I made an FBA of about 1.5cm (for a total of 3cm), adding a bust dart, and shaping the side seam to remove the excess added at the waist (so that the bust dart wasn't too large).
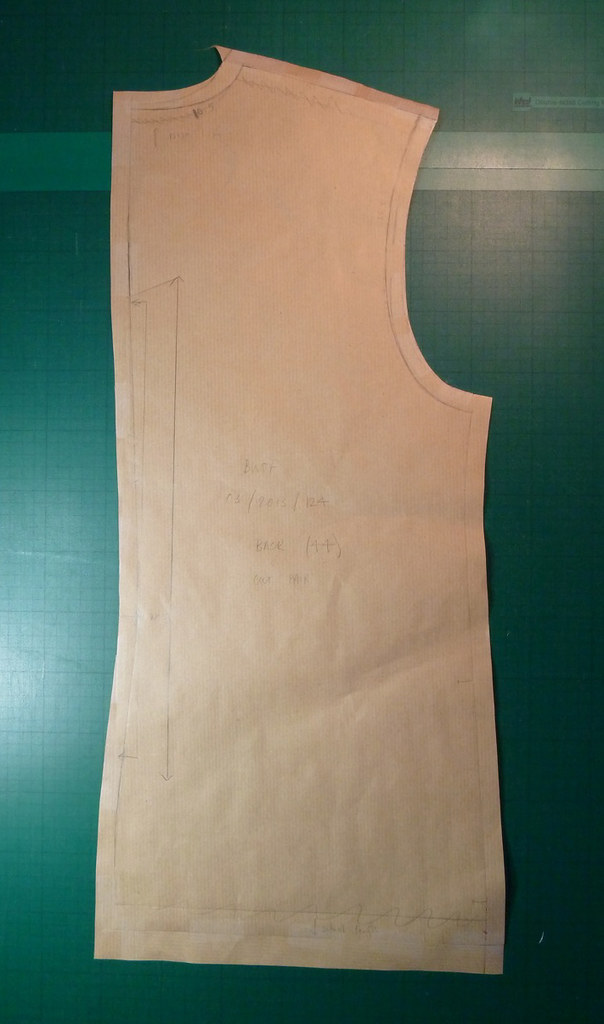
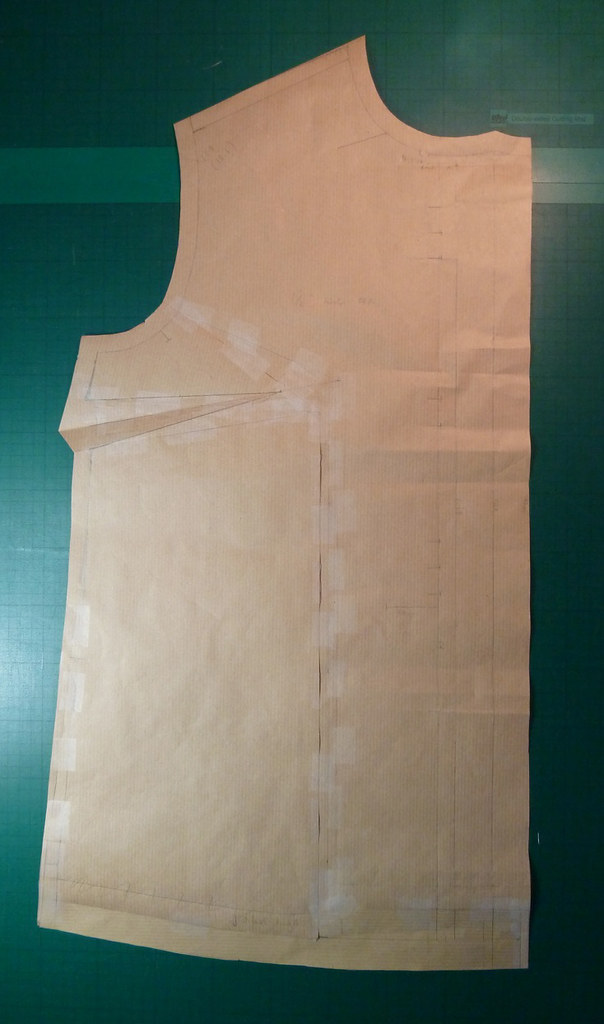
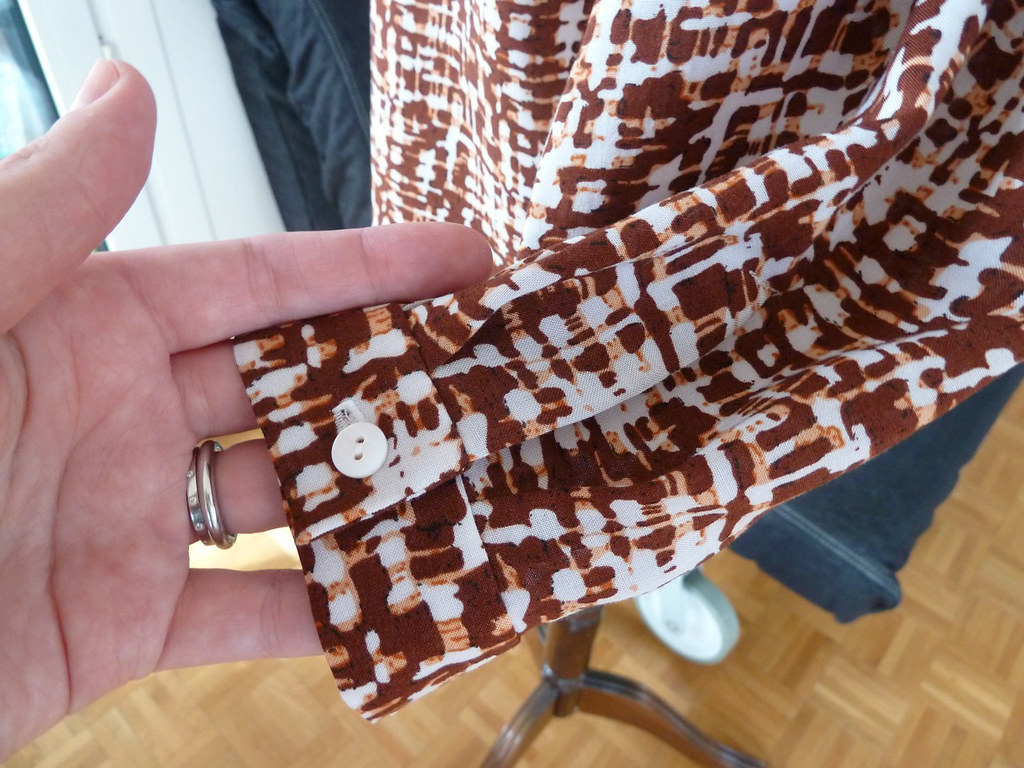
As for design changes, I added vents and cuffs to the sleeves. The pattern pieces for the sleeves to 124 are identical to pattern 125, so it was simple to add the cuffs using the instructions for the other pattern (but without the topstitching). This made it much more versatile as I can wear it with the sleeves unrolled as well.
Before making the buttonholes on the front band, I tried out (with pins) the placement as marked, having adjusted for the size 44 (the pattern is marked for size 36). I found I needed to move the second group of buttons up about 2.5cm so that my bra didn't show (I will be wearing this blouse with the very top set undone). I moved all the buttons up accordingly so that the spacing was even, but this left the single button too far from the bottom, so I added two more buttons to make this into another group of three.

Construction details

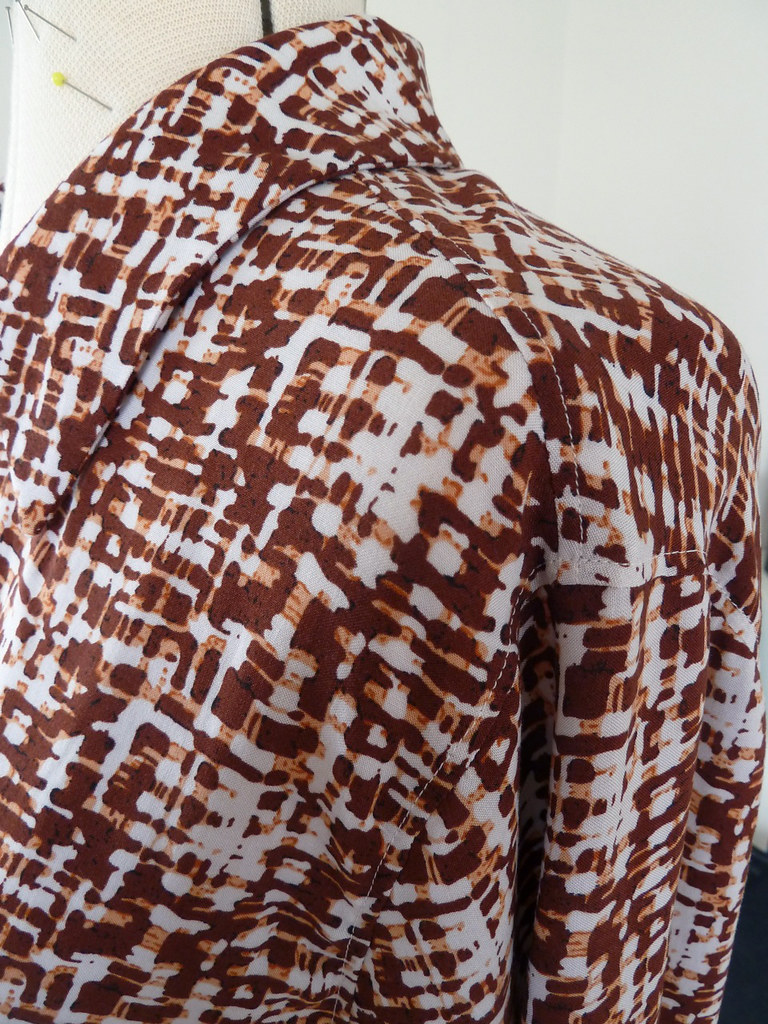
After the last project there isn't much to say about the construction here. The seams were sewn on my standard lockstitch machine with the seam allowances finished together with the serger. I topstitched the sleeve seams and hem as the pattern indicated, and also the shoulder seams to stabilise them a little.
I only needed to do a tiny bit of hand sewing for this garment: stitching down the cuffs on the inside, attaching the front plackets to the neck facing and hem, and sewing on the buttons. I'm a little concerned about how the button plackets will hold up as they are held in place only at the top, bottom and by the buttons/buttonholes, so it's possible for them to flap open a little, exposing the raw edges, especially at the bottom section. I'll see how it goes and whether I need to add an extra tack or two. If I make this again I guess it would be advisable to finish the edges of the placket before folding it under (or add topstitching).
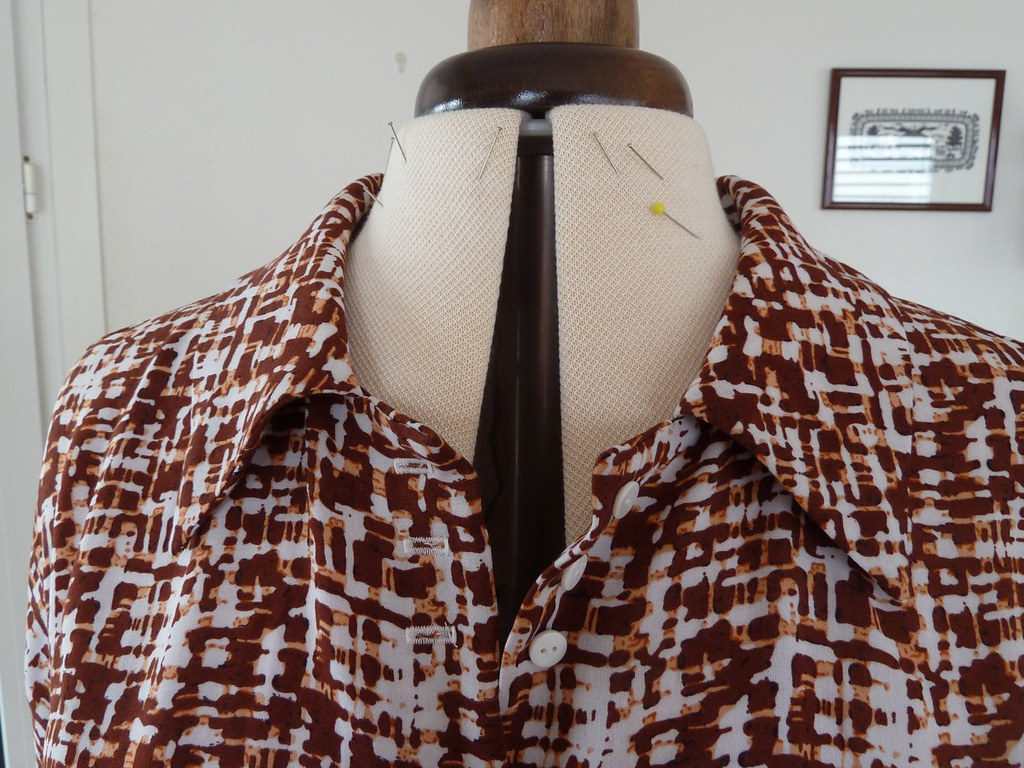
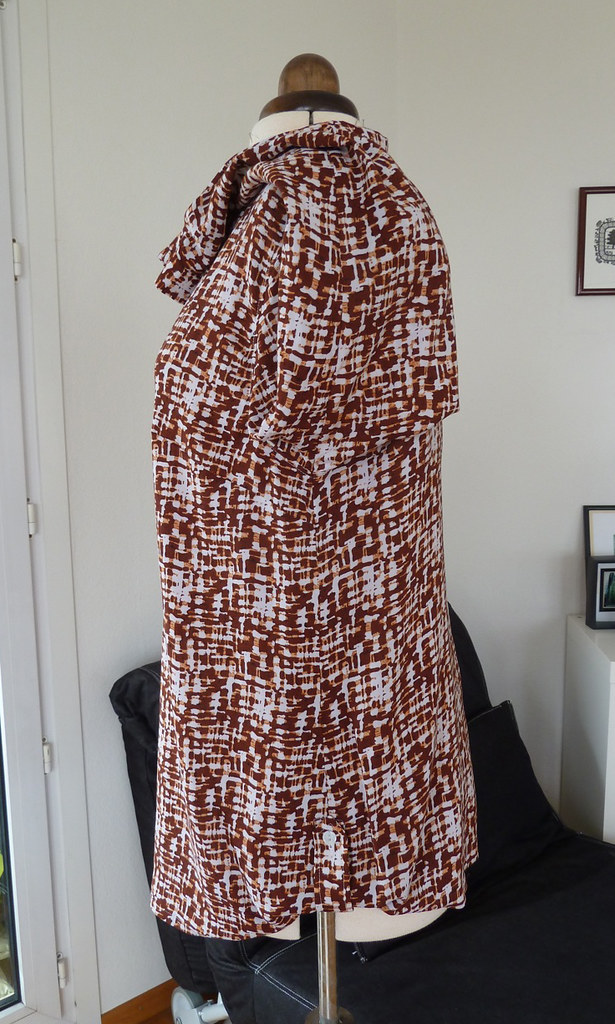
I did do some nominal pattern matching, but didn't do anything particularly accurately - which makes it both surprising and pleasing that it worked so well! The CB seam is nearly invisible, and even the sleeves nearly line up!
Would you sew it again? Would you recommend it to others?

I may well sew this again, although I have other shirt and blouse patterns that I'd also like to try. It would be nice to have another version before going on holiday, but I'm not sure I'll have time to make it as there are several other things I would like to make.

I would recommend this pattern, but not for absolute beginners as it requires a bit of precision. I think it also works best in slightly drape-y fabrics, and these can be a little hard to handle during construction.
Conclusion

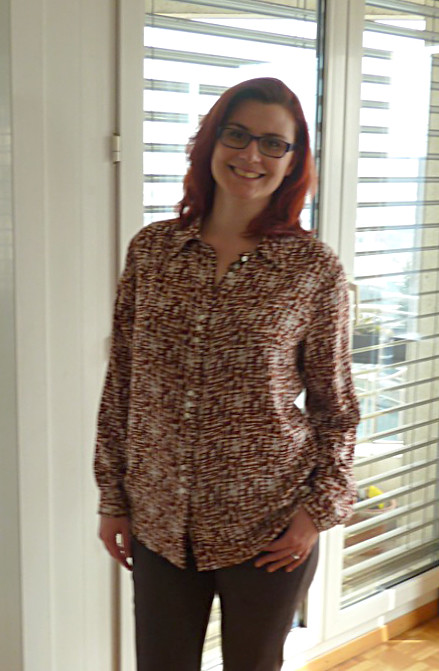
At last, a flattering shirt! It still pulls slightly to the back, despite the forward shoulder adjustment, but this doesn't bother me too much. The button bands also sag slightly, but I think this is unavoidable with such a lightweight fabric. I'm super pleased with this though, and it will certainly be useful for my holiday as I can cover up a bit without boiling. The rayon is so light and airy to wear, and (despite my husband telling me it reminded him of his 70s pyjamas) I can see myself wearing this throughout the summer.