Making myself a knit/stretch bodice "block" has been on my to-do list for a long time, as I wear knit tops and dresses much more than wovens, and therefore would be much more likely to wear more of the things I make if more were knit.
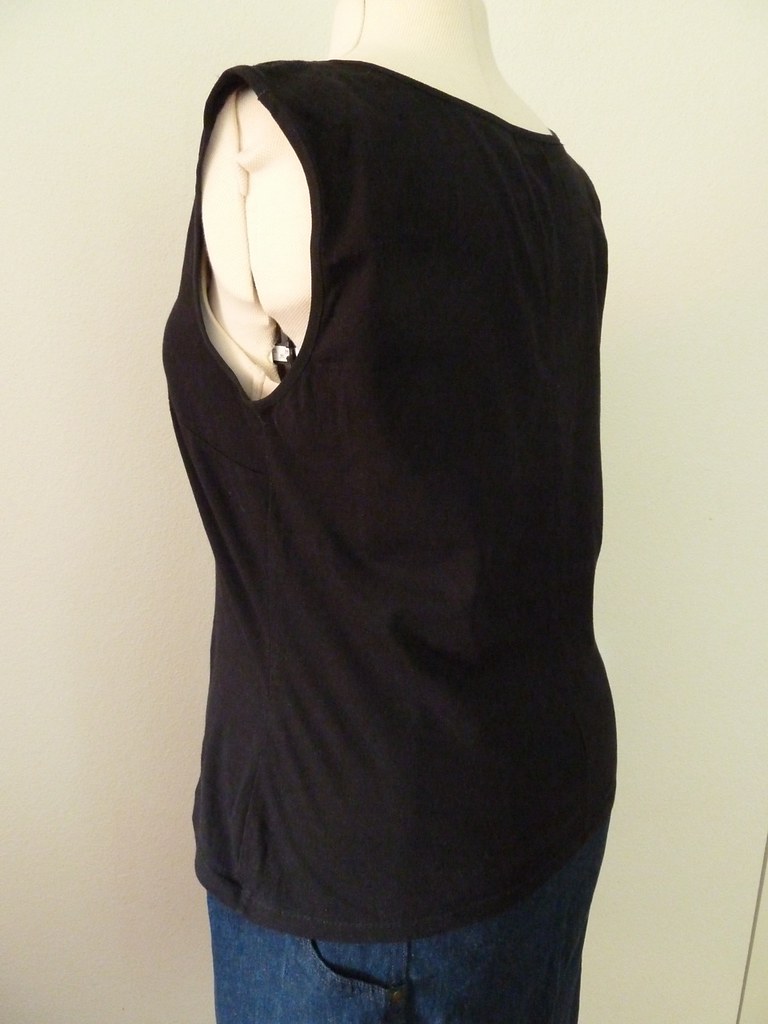
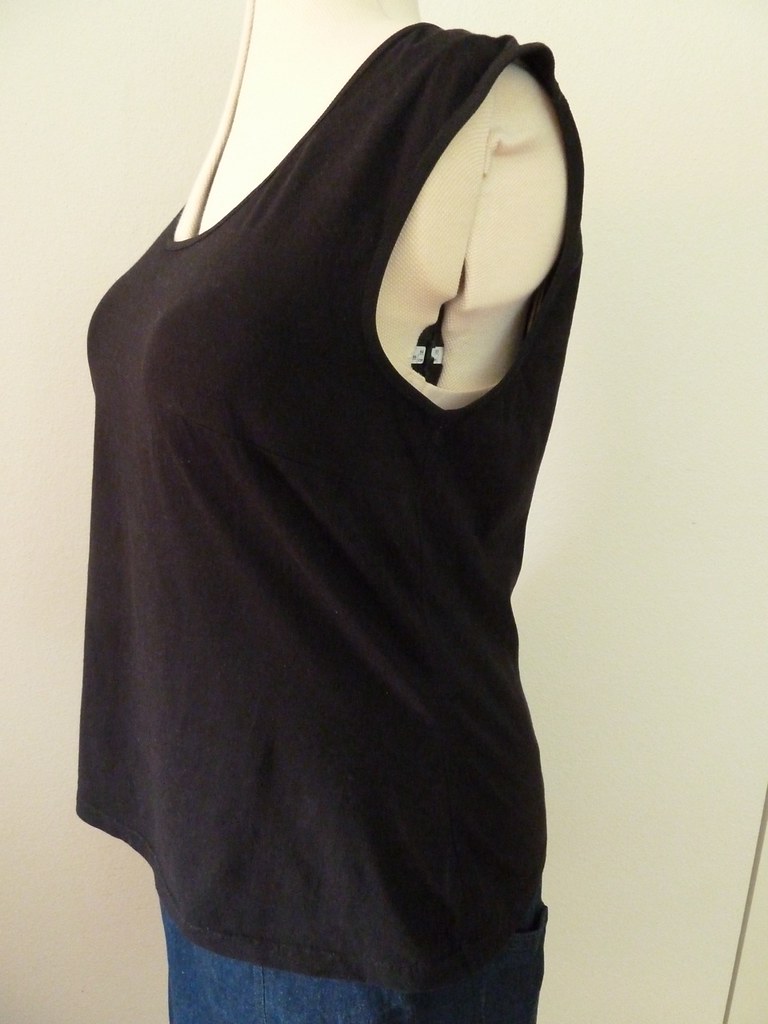
I'd previous attempted using KwikSew 3497 as a starting point to making a fitted top to use as a block, but I eventually gave up in frustration as it was just getting worse with each iteration. I think one problem was that the drafting wasn't quite right (is it just me or do KwikSew stretch garments have huge amounts of ease?), and an even bigger problem was that I didn't know enough at that point about pattern manipulation for stretch garments or about my particular fitting alterations. I thought I'd done a blog post on this top, but I can't find it, so you can see the results from my first try below.
As you can see, I did an FBA but used a dart (always odd in knits), didn't add enough length at the front (and because of the FBA the bottom wasn't straight across grain, so it would look odd in anything with horizontal stripes), the fabric hangs out too much under the bust, and the fit at the back is decided dodgy, despite a shaped CB back seam. You can also see what I mean about the generous ease in the pattern (I cut the size recommended using my high bust measurement as the bust measurement!). I actually quite like tops that aren't skin tight, but this was just silly.
So, a year or so passes, and after getting more used to sewing with knits (with garments drafted from woven blocks), I thought I would have a go drafting a proper knit block to my own measurements and using that as a starting point. I used the method given in my Aldrich book (I have the 4th edition), as I've used this before, including in the custom pattern cutting course that I did a few years' back at LCF, drafting the close fitting body block with the ease for the "less flexible jersey" as I didn't want it super tight.
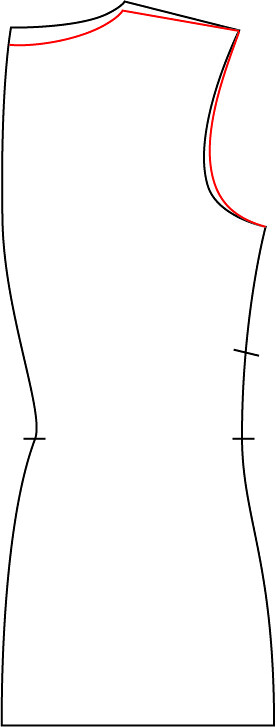
(Unfortunately I didn't take any pictures of my muslining adventures, so I've made some diagrams - note that these are not to scale, and adjustments are slightly exaggerated. I really must remember to take more pictures whilst working)
I drafted the block using a "standard" bust measurement (close to my high bust measurement) rather than my actual bust measurement, and did the FBA as below to add the extra to the front pattern piece. This was the method I learnt in the pattern cutting class and means that a large relative bust measurement doesn't distort the shape of the block. The main difference in my drafting was to use my actual hip measurement rather than squaring down from the underarm point, as I knew otherwise the garment would get caught up in that area. I also made a small square shoulder adjustment by raising the shoulder point. I then did the following steps (for ease of explanation, I've included the adjustments I made after making a first muslin):
1. Traced off front and back to a separate pattern, adding balance points/notches at waist and on the side seam between waist and underarm, below the level of the bust point (you'll see why I needed this a bit later).
2. Adjusted the back by transferring half the waist shaping to the centre back seam. I didn't initially do a sway back adjustment, as I've recently realised much of my problems fitting at the back result from an incorrectly fitting front, coupled with a large back high hip and large bottom (hey hey!), and I wanted to correct for these bigger (ha) problems first.
3. After the first fitting, I still needed adjustments to the back, so did a combination of more shaping at the CB waist and neckline, and a small "quick" swayback adjustment (using inspiration from this excellent analysis) by pivoting the back neck down, using the shoulder point as the pivot (remembering to re-square the CB neckline to the CB seam). I also un-scooped out the back armscye so that it fit more to my liking.
4. Adjusted the front with a dartless FBA. Now, I spent hours and hours trawling my books and the internet to find how to do this, with not really much luck in finding actual details. So for the benefit of others, this is how I ended up doing it - it worked pretty well for me. I think it's some sort of bastardisation of a "pivot-and-slide" method, although I couldn't find a good description of the whole process of using this for an FBA.
First of all I traced around most of the pattern - the shoulder, neckline, CF, hem and side seam up to the waistline. I then pivoted the side seam at the armscye out to add width, pivoting around the shoulder point (red), then pivoted around the new underarm point to bring the waist back into the original measurements (blue). Note here that you need to do a significantly smaller width adjustment in a knit! I forgot to take into account the stretch of the knit and ended up taking it in by about half the measurement I added.
To add the length needed to fit the top over my bust I slashed and spread across (roughly...) the bust point. I found that the length I needed to add was fairly equivalent to that needed for a woven.
These adjustments meant that the distance underarm-waist was now much longer on the front - the excess here would under normal circumstances be taken out with a dart, but I didn't want to have a dart on my tops. So, I shaped the side seam where the dart would normally be, and simply stretched the back piece to match between the underarm and the first notch (I guess this would work to some extent in a non-stretch fabric by easing the front rather than stretching the back). After a little refinement of the shaping in the front side seam this worked nicely to give the space needed in the front - I would imagine though that if you were making a very large FBA (or using a non-stretch fabric) you might need a combination of this method with a small dart.
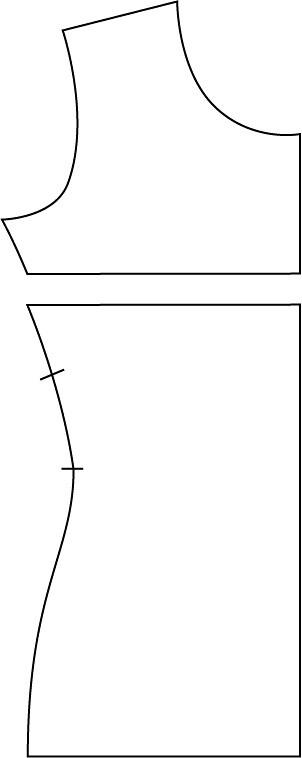
I drafted the sleeve block at the same time as the original bodice block, but haven't yet made up and fitted the sleeves - this is the next stage that I'll move onto shortly.
I'll show you the first thing that I made from this block in the next post...


Great, thanks
ReplyDelete