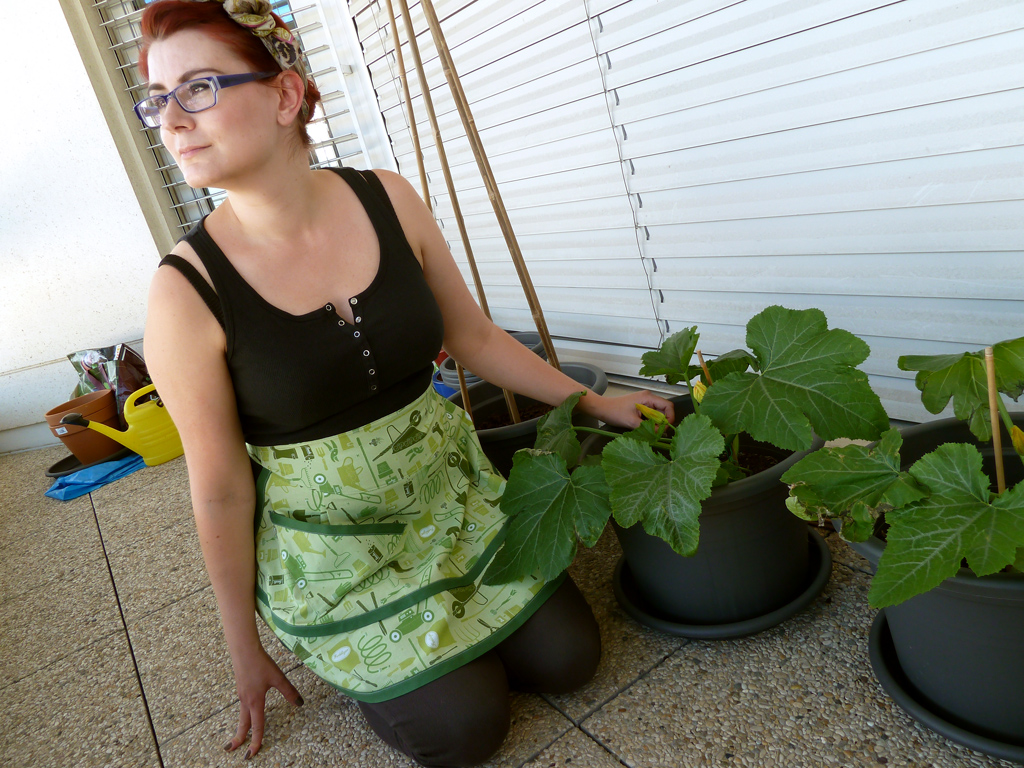
Apron: Me-made / Top: H&M / Jeans: Uniqlo / Scarf: Accessorise / Courgettes: Migros
I've realised I need a few aprons for a while now after several messy episodes whilst cooking and gardening, but I refuse to buy them as they are so simple to make. So, at long last I've made one! This is (obviously) for gardening, I plan to make a full apron for cooking soon. This post is also Day 5 for Me-Made-June
Pattern description
Woman's Day, April 1951: "Ripply apron". Half-apron with contrast bias binding and triangular pocket. This is a free pattern.Pattern sizing
One size.Fabric used
Quilting cotton with a print of garden miscellanea by Robert Kaufmann. Bought a while back from eQuilter.Did it look like the photo/drawing on the pattern envelope when you were done?
Yep, pretty much, but in colour rather than black and white :)Were the instructions easy to follow?
They're a little cryptic in places, but it's pretty straight forward to make up (although having said that, I was just looking at them again whilst getting the link to the pattern, and realised I think the waistband was meant to be sewn on the other way up...)What did you particularly like or dislike about the pattern?
This is super quick to sew up - I drafted the pattern, cut and sewed it in less than an afternoon.Pattern alterations or any design changes you made
As my bias binding wasn't terribly wide, I folded it in half and sewed that on, rather than actually binding the edges properly, so my mitred corners aren't perfect. As I mentioned above, I think I sewed on the waistband the wrong way up, but this made much more sense to me, as it adds length to the apron, which would otherwise be very short (although I guess it means it's a little less ripply at the centre).If I did sew this again, I would definitely make the apron itself a bit larger, both widthwise and lengthwise - I forgot my waist doesn't quite equate to a 1950s waist measurement, so it doesn't wrap quite far enough at the sides of my waist (it's perfectly useable though!). I made it up with the pocket as designed, but I had my doubts about how practical this pocket would actually be. I tried it out with some gardening after I finished it, and I'm definitely going to take off this pocket and replace it with something deeper and a bit squarer.


No comments:
Post a Comment